Introduction
The garage is often the most overlooked space in a home, quickly becoming a catch-all for tools, sports gear, holiday decorations, and forgotten projects. Over time, this vital area can morph into a cluttered maze, making it difficult to find what you need, park your car, or safely move around. A disorganized garage isn’t just unsightly—it can create safety hazards, reduce your home’s usable space, and even impact property value. If you’re frustrated by tripping over misplaced items or wasting time searching for a screwdriver, it’s time to take control. This guide provides a comprehensive, step-by-step approach to transforming your garage from chaos to order. Whether you’re a weekend warrior, hobbyist, or just want a functional storage zone, you’ll discover practical solutions for sorting, storing, and maintaining your garage. Let’s dive in and reclaim this hardworking space, boosting both utility and peace of mind.
Step 1: Assess and Plan Your Garage Organization
Take Inventory
Begin by emptying your garage completely. This may seem daunting, but removing everything helps you see the true size of your space and assess every item. As you remove items, group them by category—tools, lawn equipment, automotive supplies, sports gear, seasonal decor, and so on. Don’t forget to check shelves, cabinets, and nooks for overlooked items.
Evaluate Storage Needs
Once your items are sorted, assess what you truly need. Ask yourself:
- How often do I use each item?
- Is it in good, usable condition?
- Does it belong in the garage or elsewhere in the house?
Set aside broken, duplicate, or unused items for donation, recycling, or disposal.
Plan Zones
Visualize your garage as a set of functional zones, such as:
- Workshop/tool area
- Sports and outdoors
- Gardening/lawn care
- Automotive area
- Seasonal storage
Sketch a simple floor plan to designate where each category will live. Keep frequently used items accessible and infrequently used items higher up or in harder-to-reach spots.
Step 2: Deep Clean and Prep Your Space
Clean Thoroughly
With the garage empty, sweep or vacuum the floor to remove dirt and debris. Use a degreaser for oil stains and mop the floor if needed. Clean shelves, windows, and lighting fixtures. Inspect for signs of pests, water damage, or mold. Address any issues before moving forward.
Inspect and Repair
- Check for cracks in the floor or walls and repair as needed.
- Test electrical outlets and lighting; replace burned-out bulbs and faulty fixtures.
- Ensure the garage door operates smoothly and seals properly to prevent drafts and pests.
Upgrade Lighting and Ventilation
Bright, energy-efficient LED lighting enhances safety and visibility. Consider adding a portable fan or vent to improve airflow, especially if you use the garage as a workspace.
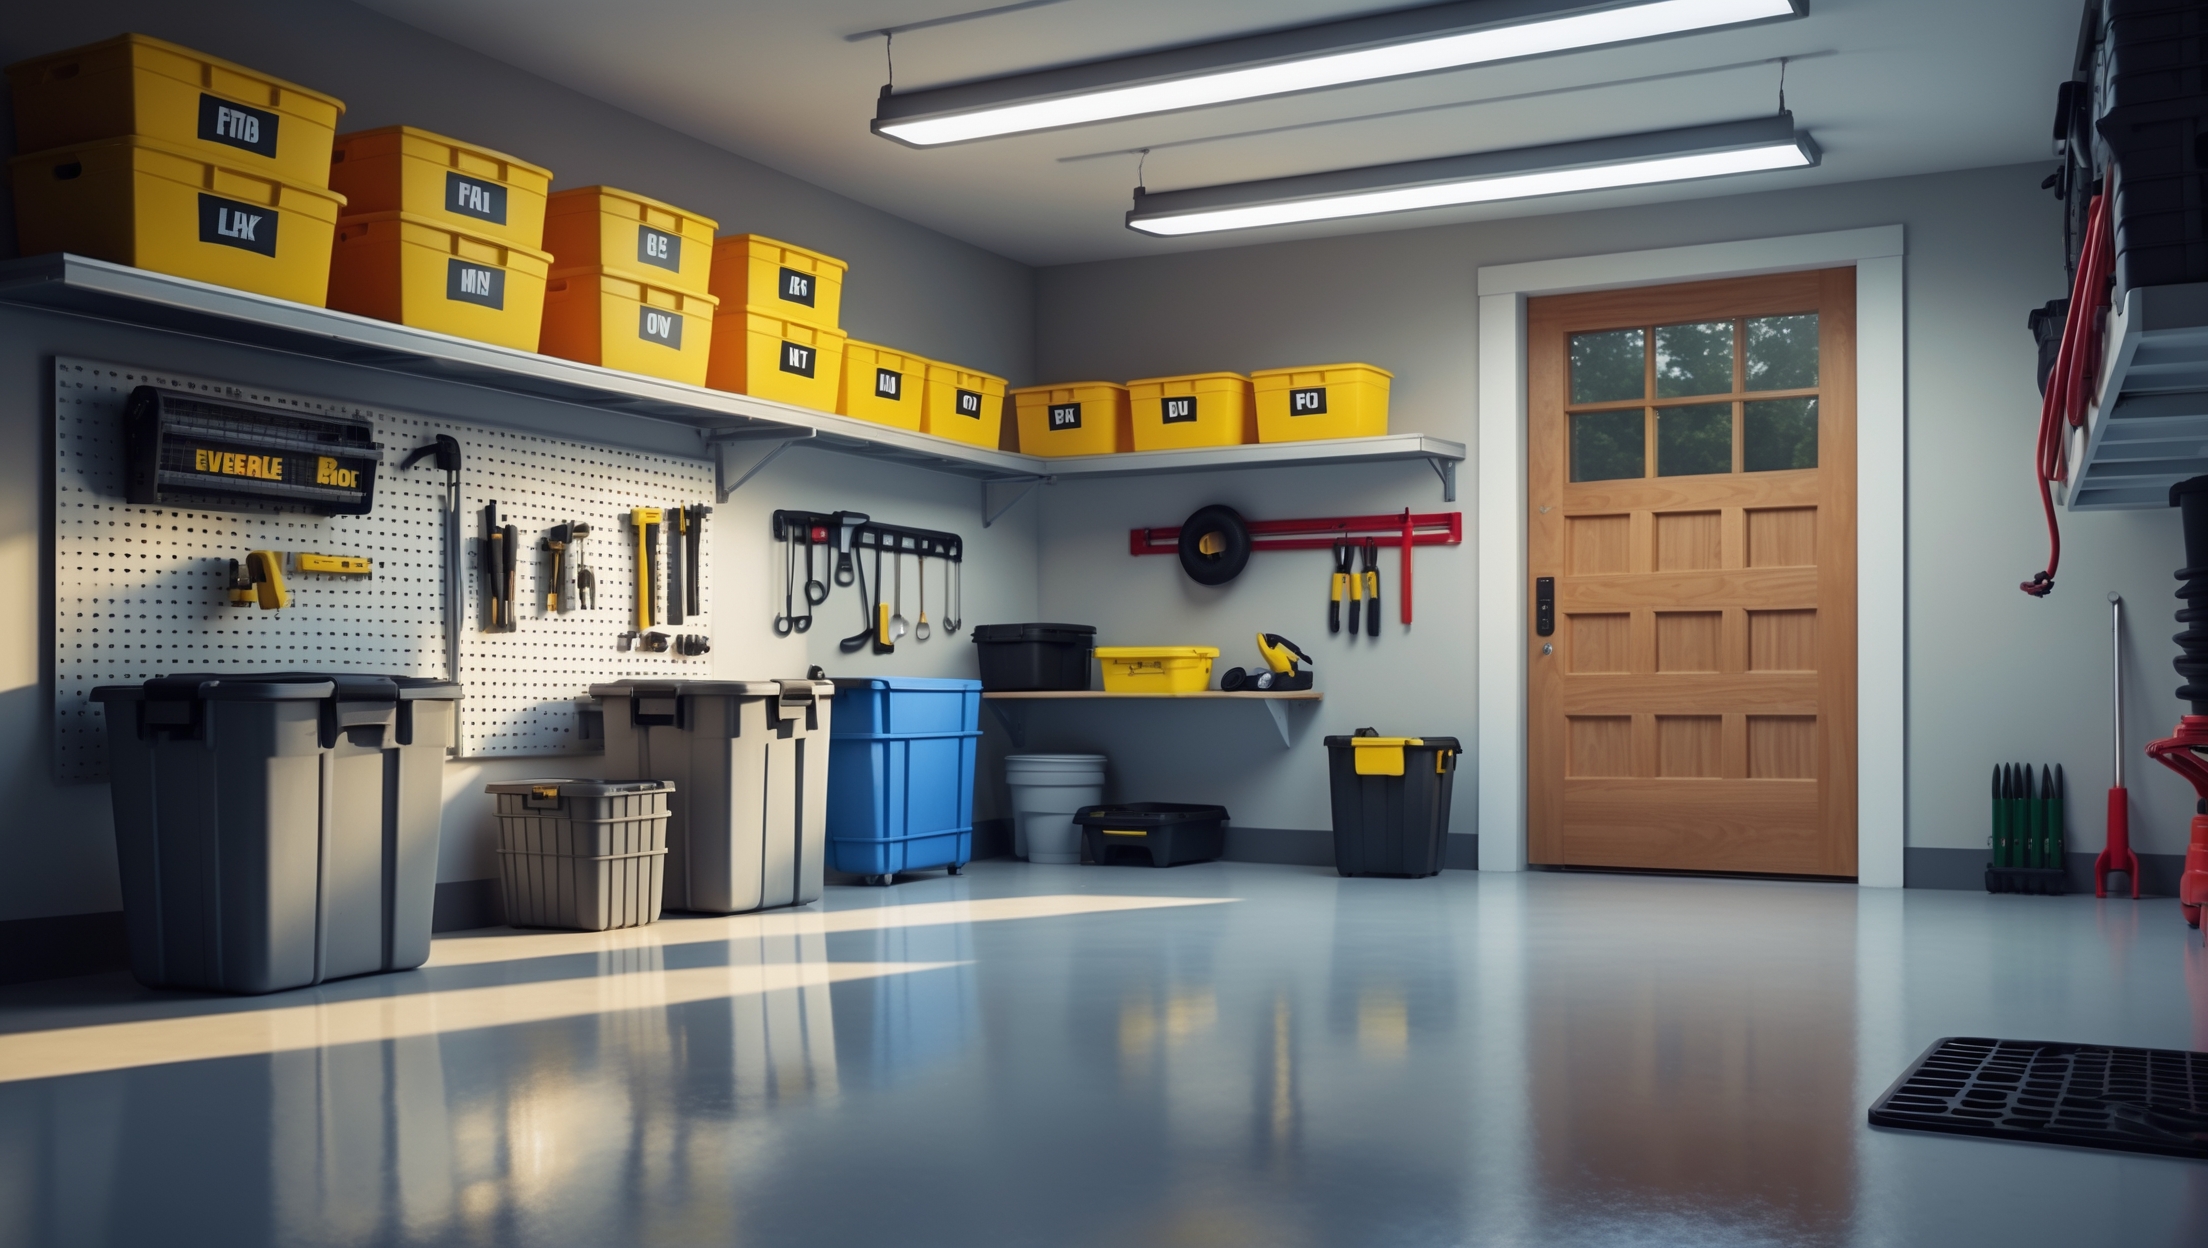
Step 3: Choose Smart Storage Solutions
Wall Storage Systems
Maximize space by utilizing vertical storage. Options include:
- Pegboards: Perfect for organizing hand tools and accessories. Hooks and baskets can be rearranged as your needs change.
- Slatwall Panels: Versatile for hanging bikes, ladders, or shelving units.
- Track Systems: Hold heavy items like power tools, garden equipment, or sporting goods.
Ceiling Storage
Overhead racks can store seasonal items, luggage, or rarely used bins, freeing up valuable floor space. Ensure racks are securely anchored to ceiling joists and can support the intended weight.
Shelving and Cabinets
- Freestanding Metal Shelves: Durable and adjustable for bulky items.
- Wall-Mounted Shelves: Ideal for lighter bins and containers.
- Lockable Cabinets: Store chemicals, paints, and hazardous materials safely out of children’s reach.
Bins and Containers
Use clear, stackable plastic bins for small items. Label each bin for easy access. For hardware, opt for compartmentalized organizers or drawers.
Specialty Storage Solutions
- Bike Racks: Wall or ceiling mounts keep bikes off the floor.
- Sports Gear Organizers: Mesh baskets, ball racks, and hooks corral balls, bats, and helmets.
- Tool Chests: Keep valuable or delicate tools organized and protected.
Step 4: Declutter and Organize with Purpose
Declutter Ruthlessly
Be honest about what you really need. If you haven’t used an item in over a year, consider donating or discarding it. Avoid keeping broken or incomplete items “just in case.” This mindset shift is key to long-term organization.
Sort Items by Frequency of Use
Store items you use regularly (like lawn tools or frequently used power tools) at eye level or within easy reach. Place seasonal or rarely used items higher up or towards the back.
Label Everything
Use large, clear labels on bins, drawers, and shelves. For frequently accessed items, picture labels can help kids or guests find things easily. Consider color-coded bins for different categories.
Implement a System for Small Parts
- Use compartmentalized organizers for screws, nails, fasteners, and other tiny items.
- Magnetic strips are useful for storing metal tools like screwdrivers and wrenches.
- Install a small parts cabinet for hardware and accessories.
Step 5: Prioritize Safety and Accessibility
Safe Chemical and Tool Storage
- Store chemicals, paints, and fuels in a dedicated, well-ventilated cabinet, away from heat sources and out of children’s reach.
- Keep sharp tools in locked chests or on high shelves.
- Store flammable items in approved containers.
Maintain Clear Walkways
Keep the central floor area clear to prevent trips and falls. Avoid stacking items in front of doors or blocking emergency exits.
Child and Pet Safety
- Install childproof locks on hazardous cabinets.
- Store heavy items low to the ground to prevent tip-overs.
- Keep sharp or dangerous tools well above reach.
Fire Prevention
- Install a smoke detector in your garage.
- Keep a fire extinguisher rated for chemical and electrical fires near an exit.
- Avoid overloading electrical outlets; use surge protectors as needed.
Step 6: Organize for Projects and Hobbies
Workshop Setup
If you use your garage for woodworking, car repairs, or other hobbies, dedicate a zone for these activities. Install a sturdy workbench with integrated power strips and task lighting. Use pegboards or magnetic strips to keep tools within arm’s reach.
Project Supply Management
- Store ongoing project materials in labeled bins or rolling carts.
- Keep measuring tapes, pencils, and safety gear on hooks or in drawers near your bench.
Mobile Storage
Rolling tool cabinets and carts allow you to bring supplies to your work area, then stow them away when finished. This maximizes space and efficiency.
Step 7: Maintain Your Organized Garage
Regular Maintenance Schedule
- Set a reminder to tidy your garage monthly—return misplaced items, sweep the floor, and check for expired chemicals.
- Twice a year (spring and fall), do a deeper clean and review your storage system. Adjust zones as your needs change.
Adopt a “One In, One Out” Policy
When you bring in a new item (tool, piece of equipment, etc.), remove something you no longer use. This prevents clutter from creeping back in.
Stay Organized Year-Round
- Label new bins or shelves as you add them.
- Teach family members where items belong.
- Keep a running list of supplies that need replenishing (like light bulbs or screws).
Additional Tips for a Functional Garage
Utilize Vertical and Ceiling Space
Install hooks for ladders, hoses, and extension cords to keep them off the floor. Ceiling-mounted racks are perfect for storing camping gear or holiday decorations.
Optimize for Vehicle Parking
- Mark parking zones with tape or paint to ensure you have enough space for your vehicle(s) and to open doors safely.
- Use wheel stops or tennis balls to prevent accidental bumps into walls or stored items.
Consider Climate and Security
- In humid climates, use a dehumidifier to prevent rust and mold.
- Install a security camera or smart garage door opener for peace of mind.
Conclusion
Reclaiming your garage isn’t just about aesthetics—it’s about safety, efficiency, and maximizing your home’s potential. By following this detailed, step-by-step guide, you can transform a cluttered, chaotic garage into a well-organized, multi-purpose space that works for your lifestyle. From strategic zoning and smart storage solutions to ongoing maintenance habits, each phase builds on the last, ensuring lasting order. Imagine parking your car with ease, finding every tool at a glance, and enjoying a workspace tailored to your hobbies or projects. An organized garage not only saves you time and reduces stress but also protects your belongings and adds value to your home. The key is to start small, stay consistent, and involve the household in maintaining the system. With a clear plan and practical solutions, your garage can become one of the most functional—and even enjoyable—areas of your home. Don’t let clutter win; take charge and experience the benefits of a garage that truly supports your needs year after year.
When you say to completely empty the garage, do you have any tips for storing everything temporarily, especially for folks with small yards or bad weather? I’m nervous about putting stuff outside while I sort since we don’t really have extra space.
If you don’t have much outdoor space or the weather isn’t ideal, you can move items in small sections instead of clearing the whole garage at once. Try using a covered porch, hallway, or even an empty room indoors for temporary storage. Large bins or tarps can help keep things contained and protected. You might also ask a neighbor or friend if you can use a bit of their space for a day or two.
Regarding the step where we set aside items for donation, recycling, or disposal, what are the most effective ways to dispose of hazardous materials like old paint or automotive fluids during a garage cleanout?
For hazardous materials like old paint or automotive fluids, it’s important not to throw them in the regular trash. Check with your local waste management facility or city website for scheduled household hazardous waste collection events. Many communities have designated drop-off sites or collection days specifically for these items. Make sure containers are clearly labeled and sealed, and never mix different chemicals together. This ensures safe, responsible disposal and helps protect the environment.
About the functional zones, how much time does it usually take to get through the assessment and planning phase before you actually start putting things back in the garage?
The assessment and planning phase for setting up functional zones typically takes anywhere from 1 to 3 hours, depending on the size of your garage and how much stuff you have. This includes sorting items, deciding what to keep or donate, and mapping out where each type of item should go. Taking your time at this stage can make the actual organization much smoother.
How long should I expect the process to take for a two-car garage that’s pretty packed with both personal and business supplies? I need to plan for minimal downtime, so would love an idea of the typical timeframe.
For a two-car garage that’s quite full with both personal and business items, you can expect the organization process to take anywhere from 2 to 4 full days. This includes sorting, decluttering, deep cleaning, and setting up new storage solutions. If you need to minimize downtime, consider breaking the work into sections over several evenings or weekends, focusing on one area at a time so you can keep some access as you go.