Introduction: Shedding Light on Skylight Installation
Adding a skylight to your home can instantly brighten dark rooms, create a feeling of spaciousness, and even improve your well-being by maximizing natural light. However, while the allure of sunbeams and starlit ceilings is powerful, skylight installation is a project rife with pitfalls for the unwary. From leaks that lead to costly water damage to compliance issues that can halt your renovation in its tracks, the risks are real—but entirely avoidable with the right know-how. Whether you’re a hands-on DIY enthusiast or planning to oversee a professional install, understanding the most common mistakes is essential for a successful, long-lasting outcome. This guide will walk you through the most frequent errors beginners make when installing residential skylights, covering everything from budgeting and compliance to tool selection, installation best practices, and maintenance essentials. By the end, you’ll be equipped to bring sunshine into your home—without inviting costly headaches.
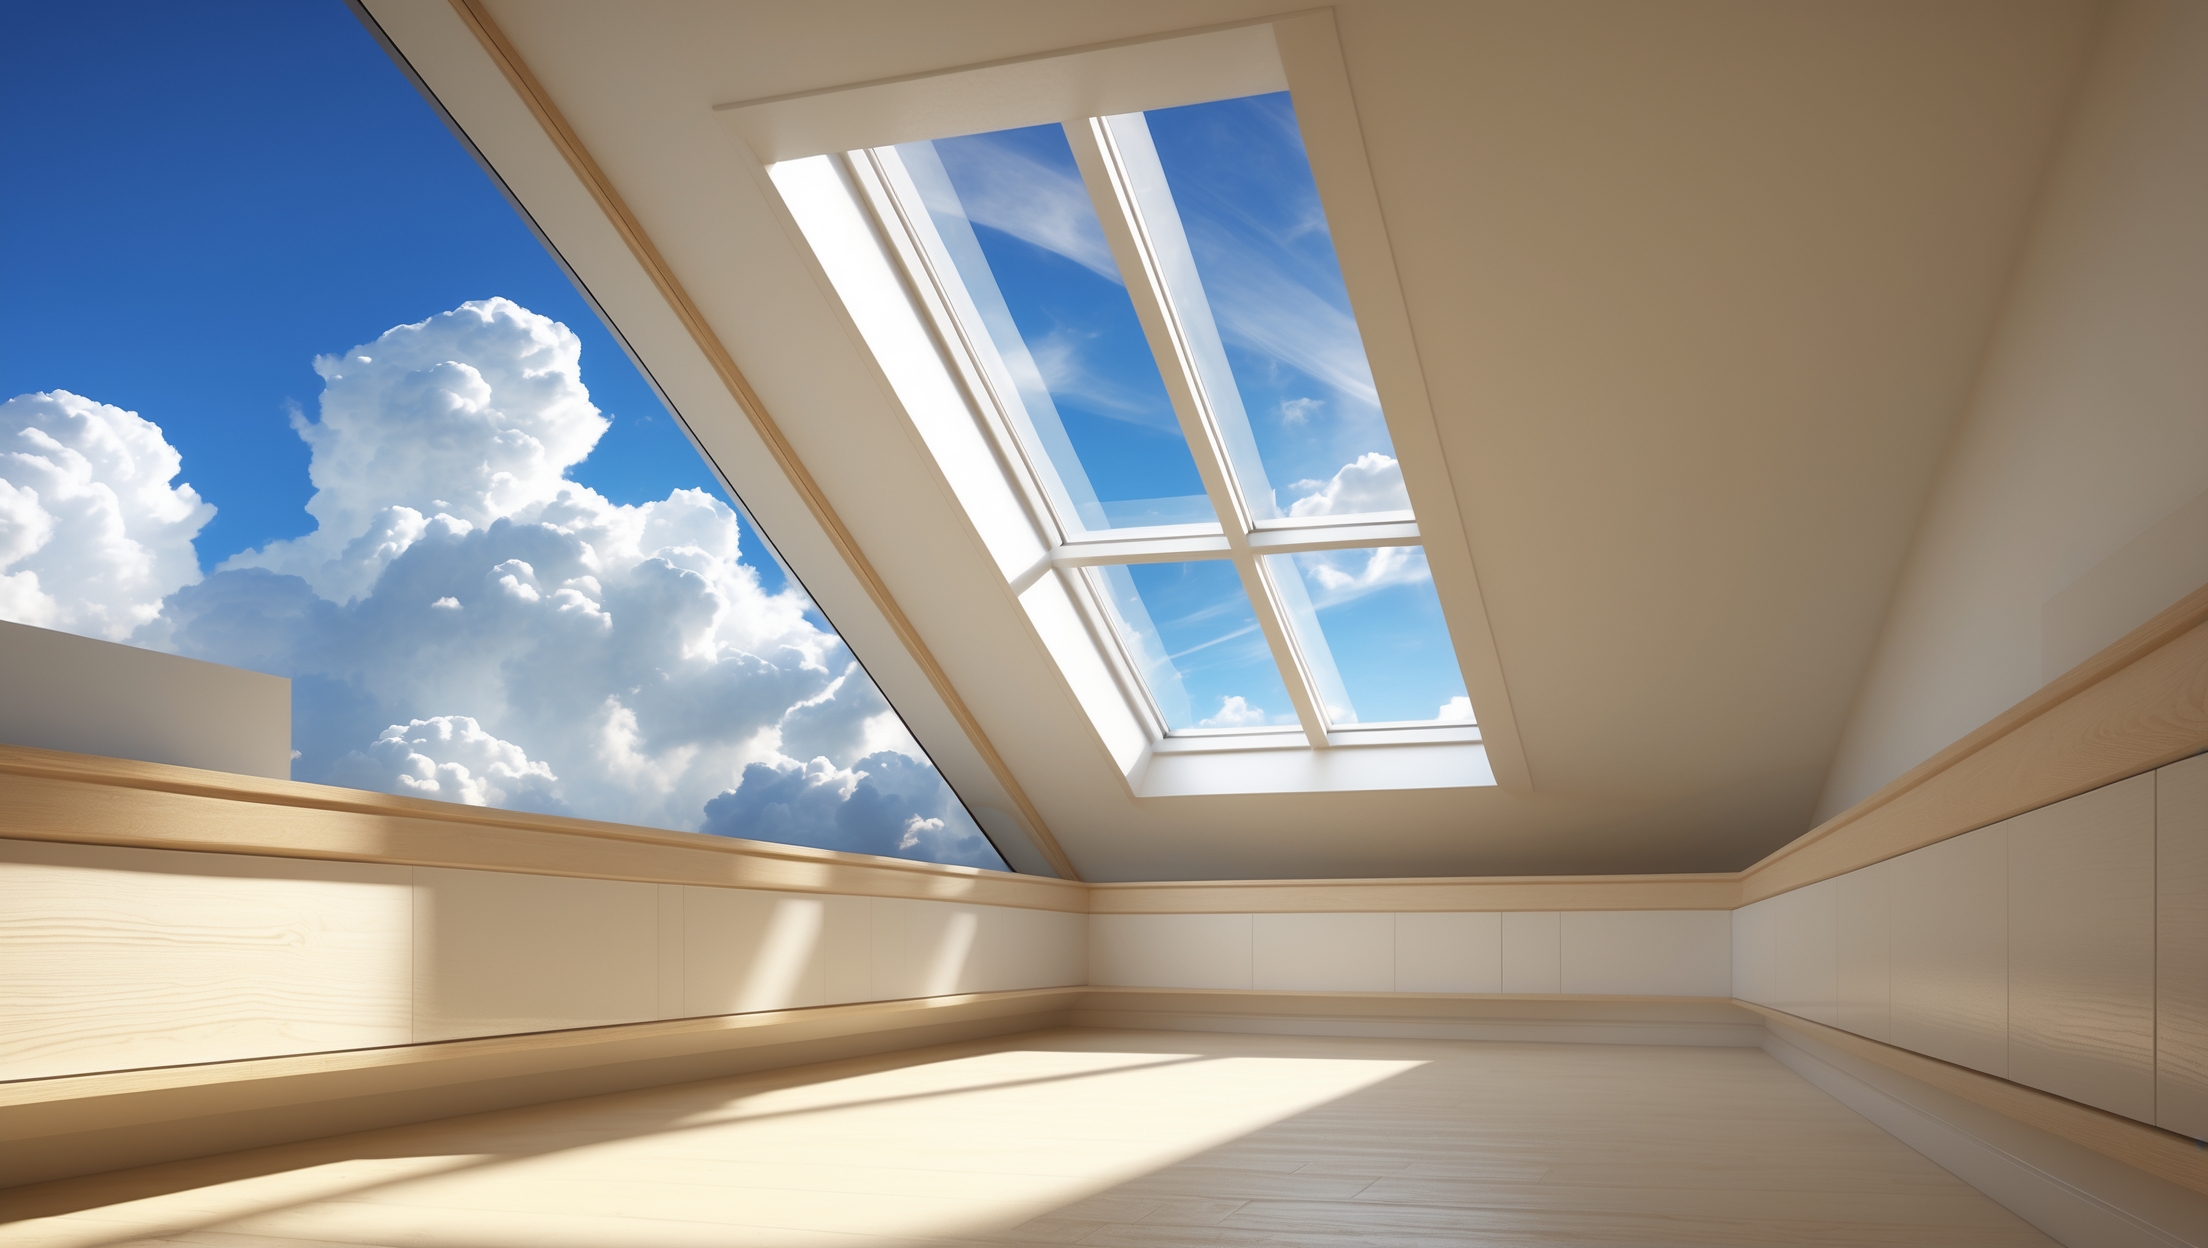
Understanding Skylight Types and Placement
Common Skylight Varieties
- Fixed Skylights: Do not open; ideal for adding natural light to attics, stairwells, or rooms where ventilation isn’t required.
- Ventilating Skylights: Can be opened (manually or electronically), providing both light and airflow—great for kitchens and bathrooms.
- Tubular Skylights: Small, tube-like structures that channel sunlight into tight or windowless spaces such as closets or hallways.
Choosing the Right Location
Skylight placement isn’t just a matter of where you want more daylight. Consider:
- Roof Structure: Rafters, trusses, and wiring can limit placement options.
- Sun Path: South-facing skylights deliver the most light but may overheat rooms; north-facing options offer softer, more consistent illumination.
- Room Function: Moisture-prone areas (kitchens, bathrooms) require venting and moisture-resistant materials.
- Privacy: Avoid placing skylights where they might expose private spaces to neighbors or street views.
Budgeting: The Real Costs of Skylight Installation
Common Budgeting Mistakes
- Underestimating the Total Cost: Many homeowners focus only on skylight unit prices, ignoring installation, structural modifications, flashing kits, finishes, and debris removal.
- Ignoring Contingencies: Failing to budget for unexpected issues like rotten roof decking or hidden wiring can derail your project.
Cost Breakdown
- Skylight Unit: $150 (tubular) – $1,500+ (large, vented, or custom models)
- Installation Labor: $500 – $2,500 depending on complexity and region
- Flashing and Weatherproofing: $100 – $400
- Roof Modifications: $200 – $1,000 (if rafters or trusses need altering)
- Interior Finishing: $100 – $1,000 (drywall, painting, trim)
- Permit Fees: $50 – $300 (varies by municipality)
- Unexpected Repairs: $200 – $1,000 (water damage, mold, etc.)
Always add a 10–20% contingency to your estimate. Consider energy efficiency upgrades (e.g., low-E coatings) that may cost more upfront but save money long-term.
Compliance and Permits: Avoiding Legal Headaches
Why Permits Matter
Installing a skylight typically alters your roof structure, affects energy efficiency, and may impact fire safety or egress requirements. Most municipalities require:
- Building permits for structural modifications
- Adherence to local energy codes and insulation standards
- Proper documentation for insurance and resale value
Common Compliance Mistakes
- Skipping Permits: Unpermitted work can result in fines, forced removal, or insurance claim denials.
- Overlooking HOA Rules: Homeowners associations often restrict exterior modifications.
- Neglecting Fire Codes: Skylights near property lines or in certain zones may have special requirements.
Contact your local building department before starting, and secure all necessary approvals in writing.
Tools and Equipment: What You Really Need
Essential Tools
- Reciprocating saw (for cutting roof deck)
- Chalk line and measuring tape
- Roofing hammer and pry bar
- Utility knife
- Caulking gun
- Drill/driver and appropriate bits
- Ladder and/or roof harness
Safety Equipment
- Fall protection harness
- Non-slip roofing shoes
- Protective eyewear and gloves
- Dust mask or respirator (if encountering insulation or mold)
Specialized Supplies
- Flashing kit designed for your skylight model
- Roof sealant compatible with your roofing material
- Ice and water shield membrane (especially in cold climates)
- Insulation batts or spray foam
Using improvised or incorrect materials is a leading cause of leaks—invest in manufacturer-recommended products.
Installation Mistakes to Avoid
1. Poor Planning and Measurement
- Failing to measure between rafters before ordering the skylight can lead to costly framing adjustments.
- Neglecting to check for obstructions (pipes, wiring, vents) above the ceiling can cause project delays and hazards.
2. Incorrect Flashing Installation
- Improper flashing is the #1 cause of post-installation leaks. Always use the skylight manufacturer’s flashing kit.
- Do not rely solely on caulk or roof cement—these are temporary at best.
- Layer flashing components in the correct order: sill, step, head, then side pieces, integrating with existing shingles.
3. Inadequate Weatherproofing
- Skipping an ice and water shield membrane in snowy or rainy climates can result in interior water damage.
- Failing to air-seal gaps between the skylight frame and roof deck can cause drafts, energy loss, and condensation.
4. Poor Insulation and Vapor Barriers
- Neglecting to insulate the skylight shaft leads to heat loss and condensation.
- Omitting a vapor barrier in humid climates can foster mold growth.
5. Improper Fastener Use
- Using nails or screws that are too short/too long can compromise roof integrity or damage the skylight frame.
- Overdriving fasteners may crack the skylight curb or frame.
6. Rushing Interior Finishes
- Finishing drywall or trim before verifying watertightness can mean redoing work if leaks develop.
- Using paint or finishes not rated for high UV or moisture exposure may result in peeling or discoloration.
7. Ignoring Manufacturer Instructions
- Each skylight model varies—always follow the supplied installation manual and check for updates online.
Maintenance Best Practices
Routine Inspection Checklist
- Inspect the skylight and surrounding roof area every spring and fall for signs of damage, leaks, or debris buildup.
- Check flashing for cracks, lifting, or corrosion.
- Look for condensation between glass panes (seal failure) or on interior trim (insulation/vapor barrier issues).
- Clear leaves, branches, and debris from around the skylight to prevent pooling water.
Cleaning Tips
- Use a soft brush or sponge with mild soap and water—never abrasive cleaners or tools.
- For high or hard-to-reach skylights, use telescoping tools or hire a professional.
Addressing Common Problems
- Minor Leaks: Often caused by clogged flashing or deteriorated sealant—clean and reseal as needed.
- Condensation: Improve insulation, add a vapor barrier, increase interior ventilation.
- Drafts: Re-insulate or re-caulk around the frame.
- Cracked Glass: Replace the skylight panel immediately to avoid water damage.
Insurance Considerations
Adding a skylight can affect your home insurance policy. Notify your provider before installation:
- Unpermitted or poorly installed skylights may void coverage for water damage.
- Some policies require proof of professional installation or code compliance.
- Skylights may increase premiums due to perceived risk—ask about possible discounts for energy-efficient or impact-rated models.
Expert Tips for a Trouble-Free Skylight Project
- Always have a helper—working on roofs is dangerous and awkward solo.
- Install during a stretch of dry weather to minimize exposure to rain.
- Order all materials and tools in advance to avoid mid-project delays.
- Keep receipts, permits, and installation photos for warranties and insurance.
- If in doubt, hire a certified installer—especially for complex or steep roofs.
Conclusion: Enjoying Natural Light Without Regret
Installing a skylight can transform your living space, making it brighter, more inviting, and even more energy-efficient. But as with any home improvement project that penetrates the building envelope, it pays to proceed with caution. The most common mistakes—improper measurements, poor flashing, inadequate insulation, and skipped permits—can turn a dream feature into a recurring headache. By taking the time to plan thoroughly, budget realistically, gather the right tools and materials, and follow both local building codes and manufacturer instructions, you can avoid these pitfalls. Regular maintenance, prompt attention to minor issues, and keeping your paperwork in order will help your new skylight remain a source of joy rather than frustration. Whether you tackle the project yourself or bring in a pro, the key is respect for the details. Let natural light pour in, but keep leaks, drafts, and regrets out. With this comprehensive guide, you’re well-prepared to make your skylight installation a bright success for years to come.
How long does it usually take for a professional team to install a ventilating skylight in a commercial building, and what kind of downtime should I anticipate for my business during the process?
For a professional team, installing a ventilating skylight in a commercial building typically takes one to three days, depending on the size and complexity of the project. Most of the work can be completed during off-hours to minimize business disruption, but you may need to plan for a few hours of limited access to the affected area. If weather or structural adjustments are involved, additional downtime may be required.
When you mention that south-facing skylights can overheat rooms, how can a DIYer minimize this risk? Are there specific materials or installation techniques that help control heat gain without blocking too much light?
To reduce heat gain from south-facing skylights, you can use glazing materials like low-E (low-emissivity) glass or double-pane glass with an argon gas fill. These help block excess solar heat while still allowing plenty of light. Installing interior shades or blinds made for skylights also helps control overheating. When installing, consider a curb-mounted skylight, as some allow for venting, which can release built-up hot air.
When it comes to budgeting, beyond the cost of the skylight itself, what other expenses should I be prepared for as a DIY installer? Are there common hidden costs or specialized tools that often catch first-timers by surprise?
When budgeting for a skylight installation, don’t forget to factor in costs for roofing materials like flashing kits, sealants, and underlayment, as well as potential drywall and paint for interior finishing. Rental or purchase of specialized tools such as reciprocating saws, roofing nailers, and safety equipment can add up, too. Unexpected expenses may also arise if you discover water damage or need structural changes when cutting the opening.
I noticed the article says roof structure and wiring can limit skylight placement. Are there common signs that a specific area of the roof isn’t suitable for installation, or should I always consult a professional before cutting?
There are a few signs that an area may not be suitable for a skylight: if you see roof trusses, support beams, or electrical wiring running through the spot, it’s best to avoid that area. If the attic space looks cramped or cluttered with HVAC ducts or pipes, that’s another warning sign. However, because these elements aren’t always visible, consulting a professional is always the safest way to avoid structural or safety issues.
I’m considering a skylight in the bathroom for extra light but worry about moisture. Could you share what kind of venting and moisture-resistant materials work best for those areas?
For bathrooms, it’s smart to choose skylights designed for high-moisture areas. Look for venting skylights, which can be opened to help control humidity and reduce condensation. Materials like vinyl or fiberglass frames resist moisture better than wood. Also, make sure the skylight comes with quality flashing kits and consider installing waterproof drywall or tile around the opening to further protect against moisture damage.
When considering venting skylights for a bathroom, are there particular installation steps or moisture-resistant materials you recommend to prevent leaks and long-term damage, especially in humid climates?
For bathroom venting skylights, it’s important to use moisture-resistant flashing kits and roofing underlayment specifically designed for humid environments. Install a vapor barrier around the skylight frame to prevent condensation buildup. Be sure to use high-quality, waterproof sealants and follow the manufacturer’s instructions closely for waterproofing and insulation. Properly sloping the skylight curb and ensuring tight seals around all edges will further protect against leaks and moisture damage.
You mention that south-facing skylights can sometimes overheat rooms. Are there specific types of glazing or shades you recommend to help control temperature without blocking too much light?
To control heat from south-facing skylights, consider using low-emissivity (low-E) glazing or double-paned glass with tinted or reflective coatings. These options reduce heat gain while still letting in plenty of natural light. You can also use solar shades or light-diffusing blinds designed for skylights, which help manage temperature without making the room too dark.
As someone who has never installed a skylight before, I’m wondering which beginner mistakes are most likely to cause leaks down the line. Is improper placement a bigger risk, or is incorrect flashing usually the problem?
Incorrect flashing is usually the biggest culprit when it comes to leaks in skylights. Even if the placement is perfect, poorly installed or low-quality flashing can let water seep in around the skylight. Placement is also important—avoid spots where water naturally collects on the roof—but focusing on careful, proper flashing installation will go a long way in preventing leaks.
Regarding skylight placement, you mention that south-facing locations can lead to rooms overheating. Are there recommended materials or technologies that help minimize heat gain for those who really want the additional light from a south-facing skylight?
Yes, if you want a south-facing skylight but are worried about overheating, there are materials and technologies that can help. Look for skylights with low-emissivity (low-E) glass, which reduces heat transfer. Tinted or reflective glazing can also minimize heat gain. Some skylights have built-in shades or blinds, and there are even solar-powered venting models that help release hot air. These options allow you to enjoy the extra light without overheating your room.
You mentioned that south-facing skylights can overheat a room. Are there effective strategies or materials to mitigate excess heat without losing the benefits of extra natural light?
Yes, you can reduce excess heat from south-facing skylights while still enjoying more daylight. Consider using skylights with low-emissivity (Low-E) coatings or tinted glazing, which filter out much of the solar heat. Installing interior shades or exterior covers can also help you control heat gain during the hottest parts of the day, without sacrificing too much natural light.
In terms of maintenance, what are the most common issues with tubular skylights that homeowners should watch out for in the first few years after installation?
With tubular skylights, homeowners often encounter issues like condensation inside the tube, which can lead to water stains or mold if not addressed quickly. Leaks around the flashing are another common problem, typically caused by improper installation or sealant failure. It’s also worth checking the diffuser and tube for dust buildup, as this can reduce light output over time. Regular inspections, especially after heavy rain, can help catch these problems early.
When considering the placement of a skylight, you mention that south-facing options can cause overheating. Are there specific materials or glazing types recommended to help reduce heat gain in these cases without sacrificing natural light?
Yes, to minimize heat gain with south-facing skylights, you can choose glazing options like low-emissivity (Low-E) glass or double-glazed units with solar control coatings. These materials help filter out excess infrared rays, reducing heat while still allowing plenty of daylight. Some skylights also offer tinted or reflective coatings specifically designed to control solar heat gain without making your space feel dim.
If my roof has both rafters and trusses in different sections, is one easier to work with when cutting the opening for a skylight? The article mentions structural considerations, but I’m not sure how that affects the installation process.
Cutting an opening for a skylight is usually easier in rafters than trusses. Rafters are spaced farther apart and are more straightforward to modify, while trusses are engineered for structural support and should not be cut without consulting a professional. Cutting a truss could weaken your roof. If your skylight can be placed in a rafter section, the process is simpler and less risky.
The article brings up compliance and potential permit issues. How far in advance should I start looking into local building codes or getting permits if I want to install a skylight myself?
It’s wise to start researching local building codes and permit requirements at least a few weeks before planning your skylight installation. Some municipalities may take several days or even a few weeks to process permit applications, and you might need to adjust your plans based on their guidelines. Starting early ensures you have enough time to gather documents, make revisions, and avoid delays or compliance issues.
The article mentions that south-facing skylights can lead to overheating in rooms. Is there a way to prevent rooms from getting too hot without sacrificing all that extra sunlight?
You can minimize overheating from south-facing skylights by using options like low-E (low-emissivity) glass, which reduces heat transfer while still allowing plenty of sunlight. Adding internal blinds, shades, or external awnings can also help you control sunlight and heat as needed. Ventilating skylights are another good choice, as they allow hot air to escape and help regulate the room temperature.
As a small business owner looking to renovate my office, how do I determine if the roof structure in an older building can support a skylight, especially regarding rafters and trusses mentioned in the article?
To determine if your older building’s roof can support a skylight, start by identifying whether you have rafters or trusses. Rafters are individual, sloped beams, while trusses are engineered frameworks. Consult a structural engineer or experienced contractor to inspect the roof. They can evaluate load-bearing capacity, spacing, and any reinforcements needed before cutting into the structure, ensuring safety and compliance with local building codes.
For DIYers, what would you say is the biggest compliance challenge when it comes to installing a skylight in an older home? Are permit requirements usually different for fixed versus venting skylights?
For DIY installers, the most common compliance challenge is navigating local building codes, especially if the home is older and may not meet modern standards for structural support or weatherproofing. Permit requirements generally focus on structural changes rather than the type of skylight, so whether it’s fixed or venting often doesn’t affect the permit process. Still, it’s essential to check with your local permitting office, as some areas may have specific rules or additional steps for venting skylights due to ventilation concerns.
The article says leaks are a big risk with skylight installs. If I notice minor water stains after some rain around my new skylight, is that something I should fix myself right away or do I need to get a professional involved?
If you notice water stains after rain, it often means water is getting in, even if the leak seems minor. While you can check for obvious issues like loose shingles or debris, skylight leaks can come from improper flashing or sealing. It’s safest to contact a professional to inspect and repair it promptly to avoid bigger damage to your roof or ceiling.
I’m curious how you would recommend approaching skylight installation in homes with complex roof structures, like those with multiple trusses or a lot of attic insulation. Are there particular tools or preparation steps that beginners often overlook in these situations?
For homes with complex roofs, it’s important to map out trusses before cutting—use a stud finder or small inspection holes to avoid structural elements. Take photos and measurements in the attic first. If there’s thick insulation, clear the area around the skylight opening to prevent debris from falling inside. Have a reciprocating saw or oscillating multi-tool for precise cuts, and plenty of tarps to protect the interior. Many beginners forget to check for electrical or HVAC lines in attic spaces, so inspect thoroughly before starting work.
You mention that skylight placement depends on roof structure and wiring. If I have a roof with trusses instead of rafters, does that seriously limit my options, or are there ways to install a skylight without compromising the structural integrity?
Having trusses does make skylight installation a bit more challenging since trusses are engineered to distribute the roof load precisely. However, it’s still possible to install a skylight by placing it between the trusses rather than cutting through them. You may need a smaller or custom-sized skylight, and it’s essential to consult a structural engineer or experienced installer to ensure the integrity of your roof isn’t compromised.
If I make a mistake with placement and end up with leaks or water damage, what immediate steps should I take to minimize costs and repairs? Hoping to be prepared just in case things don’t go perfectly on the first try.
If you notice leaks or water damage after installing your skylight, act quickly. First, cover the area with a waterproof tarp to prevent further water entry. Next, dry any wet areas inside to avoid mold. Document the damage for insurance, then contact a professional roofer or skylight installer to assess and properly fix the issue. Acting fast reduces the chance of more costly repairs down the line.
I noticed you mentioned the risk of leaks as one of the major pitfalls. In your experience, are there specific skylight models or installation methods that are less prone to water damage, especially for older homes with unconventional roof structures?
Certain skylight models, especially those with a raised curb and integrated flashing systems, tend to be less prone to leaks. For older homes with unique roof structures, customizable flashing kits are essential for a secure fit. Professional installation is highly recommended, as it ensures proper sealing around irregular roofing. Fixed skylights are also generally less susceptible to leaks compared to vented models.
The article says that south-facing skylights bring in the most light but can lead to overheating. Are there affordable shading or glazing options that can help control the heat without losing too much brightness during the summer months?
Yes, there are several affordable options to help control heat in south-facing skylights. You can try adding solar-reflective or low-E (low-emissivity) glazing, which reduces heat gain while maintaining good light levels. Another option is to install interior or exterior blinds or shades designed for skylights; some are made with reflective or heat-blocking fabrics to minimize heat without darkening the space too much.
If I’m hiring a professional rather than doing this as a DIY project, are there key questions or qualifications I should look for to make sure they avoid those common beginner mistakes you described?
When hiring a professional for skylight installation, ask if they have specific experience with skylights and can provide references or photos of past work. Make sure they’re familiar with your roof type and local building codes. Check that they’re insured and ask how they handle sealing and leak prevention, as those are common problem areas. These steps help ensure your installer avoids the mistakes mentioned in the article.
If I plan to oversee a professional installer, what are the top red flags or mistakes I should look out for during the installation process to make sure the skylight won’t end up leaking down the road?
Watch for improper flashing installation, as this is the most common cause of leaks. The flashing should be snug and overlap with the roofing material, not just caulked around the edges. Also, make sure the installer uses high-quality, waterproof underlayment and seals all joints and fasteners. If they skip weatherproofing steps or rush through sealing, that’s a big warning sign that leaks could occur later.
The article mentions that sun path is important for preventing rooms from overheating. Are there any materials or glazing options that can help reduce heat gain if a south-facing skylight is the best fit for my space?
Yes, there are several glazing options that can help minimize heat gain with a south-facing skylight. Look for skylights with low-emissivity (Low-E) coatings, which reflect much of the sun’s heat while still allowing in natural light. Laminated or tinted glass can also reduce solar heat gain. Many modern skylights use double or triple glazing with inert gas fills for added insulation, further helping to control temperature.
If I plan to put a ventilating skylight in my bathroom, are there special moisture-resistant materials or venting techniques I should ask about to prevent long-term maintenance issues down the road?
Yes, for a bathroom skylight, make sure to choose a unit with moisture-resistant materials like vinyl or fiberglass frames, and insulated, tempered glass. Look for skylights with built-in venting or electric vent options so you can easily control airflow and reduce humidity. Also, ask your installer about using proper waterproof flashing and vapor barriers around the skylight to prevent moisture intrusion and minimize maintenance over time.
Once a skylight is installed, how often do you recommend checking it for leaks or maintenance issues, and are there common early signs of problems that beginners might overlook?
It’s a good idea to inspect your skylight at least twice a year, especially after heavy storms or seasonal changes. Watch for early signs like water stains on the ceiling, peeling paint, visible condensation between panes, or drafts. Beginners sometimes overlook small cracks in the sealant or flashing—these can let moisture in, so check them regularly to catch issues early.
You talked about budgeting as one of the key beginner mistakes. When estimating costs, what hidden expenses do homeowners often overlook, especially if doing a DIY install versus hiring a pro?
Homeowners often overlook expenses like structural modifications if the roof framing needs adjustment, extra flashing or waterproofing materials, and repairing interior finishes such as drywall or paint after the install. For DIY projects, the cost of renting or buying specialized tools and safety equipment can add up. If hiring a pro, permit fees and cleanup costs may be additional. Factoring in these hidden expenses upfront helps avoid surprises during your skylight project.
Could you clarify what compliance issues might halt a skylight renovation? Are there common building code requirements or HOA rules that people should check before getting started?
Compliance issues that could halt a skylight renovation often include not meeting local building codes, such as requirements for proper flashing, minimum distances from roof edges, and safety glass standards. You should also check if your HOA restricts exterior modifications or has guidelines about skylight placement and appearance. Always review both municipal codes and HOA rules before starting to avoid delays or needing to redo work.
You mentioned that south-facing skylights can lead to overheating. Are there specific types of glass or shades you recommend for controlling heat buildup, or does it mostly come down to placement and size?
Controlling heat buildup from south-facing skylights can be managed with several options. Low-E (low-emissivity) glass is effective at reducing heat gain while still allowing natural light through. Tinted or double-glazed glass can also help. Additionally, installing interior or exterior shades, such as cellular or roller blinds, adds another layer of heat control. While placement and size are important, choosing the right glazing and using shades can significantly minimize overheating.
I noticed you talked about both fixed and ventilating skylights. If I want to install one in my bathroom, do you recommend the ventilating type only, or can fixed work if I have good exhaust fans already?
If your bathroom already has strong, effective exhaust fans, a fixed skylight can work well and still provide natural light. However, a ventilating skylight gives you the option for additional airflow, which can be especially helpful to quickly clear out humidity after showers. Either type is possible, so it depends on how much extra ventilation you’d like beyond your current setup.
I noticed you said ventilating skylights are better for kitchens and bathrooms. What kind of maintenance do those require compared to fixed skylights, especially in spaces with a lot of moisture?
Ventilating skylights need a bit more attention than fixed ones, especially in moist rooms like kitchens and bathrooms. You should regularly clean the opening mechanism and check for dirt or debris that could block airflow. Inspect and wipe down the seals to prevent mold or mildew buildup. It’s also important to make sure the skylight closes tightly to avoid leaks. Fixed skylights usually just need occasional glass cleaning.
You mention that south-facing skylights can overheat a room. Are there practical ways to manage or reduce heat gain without losing too much light, like shades or special glass coatings?
Yes, you can manage heat gain from south-facing skylights without sacrificing much natural light. Installing skylight shades or blinds that you can open and close as needed is a popular solution. You might also consider low-emissivity (low-E) glass coatings or glazing, which help block heat while letting in light. Another option is to use tinted skylight glass designed to reduce solar heat gain.
The article mentions budgeting as a common mistake. Can you give a ballpark figure for how much a typical residential skylight installation might cost, including professional labor?
A typical residential skylight installation, including professional labor, usually ranges from $900 to $2,500 per skylight. The total cost depends on the skylight type, roof complexity, and local labor rates. Basic fixed skylights tend to be on the lower end of the range, while vented or larger units and challenging roof situations can increase the price.
You talk about compliance issues halting renovations—what are the typical codes or permits I might need to look out for before starting a skylight project on my own home?
Before installing a skylight, check your local building codes, as many areas require a building permit for structural changes like cutting roof openings. You may need to meet specific requirements for energy efficiency, proper flashing to prevent leaks, minimum distances from roof edges, and sometimes fire safety regulations. Always contact your city or county building department to confirm which permits and codes apply in your area before starting work.
Could you explain a bit more about the differences in maintenance needed for fixed skylights versus ventilating ones? I’m curious if one type ends up being a lot more work over time, especially for someone with a busy schedule.
Fixed skylights typically require less maintenance because they don’t have moving parts. You’ll mainly need to clean the glass and check seals occasionally for leaks. Ventilating skylights, on the other hand, need all the same care as fixed ones but also require you to keep the hinges, opening mechanisms, and screens clean and in good working order. Over time, ventilating models can be a bit more work, especially if you’re short on time.
I noticed you mentioned that south-facing skylights give off the most light but can cause overheating. Are there specific materials or technologies you recommend to minimize heat gain without sacrificing daylight if I want to install a skylight on a south-facing roof?
To reduce heat gain from a south-facing skylight while keeping plenty of daylight, consider using low-emissivity (low-E) glass, which reflects infrared heat but lets through visible light. You can also look into double- or triple-glazed skylights for better insulation, and some skylights offer built-in shades or tints to further control sunlight. These features help balance light and temperature effectively.
I’d like to put a skylight in our kitchen for extra ventilation, but I’m worried about moisture. What maintenance should I plan for to keep it from leaking or developing mold over time?
To keep your kitchen skylight leak-free and mold-resistant, regularly check the seals and flashing for any wear or gaps, especially after heavy rain or storms. Clean the skylight frame and glass to prevent buildup of dirt and moisture. Make sure your kitchen is well-ventilated to reduce condensation, and promptly dry any water you notice around the skylight. Inspect for signs of mold, and address any issues right away to prevent bigger problems.
You talk about different skylight types like fixed, ventilating, and tubular. For a bathroom where privacy and moisture control matter, which would you suggest is the most beginner-friendly to install and maintain?
For a bathroom, a fixed skylight is usually the most beginner-friendly option to install and maintain. It offers good natural light and, since it doesn’t open, you won’t have to worry about moisture getting into the mechanisms or potential leaks from moving parts. Just make sure it’s rated for moisture-prone areas and use proper flashing to prevent leaks.
How long does it usually take a DIY enthusiast to install a typical fixed skylight from start to finish, assuming they have basic carpentry skills? Are there any steps where beginners often underestimate the required time?
For someone with basic carpentry skills, installing a typical fixed skylight usually takes about one full day—around 6 to 8 hours. Beginners often underestimate how long it takes to properly cut and frame the roof opening, as well as ensuring watertight flashing and sealing. Finishing the interior trim can also be more time-consuming than expected, especially if drywall or painting is involved.
For those of us considering a DIY approach, what are some specific compliance issues or local building codes that often trip up beginners during residential skylight installs?
When installing a skylight yourself, common compliance issues include not getting the required permits, failing to follow local energy efficiency standards, and overlooking roof load requirements. Many areas also have specific rules for flashing and waterproofing to prevent leaks. Be sure to check your municipality’s codes about minimum distances from roof edges and fire safety regulations. Always verify with your local building department before starting.
You mentioned that south-facing skylights can cause rooms to overheat. Are there any affordable shading or glazing options that help control the temperature without blocking too much sunlight?
Yes, there are budget-friendly ways to manage heat from south-facing skylights. You can use solar-reflective films or low-emissivity (Low-E) glazing, which reduce heat gain while still letting in plenty of light. Interior options like light-filtering roller shades or cellular blinds are also effective and affordable, providing insulation without making the room too dark.
The article talks about different skylight types like fixed, ventilating, and tubular. Are some types significantly cheaper to buy and install than others, or does most of the budget go to labor and materials regardless of style?
There are noticeable cost differences between skylight types. Fixed skylights are usually the most affordable option, both to buy and install, because they have no moving parts. Ventilating skylights cost more due to their opening mechanisms. Tubular skylights are often less expensive in materials but may require unique installation steps. Labor and installation materials do add to the total cost, but the style you choose definitely affects your budget.
The article mentions that south-facing skylights can cause overheating. If my only good roof spot faces south, are there specific materials or shading solutions recommended to minimize excess heat without sacrificing daylight?
If your skylight must face south, consider using glazing materials with low solar heat gain coefficients, such as low-E (low-emissivity) glass, which helps reduce heat entry while allowing plenty of daylight. Adding external shading options like retractable awnings or interior solutions such as blinds or cellular shades can also help manage heat without blocking natural light.
If I have an older house with unusual roof trusses, how can I accurately figure out if and where a skylight could be installed without running into structural issues?
For older homes with unusual roof trusses, the best approach is to consult with a structural engineer or an experienced skylight installer. They can inspect your attic, identify where the trusses are, and determine safe locations for a skylight without compromising the roof’s integrity. Avoid cutting any trusses on your own, as that could weaken your roof structure.
After installation, are there common signs of poor placement or improper installation that homeowners should watch for in the first few months? I want to catch any issues early before they develop into bigger problems.
Yes, there are several signs you can look for after your skylight is installed. Watch for water leaks or damp spots around the skylight, especially after rain—this could mean poor sealing. Condensation between panes or drafts might indicate issues with insulation or placement. Also, check if the skylight opens and closes smoothly and ensure there are no visible gaps between the frame and roof. Catching these issues early can help prevent more serious damage.
The article touches on budgeting for installation, but I’m curious—what are the hidden costs I should look out for, like extra framing or permits, that tend to catch first-timers by surprise during a DIY skylight project?
Some hidden costs to keep in mind include additional framing if your roof structure needs reinforcement, permit fees depending on your local regulations, and potential repairs for unexpected issues like water damage or mold found during the installation. You might also need to purchase extra flashing or insulation materials, and renting or buying specialized tools can add up. These are common surprises that can increase your total project cost beyond the skylight itself.
The article talks about different skylight types, like fixed and ventilating. For a bathroom, would you recommend a particular type, considering moisture and privacy? How do you balance those two factors when making the decision?
For a bathroom, a ventilating skylight is often a good choice because it can help manage moisture and reduce humidity, which is important in such a damp environment. To address privacy, consider frosted or tinted glass, or built-in blinds. This way, you get the benefits of air circulation without compromising your privacy.
The article mentions budgeting, but are there any hidden costs that commonly catch beginners by surprise during skylight installation, such as adjustments for sun path or additional insulation needs?
Yes, hidden costs can come up during skylight installation. Many beginners are surprised by expenses for extra insulation around the skylight to prevent heat loss or condensation. Adjustments for the sun path may require special glazing or blinds to manage heat and glare, which add to the budget. You might also face unexpected roof repairs if structural changes are needed, or higher labor costs if your roof is steep or complex.
When budgeting for a project like this, what unexpected costs tend to come up—especially regarding compliance or permitting for commercial properties?
When budgeting for skylight installation on commercial properties, unexpected costs often arise from meeting local building codes, obtaining necessary permits, and addressing fire safety or energy efficiency standards. There may also be fees for architectural or engineering reviews, and costs for inspections or code-required modifications. It’s wise to allocate extra funds for these compliance-related expenses to avoid surprises.