Introduction: The Value of a Well-Planned Home Workshop
For homeowners and DIY enthusiasts alike, having a dedicated home workshop can be transformative. Whether you’re tackling minor repairs, building custom furniture, or diving into creative projects, a well-organized workshop saves time, boosts productivity, and improves safety. Yet, setting up an efficient, safe, and comfortable workshop isn’t as simple as clearing a corner in the garage. It requires thoughtful planning—from layout and tool selection to storage and electrical considerations. In this comprehensive guide, we’ll walk you through every step of creating a home workshop that suits your space, ambitions, and safety needs. Whether you’re converting a basement, repurposing a shed, or claiming a section of your garage, this guide will help you build a workshop that empowers your projects for years to come.
Evaluating and Choosing Your Workshop Space
Assessing Potential Locations
The first step is identifying a suitable area in your home. Consider these common options:
- Garage: Offers ample space and easy access for large projects but may require climate control and dust management.
- Basement: Often quieter and separate from living areas, but consider ventilation and moisture control.
- Shed or Outbuilding: Ideal for noisy or messy work, but may need upgrades for security, power, and insulation.
- Spare Room: Suitable for light crafts or electronics, though floor protection and ventilation are crucial.
Space Requirements and Constraints
Measure your available area. A minimum of 8’x10’ is workable for basic tasks, but more space allows for larger tools, better movement, and safer workflows. Watch for these constraints:
- Ceiling height (especially for tall equipment or overhead storage)
- Access to electrical outlets and natural light
- Proximity to noise-sensitive areas (bedrooms, neighbor walls)
- Existing flooring (concrete is ideal; wood may need reinforcement)
Planning Your Workshop Layout
Workflow Zoning
Organize your space into functional zones:
- Assembly/Work Area: Central workbench or table with clear access on all sides
- Tool Storage: Wall-mounted organizers, cabinets, or mobile carts close to your main work area
- Materials Storage: Shelving for wood, fasteners, hardware, and project supplies
- Power Tool Zone: Fixed stations for table saws, drill presses, or sanders, ideally along walls for dust extraction
- Finishing Area: A well-ventilated space for painting, staining, or gluing
Accessibility and Ergonomics
Design your layout to minimize wasted motion and ensure comfort:
- Allow at least 3 feet of clearance around main work areas
- Store frequently used tools within arm’s reach of your workbench
- Use adjustable-height work surfaces to reduce strain
- Ensure clear, unobstructed pathways—especially to exits
Lighting and Ventilation
Good lighting is critical for safety and accuracy. Combine ambient lighting (such as ceiling LEDs) with task lighting over benches. For ventilation, use windows, fans, or a dedicated exhaust system—especially for finishing work or when using solvents.
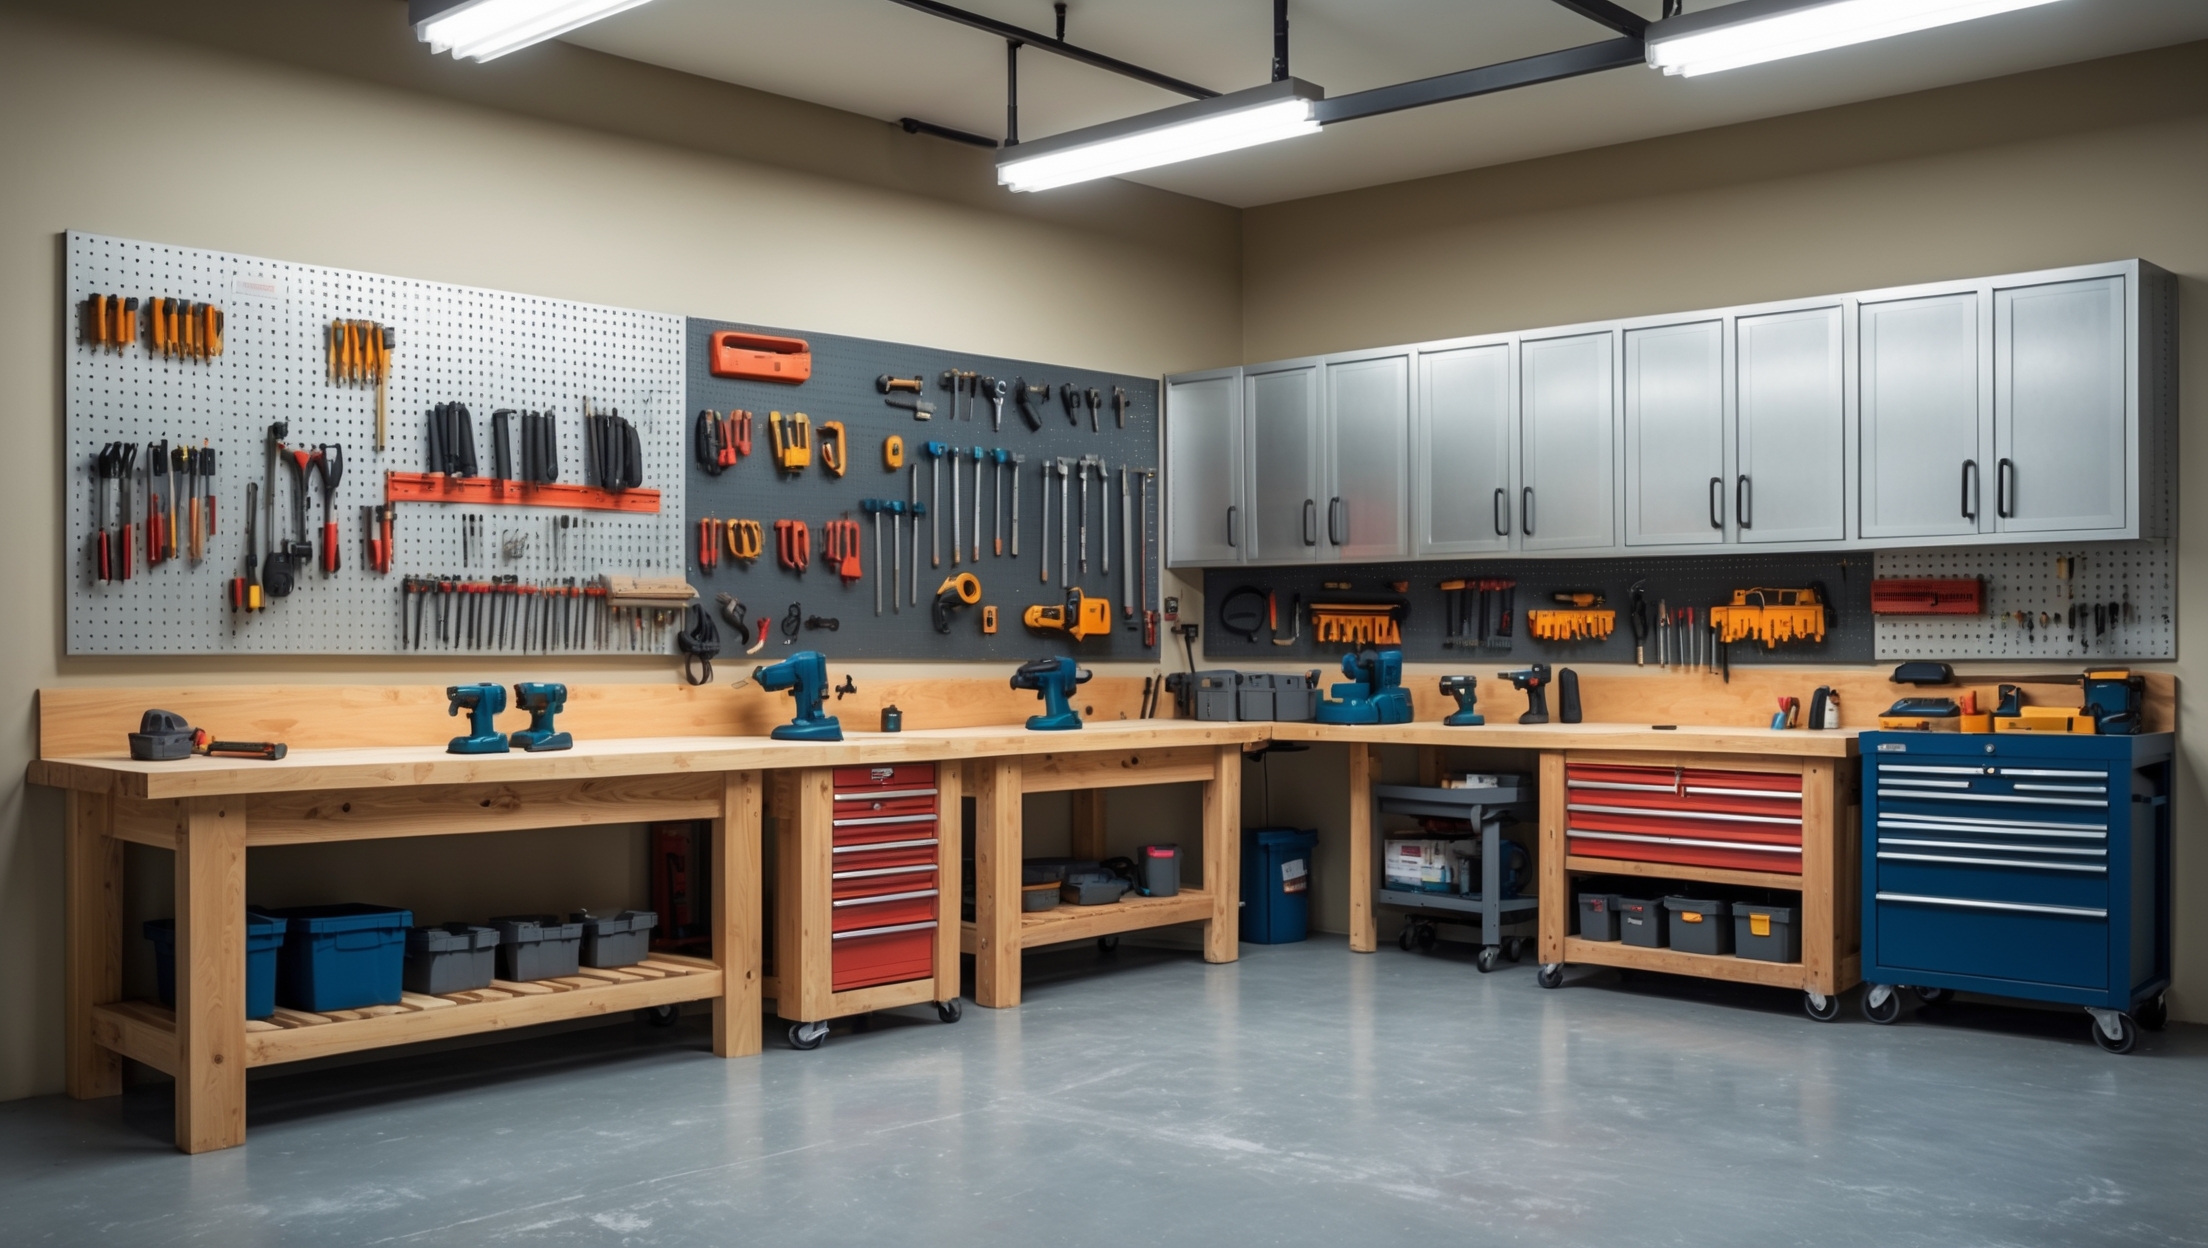
Essential Workshop Tools: Selecting for Versatility and Value
Core Hand Tools
- Hammer (16 oz. claw for general use)
- Screwdrivers (a set of flathead and Phillips)
- Measuring tape (at least 25 feet)
- Utility knife
- Level (24” or longer)
- Pliers (needle-nose, slip-joint, and locking)
- Adjustable wrench
- Handsaw or backsaw
- Chisels (1” and ½”)
Must-Have Power Tools
For most DIYers, these tools strike a balance between utility and budget:
- Cordless drill/driver with extra batteries
- Circular saw for quick, straight cuts
- Jigsaw for curves and custom shapes
- Random orbital sander for smooth finishes
- Shop vacuum for cleanup and dust management
Consider stationary tools like a table saw or drill press as your skills and space grow.
Tool Storage Solutions
- Pegboards for wall-mounted, visible tool access
- Lockable cabinets for power tools and hazardous items
- Drawer organizers for small hand tools and bits
- Rolling tool chests for mobility
Organizing Materials and Supplies
Shelving and Racking
Sturdy metal or heavy-duty plastic shelves keep lumber, sheet goods, and bulk materials off the floor and easily accessible. Use vertical space efficiently, but avoid shelving above head height for heavy items.
Bins, Jars, and Small Parts Storage
- Clear plastic bins for hardware, fasteners, and project parts
- Labeled jars or magnetic trays for nails, screws, and washers
- Hanging organizers for sandpaper, glue, and frequently used consumables
Project Staging Area
Dedicate a table or shelf for in-progress projects to keep materials organized and prevent accidental damage.
Electrical and Power Considerations
Assessing Power Needs
Calculate the amperage required for your tools. Most home workshops need several 15- or 20-amp circuits. High-draw tools (like table saws or air compressors) may require dedicated circuits or 220V outlets.
Safe Power Distribution
Install ample grounded outlets along each wall—ideally every 4–6 feet. Avoid overloading circuits with power strips; use surge-protected outlets where possible. Consider ceiling-mounted reels for retractable power cords to keep floors clear.
Lighting Upgrades
LED shop lights are bright, energy-efficient, and easy to install. Supplement with clamp lights or under-cabinet fixtures for close work.
Dust Collection and Cleanliness
Dust Management Basics
Woodworking and cutting generate fine dust that can harm lungs and settle on surfaces. At minimum, use a shop vacuum with HEPA filtration. For larger setups, consider a dedicated dust collector with hoses to stationary tools.
Workshop Clean-Up Routine
- Sweep or vacuum floors after every session
- Empty dust bags or bins regularly
- Wipe down benches and power tool surfaces
- Store solvents and finishes in sealed containers
Workshop Safety Essentials
Personal Protective Equipment (PPE)
- Safety glasses or goggles for all cutting or drilling
- Hearing protection (earmuffs or plugs) for power tool use
- Dust masks or respirators when sanding or using chemicals
- Durable gloves for handling rough materials
- Non-slip footwear
Fire Safety
- Keep a multi-purpose fire extinguisher within easy reach
- Store oils, finishes, and solvents in metal safety cabinets
- Dispose of rags soaked in flammable liquids in sealed containers
First Aid and Emergency Preparedness
- Wall-mounted first aid kit stocked with bandages, antiseptic, and burn cream
- Clearly marked exit routes
- Emergency contact numbers posted near the door
Noise, Insulation, and Comfort
Soundproofing for Peace of Mind
If your workshop is near living areas, use rubber mats, acoustic panels, or weatherstripping on doors to reduce noise transfer.
Climate Control Tips
- Portable electric heaters or fans for comfort
- Insulate walls and doors to maintain consistent temperature
- Dehumidifiers in basements to prevent mold
Seating and Ergonomics
Invest in an adjustable stool or anti-fatigue mat for long sessions standing at the bench. Maintain good posture and take breaks to avoid strain.
Upgrades and Custom Features
Mobile Workstations
Build or buy workbenches with locking casters for flexibility. Mobile tool stands let you reconfigure your space for different projects.
Specialty Stations
- Sharpening station for blades and chisels
- Dedicated electronics or soldering bench
- Paint booth with exhaust fan for finishing
Smart Workshop Technology
Add Wi-Fi-enabled outlets, digital tool organizers, or inventory apps to streamline your workflow and keep track of consumables.
Maintaining and Evolving Your Workshop
Routine Maintenance
- Inspect power cords, outlets, and tool batteries monthly
- Lubricate moving parts and sharpen blades regularly
- Check for moisture or pest issues in basements and sheds
Scaling Up as Your Skills Grow
Start with core tools and expand as your projects demand. Upgrade storage, add specialty tools, or reconfigure your layout for efficiency. Keep a wish list for future enhancements, and revisit your setup annually to address new needs.
Conclusion: Building a Workshop that Grows with You
A home workshop is more than just a collection of tools—it’s a creative sanctuary, a space for learning, and a hub for tackling repairs or ambitious builds. By thoughtfully planning your layout, choosing the right tools, organizing materials, and prioritizing safety, you lay the groundwork for a workshop that supports your goals and grows with your skills. Remember, the best workshops are tailored to their owners. Start with the fundamentals, adapt as you learn, and don’t hesitate to make improvements as your needs change. With careful setup and regular maintenance, your home workshop will become a space where inspiration and productivity thrive—empowering you to take on projects with confidence for years to come.