
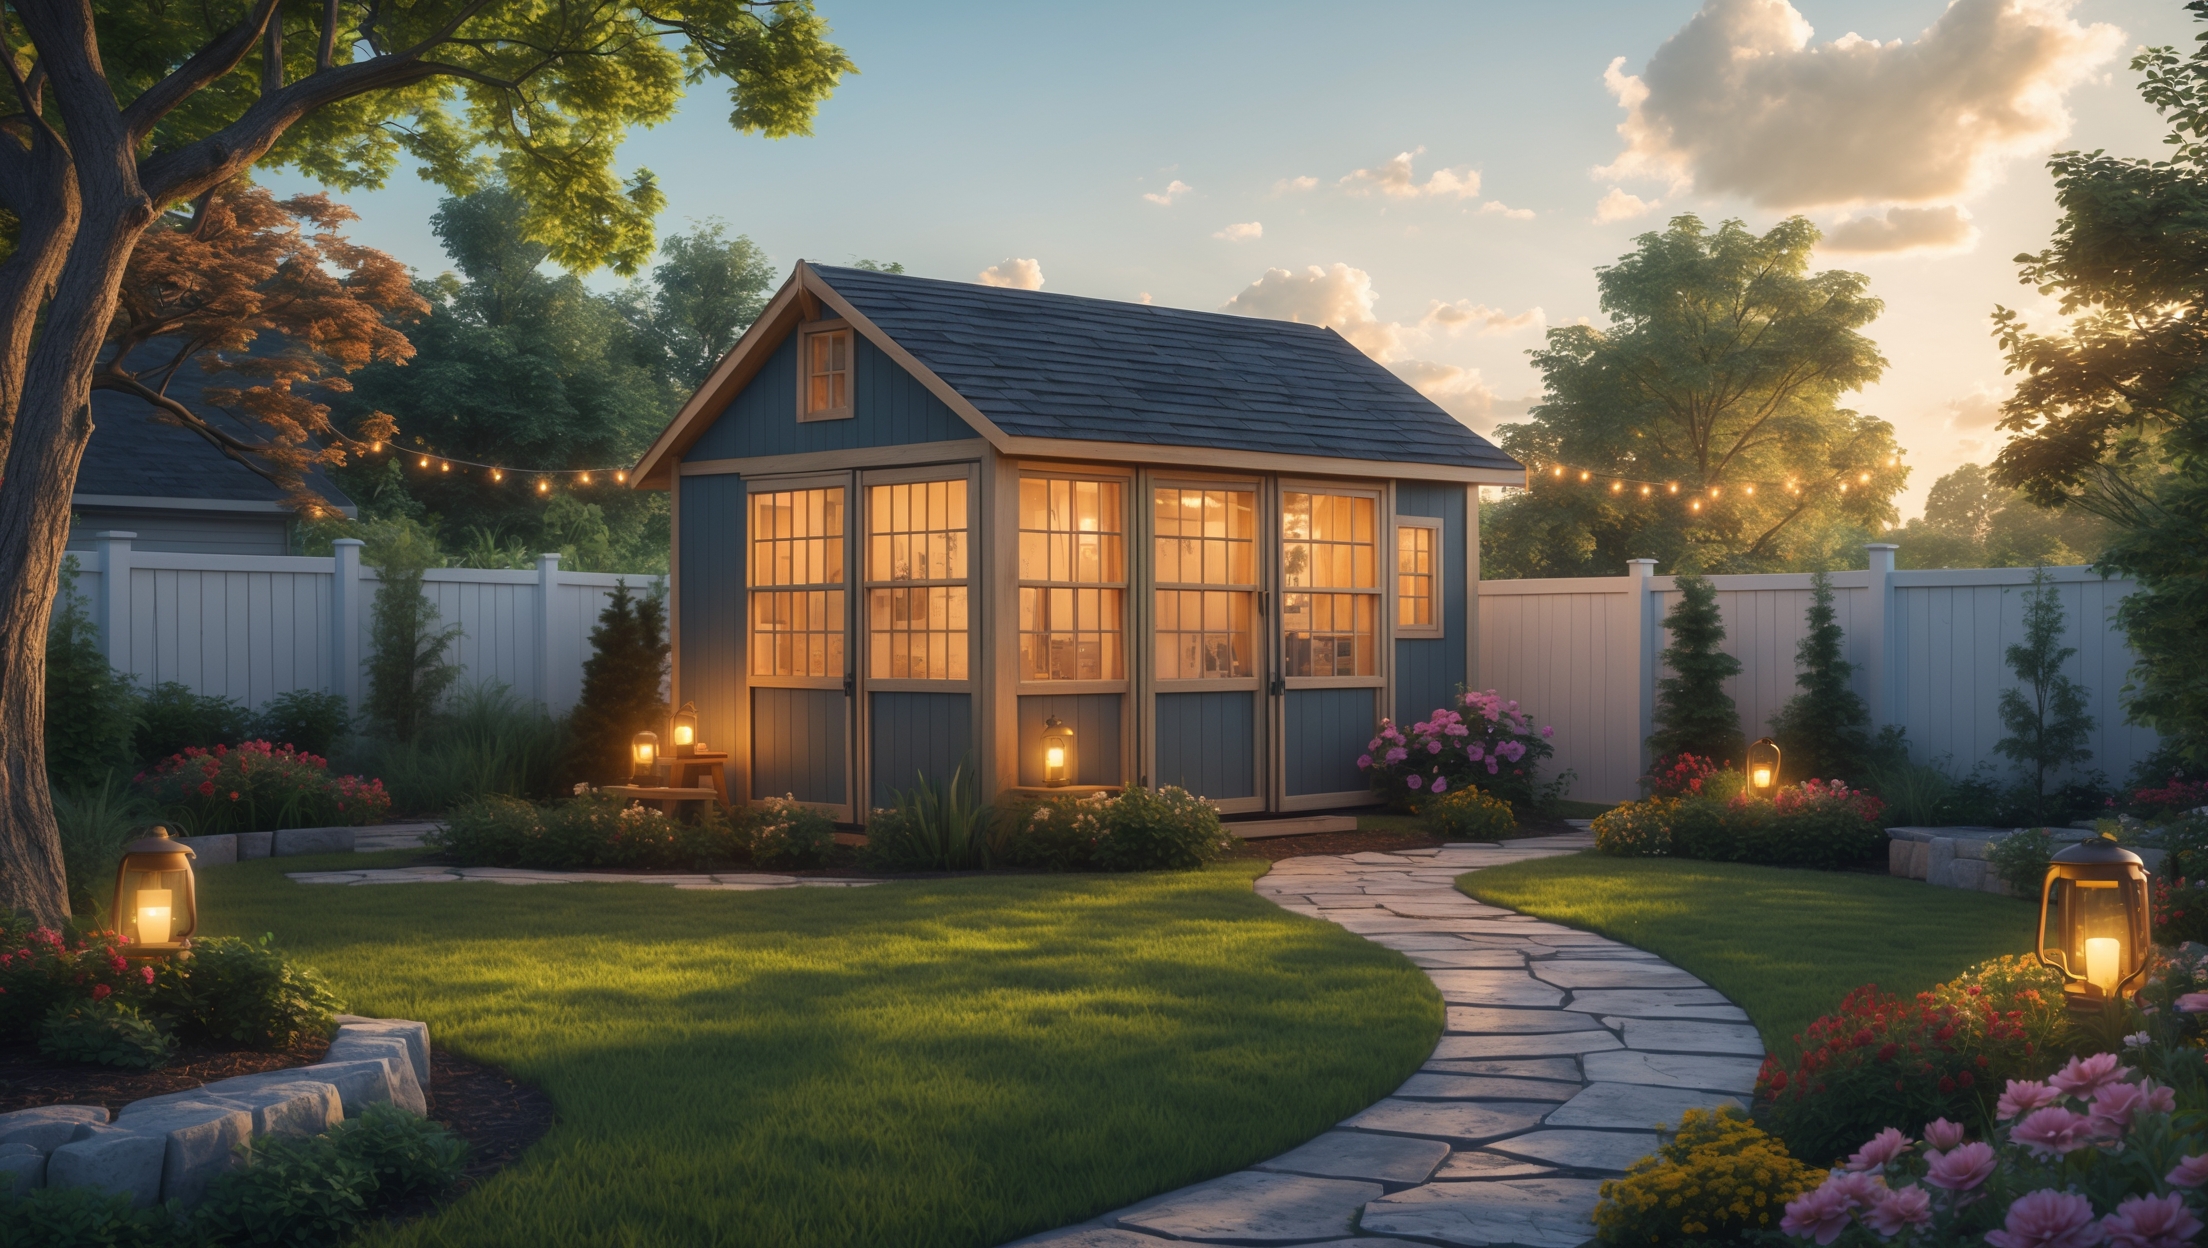
Introduction: Why Convert Your Shed Into a Backyard Workspace?
With remote work and creative hobbies on the rise, more homeowners are seeking quiet, productive spaces right on their property. Converting an underused backyard shed into a home office, studio, or workshop is a cost-effective and rewarding solution. Unlike expensive additions or renting an outside studio, a shed conversion makes use of existing structures and can be tailored to your needs and style. However, the process involves much more than simply moving in a desk and chair. To ensure your shed conversion is safe, comfortable, and compliant with local regulations, you’ll need to plan carefully, budget wisely, and execute each step with attention to detail. This comprehensive guide walks you through every phase—from assessing your shed’s potential to final touches—arming you with practical tips and expert insights for a successful backyard workspace transformation.
Assessing Your Shed’s Suitability
Structural Integrity Check
Before getting inspired by Pinterest boards, determine if your shed is up to the task. Look for solid, rot-free framing, a level floor, and a roof that keeps out weather. Check for:
- Foundation: Should be stable with no signs of shifting, sinking, or water pooling underneath.
- Framing: Inspect for rot, mold, pest damage, or warping.
- Roof: Look for leaks, missing shingles, or daylight peeking through boards.
- Floor: Ensure it’s strong enough for furniture and equipment, with no soft spots.
Space and Access Considerations
Measure the interior dimensions—length, width, and height. Most workspaces need at least 80 sq. ft. for comfort and utility. Consider access:
- Can you easily bring in furniture and supplies?
- Is there room for insulation and interior walls?
- Is the entrance secure and weather-tight?
Budgeting and Cost Breakdown
Major Expense Categories
- Structural Repairs: $500–$2,500 (if needed)
- Insulation & Interior Walls: $800–$2,000
- Electrical Work: $1,000–$3,000
- Heating/Cooling: $500–$2,000
- Windows/Doors Upgrade: $400–$1,200
- Flooring: $400–$1,000
- Permits & Compliance: $100–$600
- Furnishing & Décor: $500–$2,000
Expect a total investment between $4,000 and $14,000, depending on choices and DIY vs. pro labor.
Budget Smart Tips
- Reuse materials where possible (flooring, doors, windows).
- Shop sales and secondhand for furniture and fixtures.
- DIY what you can safely; hire pros for electrical and structural work.
- Add a 10% contingency fund for unexpected costs.
Permits and Compliance Essentials
Do You Need a Permit?
Most municipalities require permits for any shed conversion involving electrical, plumbing, or structural changes. Common triggers include:
- Running electrical wiring or installing outlets/lighting
- Adding windows or doors
- Installing HVAC
- Significant structural modifications
Visit your local building department’s website or office to review requirements. Failing to secure permits can result in fines, forced removal, or denied insurance claims.
Zoning and HOA Considerations
- Check setback requirements (distance from property lines).
- Verify allowed shed usage—some areas prohibit living or working in sheds.
- If you have a Homeowners Association (HOA), get written approval before starting.
Planning the Layout
Define Your Workspace Needs
Start with a list of must-haves based on how you’ll use the space:
- Desk and ergonomic chair
- Storage for supplies, equipment, or files
- Good lighting (task and ambient)
- Electrical outlets for devices and chargers
- Ventilation and climate control
Draft a Floor Plan
Sketch the shed’s interior with accurate measurements. Use graph paper or free online tools (like SketchUp or Roomstyler). Place doors and windows, then arrange furniture and storage. Don’t forget:
- Clear walking paths
- Space for opening doors and windows
- Accessibility for electrical panels or outlets
Insulation and Weatherproofing
Insulation Options
- Fiberglass Batts: Affordable and effective for standard stud walls. Must be covered with drywall or paneling.
- Rigid Foam Board: Good for thin walls, adds high R-value per inch, moisture-resistant.
- Spray Foam: Best air-sealing, fills gaps, but higher cost and requires pro installation.
Don’t forget to insulate the floor and roof/ceiling—these are major sources of heat loss or gain.
Sealing for Comfort
- Caulk around windows and doors
- Install weatherstripping on doors
- Seal any gaps in the foundation or siding
Electrical and Lighting: Do It Safe and Smart
Hiring a Licensed Electrician
Running power to your shed is not a DIY job unless you’re highly experienced. Improper wiring is a fire hazard and may violate code. A licensed electrician will:
- Install a subpanel or dedicated circuit from your main electrical panel
- Trench and run conduit safely underground
- Provide outlets, switches, and overhead lighting per code
- Install hardwired heaters or mini-splits if needed
Lighting Ideas
- LED Overhead Fixtures: Energy-efficient, bright, and long-lasting
- Desk Lamps: Adjustable task lighting for focused work
- Natural Light: Add or upgrade windows to maximize daylight
Heating, Cooling, and Ventilation
Climate Control Options
- Mini-Split Heat Pumps: Highly efficient, provide both heating and cooling, but require pro install
- Electric Space Heaters: Affordable, but less efficient for long-term use
- Window AC Unit: Good for smaller sheds, easy to install in a new or existing window
- Ceiling or Wall Fans: Improve air circulation, supplement other systems
Don’t overlook ventilation. Install operable windows or a small exhaust fan to prevent stuffiness and moisture buildup.
Windows and Doors: Security and Comfort
Adding or Upgrading Openings
Well-placed windows bring in daylight and fresh air. When adding or enlarging windows, ensure:
- They’re properly flashed and sealed to prevent leaks
- Window glass is energy-efficient (double-pane preferred)
- Frames are secure to deter break-ins
Upgrade doors to solid-core or insulated models for security and energy efficiency. Add deadbolts or smart locks for peace of mind.
Finishing the Interior
Walls and Ceilings
- Drywall: Standard finish, paintable, fire-resistant
- Plywood Panels: Durable, easy to install, can be stained or painted
- Beadboard: Attractive, cottage-style look
Don’t forget to finish the ceiling for a polished look and to conceal wiring or insulation.
Flooring Options
- Vinyl Plank: Durable, waterproof, budget-friendly
- Laminates: Easy to install, various styles
- Carpet Tiles: Add warmth and sound absorption
Painting and Decorating
Choose light, neutral paint colors to maximize daylight and make the space feel larger. Add personal touches: area rugs, wall art, plants, or shelving.
Furnishing and Organizing Your Workspace
Ergonomic Essentials
- Adjustable desk and supportive chair
- Monitor stands or arms to reduce neck strain
- Task lighting positioned to minimize glare
Smart Storage Solutions
- Wall-mounted shelves to save floor space
- Cabinets or drawers for supplies and files
- Pegboards or hooks for tools if using as a workshop
Keep clutter at bay with organizers and cable management systems.
Safety and Security Checklist
Fire and Electrical Safety
- Smoke detector and (if applicable) carbon monoxide alarm
- Fire extinguisher rated for electrical and ordinary fires
- No daisy-chained extension cords—use installed outlets
- Regular checks for frayed wires or overloaded circuits
Physical Security
- Deadbolts or smart locks on doors
- Window locks or security film
- Motion-sensor exterior lighting
- Consider a Wi-Fi camera for remote monitoring
Personal Safety
- Clear path to the house, lit for nighttime use
- Weather-resistant steps or ramps
Utilities and Internet Connectivity
Powering Devices
Plan outlet placement for computers, printers, chargers, and any specialty equipment. Install USB outlets for convenience.
Internet Access Options
- Wi-Fi Extenders: Boost your home’s signal to reach the shed
- Outdoor Ethernet Cables: For fastest, most reliable connection
- Mesh Wi-Fi Systems: Seamlessly expand network coverage
Test signal strength before finalizing your setup to avoid surprises.
Landscaping and Exterior Improvements
Pathways and Lighting
- Install a durable, slip-resistant path from your house to the shed (pavers, gravel, or stepping stones)
- Add solar or low-voltage path lights for visibility and safety
Curb Appeal
- Paint or stain the exterior to complement your home
- Plant shrubs or flowers around the shed for a welcoming touch
- Add a small deck or patio for outdoor breaks
Maintenance Best Practices
Routine Inspections
- Check for leaks after heavy rain
- Inspect exterior paint or siding for wear
- Test smoke alarms monthly
- Ensure windows and doors still seal tightly
Seasonal Tasks
- Clean gutters and clear debris from roof
- Lubricate door hinges and locks
- Check HVAC filters and clean vents
Conclusion: Your Inspiring Backyard Retreat Awaits
Transforming your shed into a backyard workspace is a project that rewards attention to detail, thoughtful planning, and a willingness to invest effort and resources. The payoff—a quiet, personalized retreat just steps from your home—can boost productivity, creativity, and even property value. By following the steps outlined in this guide, you’ll avoid common pitfalls, stay on budget, and ensure your workspace is safe, comfortable, and code-compliant. Whether you dream of a high-tech office, an artist’s studio, or a cozy reading nook, your converted shed can become a daily sanctuary that supports your goals and lifestyle.
Remember, the most successful conversions are those that blend function with style, and security with comfort. Take time to choose finishes and furnishings that inspire you, and don’t hesitate to seek professional help for electrical, structural, or compliance tasks. With each phase—from laying out your floor plan to adding the final decorative touches—you’re investing in a space that’s uniquely yours. So roll up your sleeves, get creative, and enjoy the journey of designing your perfect backyard workspace. Your shed holds more potential than you ever imagined—unlock it with confidence and craftsmanship.
You suggest budgeting up to $2,500 for structural repairs. If my shed only has minor rot and no pest damage, could I realistically stay on the lower end of that range, or do costs tend to add up quickly?
If your shed only has minor rot and no pest damage, you can likely stay on the lower end of the $2,500 range for structural repairs. Minor repairs like replacing small sections of wood or patching up limited damage usually won’t require a big budget, especially if you handle some tasks yourself. Costs tend to rise mainly with extensive rot, foundation work, or hidden issues, so keeping the repairs focused should help you manage expenses.
After assessing structural integrity and space, what are the first steps you recommend for planning insulation and installing interior walls? Should those happen before or after addressing electrical upgrades?
Once you’ve checked the shed’s structure and space, it’s best to plan and install any electrical upgrades before adding insulation or interior walls. This way, you’ll avoid having to remove finished surfaces to run wiring. After electrical work is safely completed and inspected, you can move on to insulation and then put up your interior walls for a neat finish.
Once the shed passes structural checks and planning, what would you say is the most time-consuming phase of the conversion process based on your experience or feedback from others?
After structural checks and planning, the most time-consuming phase is usually finishing the interior. Tasks like installing insulation, drywall or paneling, electrical wiring, flooring, and painting can all take significant time, especially if you want a polished, comfortable workspace. Customizing the shed to fit your needs with shelving or built-in desks can add to the timeline as well.
I noticed you mention checking for structural integrity and potential repairs ranging from $500 to $2,500. In your experience, are there certain types of existing sheds that tend to need more work or cost significantly more to bring up to standard for a workspace?
Older wooden sheds, especially those that haven’t been well-maintained, often require more repairs—like replacing rotted wood, reinforcing floors, or fixing leaks. Metal sheds can develop rust and sometimes have weaker insulation. Plastic sheds usually need less structural work but may require upgrades for insulation and ventilation. Generally, heavily weathered or very old sheds will cost more to refurbish for safe, comfortable workspace use.
You referenced a range of costs for structural repairs and electrical work. If I’m handy and plan to DIY most of it, which areas would you still recommend leaving to professionals for safety or code reasons?
Even if you’re skilled at DIY, it’s safest to let professionals handle any major electrical work—especially wiring, panel upgrades, or new circuits—as these must meet code and can be hazardous. Structural repairs that affect the shed’s foundation, load-bearing walls, or roof integrity are also best left to experienced pros to ensure safety and compliance with building regulations.
For insulation and interior wall upgrades, what are the best materials to use if I’m trying to keep costs down but still want to be comfortable year-round?
If you’re aiming to balance comfort and affordability, consider using fiberglass batt insulation, which is cost-effective and widely available. For interior walls, painted drywall is an inexpensive and durable choice. If you’d like something even more budget-friendly, oriented strand board (OSB) can work, though it’s less refined in appearance. Make sure to also seal gaps and use a vapor barrier to improve year-round comfort.
Are there specific building permits or zoning rules that often catch people off guard when turning a backyard shed into a workspace? I’m worried about running into issues after investing in upgrades.
Yes, converting a shed into a workspace often involves permits or zoning rules that surprise many people. Common issues include needing permits for electrical work, plumbing, or making the space habitable year-round. Zoning laws in some areas restrict sheds being used as offices or limit their size and placement. It’s best to check with your local planning department before starting upgrades to avoid costly corrections later.
Once the shed passes the initial structural checks, how long does the average conversion project usually take from start to finish if I am handling most of the work myself on weekends?
If you’re taking on most of the work yourself and only working weekends, a typical shed conversion can take anywhere from 2 to 4 months to complete. This timeline includes tasks like insulation, wiring, drywall, flooring, and finishing touches. Your experience level, shed size, and any unforeseen issues can influence the actual duration.
You mentioned needing at least 80 square feet for comfort—does that include the space taken up by insulation and adding interior walls, or should I factor in extra footage for those modifications?
The recommended 80 square feet refers to the usable interior space after insulation and interior walls are installed. It’s a good idea to factor in some extra square footage when planning the shed size, since insulation and finishing materials will slightly reduce the interior dimensions. This way, you’ll ensure you have a comfortable workspace once everything is complete.
How did you address moisture issues, especially with sheds that might not have a solid foundation or are prone to water pooling underneath? Any tips for preventing mold long-term?
To address moisture issues, we recommend first improving drainage around the shed—gravel or a slight slope can help divert water away. Installing a vapor barrier beneath the floor and ensuring good ventilation inside the shed are key for long-term mold prevention. If your shed lacks a solid foundation, consider raising it slightly on concrete blocks or treated wood to keep it off damp ground.
When checking for rot or pest damage in the framing, are there any specific signs I should look out for if I have zero construction experience?
Absolutely, there are some simple things to watch for. For rot, check the wood for softness, crumbling edges, or a musty smell. If you notice wood that looks darker or feels spongy, that’s a red flag. For pests, look for small holes, sawdust piles, tunnels in the wood, or even visible insects like termites or ants. If you spot any of these signs, it’s best to consult a professional before moving forward.
The electrical work estimate seems pretty broad at $1,000 and up. For a basic setup with lighting and two outlets, is it realistic to expect costs at the lower end, or does it usually end up higher?
For a basic setup with simple lighting and two outlets, costs can sometimes fall at the lower end of the estimate, especially if your shed is close to your main electrical panel and there are no unusual site challenges. However, prices often go higher due to factors like local permit fees, trenching requirements, or the distance from your house. Getting a few detailed quotes from licensed electricians will give you a clearer idea for your specific situation.
Could you explain a bit more about the electrical work? For someone who’s not experienced with wiring, do you suggest hiring a professional for basic outlets and lighting, or are there safe DIY options suitable for a backyard workspace?
Electrical work can be complex and potentially hazardous, especially if you’re not experienced with wiring. For a backyard workspace, even basic outlets and lighting must meet safety codes, and improper installation could lead to risks like fire or shock. For most people, hiring a licensed electrician is the safest choice. They can ensure everything is up to code and properly grounded. DIY options exist, but they typically suit only very simple setups, like plug-and-play extension cords, which aren’t a substitute for permanent wiring in a workspace.
You mention budgeting for insulation and interior walls separately—do you have recommendations for the most cost-effective insulation types that still maintain comfort, especially if I want to use the workspace year-round?
For year-round use, consider rigid foam board or fiberglass batt insulation, as both offer solid thermal performance at a reasonable price. Rigid foam is easy to install and resists moisture, making it ideal for sheds. Fiberglass batts are budget-friendly and widely available but require a vapor barrier. Ensure proper sealing around doors and windows to maximize comfort and efficiency.
If my shed is only about 70 square feet inside, do you have any suggestions for layout or creative ways to make it feel bigger? The article mentioned 80 square feet as ideal, so I’m wondering how much of a difference that makes.
A 70 square foot shed can still make a great workspace! Use light colors for walls and furniture to create an airy feel. Opt for vertical storage—shelves and wall hooks—to keep the floor open. Choose compact, multi-functional furniture, and keep windows unobstructed for natural light. While 80 square feet gives a bit more flexibility, careful layout and decluttering will help your 70 square foot shed feel inviting and productive.
You mentioned checking for rot and pest damage. If there is minor mold or warping in the framing, is that a deal breaker or can it usually be repaired without replacing the whole structure?
Minor mold or warping in the framing doesn’t automatically mean you need to replace the entire structure. Mold can often be cleaned with a fungicide and dried out, while slight warping may be fixable by reinforcing or bracing the affected areas. However, if the damage is extensive or compromises the shed’s stability, replacing those parts is safer. Always address the underlying cause, like leaks or poor ventilation, to prevent future problems.
Does adding insulation and interior walls to an existing shed significantly reduce the usable space? I’m working with just about 85 square feet and wondering if it’s still worth the effort for temperature and noise control.
Adding insulation and interior walls will reduce usable space slightly, but in an 85 square-foot shed, the loss is usually minimal—typically just a few inches on each wall. The benefits for temperature stability and noise control often outweigh the small reduction in space. Careful planning and choosing thinner yet effective insulation, like rigid foam panels, can help you maximize your remaining space.
You emphasize the importance of checking for rot and pest damage before starting. If someone discovers mild mold, what are the recommended next steps before moving forward with insulation and interior walls?
If you find mild mold during your shed inspection, start by wearing gloves and a mask to protect yourself. Clean the affected area with a mixture of water and detergent, scrubbing thoroughly. Allow the area to dry completely, then apply a mold-resistant treatment or primer. Make sure the shed is well-ventilated and address any moisture sources before adding insulation and interior walls.
For a workspace that’s mainly for creative hobbies rather than a full-time office, are there any steps from your guide I could potentially skip or simplify to save on costs and time?
If your shed will be used mainly for creative hobbies instead of daily office work, you can likely simplify or skip some steps. For example, you might not need full insulation, advanced climate control, or extensive electrical wiring. Focus on good lighting, basic weatherproofing, and functional storage. This approach should help you save both time and money while still creating a comfortable creative space.
When budgeting for insulation and interior walls, how do material choices like spray foam versus fiberglass factor into your estimated costs? I’d like to keep expenses down but also want good year-round comfort.
Spray foam insulation offers excellent thermal performance and air sealing, but it is usually more expensive than fiberglass batts. Fiberglass is affordable and provides decent insulation, but may not seal air gaps as effectively. For interior walls, drywall is cost-effective, while wood paneling can add warmth but costs more. To balance comfort and budget, you might choose fiberglass batts with careful installation, paired with drywall. Consider your climate and how often you’ll use the shed when making your decision.
Do you have any tips for maximizing storage and workspace in a shed that’s on the smaller side, say around 80 square feet? I’m struggling to balance room for supplies and a usable work area.
For an 80 square foot shed, focus on making the most of vertical space. Install shelves and wall-mounted pegboards to keep tools and supplies off the floor. Opt for fold-down or wall-mounted workbenches that can be tucked away when not in use. Use stackable bins for organized storage, and consider hooks or racks on the back of the door for smaller items. Keeping the floor clear will help maintain a functional work area.
When budgeting for the electrical work as outlined, does that estimate typically cover permits and inspections, or should I plan for additional related costs to stay compliant with local codes?
The electrical work estimate mentioned in the article usually covers labor and materials, but permits and inspections are often separate costs. It’s important to check with your local authorities since permit fees and inspection requirements can vary by location. To stay compliant and avoid surprises, plan for these extra expenses in your budget.
If my shed’s floor has a few soft spots but the rest of the structure looks solid, can that be reinforced or is it likely a sign I should skip the conversion altogether?
Soft spots in your shed’s floor can usually be repaired rather than requiring you to abandon the conversion. You can reinforce the affected areas by replacing damaged boards, adding new joists, or installing additional support underneath. Just make sure to investigate the cause—such as moisture or rot—and address it to prevent future issues. If the rest of the shed is solid, a few floor repairs shouldn’t stop your project.
The budget section shows a pretty wide range for insulation and interior walls. Is there a type of insulation that’s better for sheds if I want to save money but still keep it comfortable year-round?
For sheds, fiberglass batt insulation is often the most budget-friendly option and still does a good job keeping your workspace comfortable in different seasons. If you’re looking for something even simpler, rigid foam boards can also provide decent insulation and are easy to install on your own. Just make sure to seal any gaps for the best results.
If I find that the shed’s roof has just a few missing shingles but no major leaks, is it necessary to replace the whole roof, or would patching those spots be sufficient for a home office setup?
If the roof has only a few missing shingles and there are no major leaks or signs of water damage inside, patching just those spots should be enough for now. Make sure to securely replace the missing shingles and check the underlying area for any soft spots or rot. Regular inspections will help catch any future issues before they become bigger problems in your home office space.
If the shed’s entrance isn’t secure or weather-tight right now, do you suggest replacing the door completely or are there ways to reinforce and seal an existing shed door for a backyard office setup?
If your shed door isn’t secure or weather-tight, you don’t always have to replace it. You can reinforce an existing door by adding weatherstripping around the edges, installing a new lock or deadbolt, and sealing any gaps with caulk. If the door is warped or damaged beyond repair, replacing it might be a better long-term solution for security and insulation.
Do you have any tips on getting the shed entrance more secure and weather-tight? Mine has pretty basic doors right now, and I’m concerned about drafts and security once I start adding equipment inside.
Upgrading your shed doors is a smart move for both security and insulation. Consider installing a solid-core or metal door, along with a deadbolt lock for added protection. For weather-tightness, use weatherstripping around the frame and a door sweep at the bottom to block drafts. You might also add a threshold plate to seal gaps. Reinforcing hinges and using tamper-proof screws can further improve security.
How can I tell if my shed’s foundation is stable enough for conversion if I’ve never done any structural repairs before? Are there specific signs besides visible water pooling or shifting that I should watch out for?
You can check your shed’s foundation by looking for cracks in the floor or walls, doors or windows that stick or won’t close properly, and uneven floors. Also, look for signs of rot or insect damage along the base. If you notice any musty smells or persistent dampness, that’s another red flag. If you’re unsure, it’s a good idea to have a professional assess the foundation before starting your conversion.
If my current shed floor has some soft spots but the framing and roof look decent, is it more practical to repair the floor or would that usually mean the whole structure isn’t worth converting?
If the framing and roof are in good shape, repairing the floor is often practical and cost-effective. Soft spots typically mean you need to replace damaged floorboards or patch sections of subfloor. As long as the rest of the shed is structurally sound and free from major moisture issues, fixing the floor should make the shed a solid candidate for conversion.
I noticed you mention checking for moisture and water pooling under the shed foundation. If there is some minor water pooling but no structural shifting, is there an effective way to remedy this without having to rebuild or move the whole shed?
If you notice minor water pooling without any structural issues, you can usually address it without moving the shed. Try improving drainage by adding gravel around the base, installing a French drain, or regrading the soil to slope away from the foundation. Also, check that gutters and downspouts direct water away from the shed to prevent future pooling.
After assessing the framing and roof as you suggested, I’m worried about some minor mold along one wall. Do you recommend tackling mold remediation myself, or is it best to bring in a professional before continuing the conversion?
If the mold is minor and covers a small area, you can usually handle it yourself by wearing protective gear and using mold-specific cleaners. However, if the mold area is larger than about 10 square feet or you notice a musty smell or health symptoms, it’s safer to bring in a professional. Addressing the underlying moisture issue is also important before moving forward with your shed conversion.
I noticed you mentioned budgeting for insulation and interior walls. What type of insulation works best for keeping a converted shed comfortable year-round, especially if I live somewhere with hot summers and cold winters?
For extreme climates with both hot summers and cold winters, spray foam insulation is often the best choice for shed conversions. It provides excellent thermal resistance, seals gaps to reduce drafts, and helps with moisture control. If spray foam is outside your budget, consider rigid foam board or mineral wool, both of which offer good R-values and moisture resistance. Be sure to insulate the walls, roof, and floor for maximum comfort year-round.
Can you give more details about what kind of insulation works best for sheds with limited interior space? I’m worried about losing too much square footage if I install standard insulation and walls.
For sheds with limited space, consider using rigid foam board insulation, like polyisocyanurate or extruded polystyrene. These offer high insulating value with less thickness compared to traditional fiberglass batts. Spray foam insulation is another great option, since it expands to fill gaps and can be applied in thin layers without framing out new walls. Both options help you maintain more usable square footage inside your shed.
How long does the whole shed conversion process typically take, assuming the shed is in decent shape? I have a busy class schedule and am wondering how to plan my time.
If your shed is already in good condition, the conversion process usually takes about 2 to 4 weeks. This timeline covers cleaning, insulating, installing electricity, adding flooring, and decorating. If you spread the work over weekends or evenings between classes, you can tackle it in manageable stages. Planning ahead and prioritizing key steps will help fit the project into your busy schedule.
If my existing shed is under 80 square feet, do you have any tips on making the most of a smaller space for a workspace, or is it better to expand it first before starting the conversion?
You can definitely create an effective workspace in a shed under 80 square feet with some smart planning. Use vertical storage like shelves or pegboards, choose compact fold-down or multi-purpose furniture, and keep only essential items inside. Good lighting and light colors can help it feel more spacious. Expanding is an option if you need more room, but many people find a small, well-organized workspace works perfectly.
If my shed is under the 80 square foot recommendation you mention, are there specific space-saving strategies or layouts you’d recommend to make it as functional as possible as a workspace?
Absolutely, smaller sheds can still make great workspaces with some smart planning. Consider installing wall-mounted shelves and fold-down desks to maximize floor space. Use vertical storage for supplies and keep furniture minimal and multifunctional, like a storage bench or a compact rolling cart. Light colors and good lighting also help the space feel bigger and more comfortable.
You mention budgeting up to $2,000 for insulation and interior walls. Are there more affordable options for insulating a shed if I’m only planning to work in it during spring and fall rather than year-round?
If you only plan to use your shed in the milder seasons, you can save by using less expensive insulation like fiberglass batts or foam board panels instead of spray foam. You might also skip full drywall and use plywood or OSB for walls. Focus on sealing gaps to minimize drafts rather than achieving full winter insulation.
I see that insulation and electrical work are significant budget items. Are there certain upgrades (like insulation type or electric panel additions) that offer the best value for money when trying to keep costs down but still create a safe workspace?
To get the best value, consider using batt insulation, such as fiberglass, which is affordable and effective for most backyard sheds. For electrical work, a dedicated circuit from your main panel is often sufficient unless you plan to use heavy equipment; this avoids the higher cost of a full subpanel. Always prioritize safety by using a licensed electrician, even if you opt for budget-friendly materials.
You said workspace sheds should be at least 80 square feet for comfort, but mine is slightly smaller. Do you have suggestions for making a functional workspace in a compact shed, or is it just not worth it?
A smaller shed can absolutely work as a functional workspace with some smart planning. Try using wall-mounted shelves or fold-down desks to save floor space, and keep only essential furniture. Light colors and good lighting will help make it feel more open. With careful organization, even a shed under 80 square feet can be both comfortable and inspiring.
You mention most workspaces need at least 80 square feet for comfort. If my shed is a little under that, are there tips for maximizing a smaller space or should I look at expanding it before starting the conversion process?
You can absolutely make a slightly smaller shed work as a comfortable workspace. Focus on minimizing clutter, using vertical storage, and choosing compact or multi-functional furniture to maximize every square foot. Good lighting and light colors can also help the space feel more open. Expansion is only necessary if you need room for extra equipment or multiple people.
If my shed floor has a few soft spots but the rest of the structure looks solid, is it worth repairing the floor only, or would I be better off starting from scratch with a new shed?
If your shed’s structure is still solid and only the floor has some soft spots, repairing just the floor is usually a practical and cost-effective solution. You can replace or reinforce the affected floor sections with new boards or plywood. However, if you notice signs of widespread rot, insect damage, or structural issues elsewhere, a full replacement might be more worthwhile in the long run.
I’m interested in making my shed conversion compliant with local regulations as mentioned in the article. Could you share which steps I should take early on to ensure I’m meeting permitting or zoning requirements, especially if I plan to install electricity?
To stay compliant from the start, check with your city or county’s zoning department to confirm shed conversions are allowed in your area and learn about size or placement rules. Early in your planning, contact your local building office to see if permits are needed for structural changes or adding electricity. For electrical work, you’ll likely need plans reviewed and inspections scheduled. Keeping records and getting approvals before any work begins is important for passing final inspections.
If my shed’s roof only has minor leaks but is otherwise in good shape, is it better to patch it up or would you recommend replacing it entirely before starting the conversion?
If your shed’s roof is generally in good shape and only has minor leaks, patching up those areas should be enough before starting your conversion. Use quality sealant or roofing patches to address the leaks. Just make sure the repairs fully resolve any water entry, since even small leaks can lead to bigger issues in a finished workspace. Full roof replacement is usually only needed if there’s widespread damage.
When checking the shed for structural integrity, what are some practical ways to repair minor rot or warping in the framing without replacing the whole structure?
To address minor rot in shed framing, you can remove the affected wood, treat the area with a wood hardener, and fill gaps with epoxy wood filler. Sand the area smooth once it cures. For minor warping, you might try securing the frame with additional screws or metal brackets, or gently clamping and straightening boards. These methods help reinforce the structure without full replacement.
Can you elaborate a bit more on how to budget for unexpected costs during a shed conversion? For example, if hidden structural issues pop up, is there a percentage of the total budget you recommend setting aside?
It’s wise to set aside a contingency fund for your shed conversion, as unexpected costs like hidden structural issues are common. A good rule of thumb is to reserve about 10–20% of your total budget for unforeseen expenses. This helps ensure you have enough flexibility to tackle surprises without derailing your project.
How long does the average shed conversion take from first inspection to the finishing touches, assuming the original structure is in decent shape but needs electrical and insulation work?
For a shed in decent shape that needs both electrical work and insulation, you can expect the conversion to take about 2 to 4 weeks. This timeframe covers everything from the initial inspection and planning, to running new wiring, installing insulation, finishing interior surfaces, and adding the final touches. Weather, permit approval, and contractor availability can all affect how long it takes.
You recommend checking the foundation to ensure it’s stable and avoids water pooling. If I notice some minor water pooling under my shed after rain, what steps would you suggest to fix this issue before converting it?
If you notice minor water pooling under your shed, start by adding gravel or crushed stone beneath and around the shed to promote drainage. You can also regrade the surrounding soil so water flows away from the base. For sheds on blocks or skids, make sure they’re slightly elevated. If pooling persists, consider installing a French drain or a simple drainage trench to route water away.
For the initial structural integrity check, what should I do if I find minor mold or mildew? Is it possible to salvage the framing safely and how would that impact the rest of the process?
If you find minor mold or mildew during the structural integrity check, you can usually salvage the framing by cleaning the affected areas with a mixture of water and detergent, then treating with a fungicide. Allow everything to dry thoroughly before moving forward. Addressing mold early prevents further damage and ensures a healthy workspace, but if the wood is soft or deeply stained, replacement may be necessary.
If my shed’s framing has some minor mold but is mostly sturdy, do you recommend replacing just those sections or is it safer to rebuild the whole frame?
If the mold is minor and the framing is still structurally sound, you can usually treat and clean the affected areas rather than replacing the entire frame. Remove any visible mold using a mold remover, let the wood dry completely, and consider applying a sealant to prevent future growth. Only replace sections if the wood is rotted or weakened.
Once the shed is structurally sound and insulated, what are the most important next steps in making it a functional workspace? Should electrical work come before installing walls or after?
After your shed is structurally sound and insulated, the next key steps are electrical work, wall installation, and flooring. Electrical wiring should always come before installing interior wall panels—this way, cables and outlets are hidden and properly protected. Once electrical work is inspected and approved, you can move on to finishing the walls, then focus on lighting, furniture, and storage to complete your workspace.
In your budgeting section, you list different expense ranges for structural repairs and interior upgrades. Are there particular upgrades or features where it makes sense to splurge versus those where it’s okay to save?
It’s smart to prioritize spending on essentials like insulation, windows, and structural repairs, since these directly affect comfort and durability. Consider splurging on quality insulation and windows for year-round use. For interior upgrades, you can save on things like paint, simple shelving, and basic lighting fixtures, as these can be upgraded later or done DIY without much expense.
After budgeting and planning, how long does the average shed conversion project take from start to finish, especially if I’m working on weekends around a college schedule?
If you’re converting a shed and only working weekends around a college schedule, most projects take between 2 to 3 months from start to finish. This estimate covers cleaning, insulation, wiring, interior work, and finishing touches, assuming steady progress each weekend. Factors like the shed’s condition and the complexity of your design can add or subtract a few weeks.
About the budget breakdown, does the estimated cost for insulation and interior walls usually include installation, or is that just for materials? I’m trying to figure out if I need to factor in additional labor charges.
In most cases, the estimated cost for insulation and interior walls mentioned in budget breakdowns covers materials only, unless it’s specifically stated that installation or labor is included. If you’re not planning on doing the installation yourself, it’s a good idea to budget separately for labor charges, as these can vary based on your location and the contractor you choose.
If my shed doesn’t have any electrical wiring, is it possible to run power from my house on a DIY basis, or should I always hire an electrician? I’m not sure what the code requires for backyard outbuildings.
Running electrical wiring from your house to a shed can be complex, as it must meet local building and electrical codes for safety. While some experienced DIYers tackle this, most codes require permits and inspections, and any mistakes can be hazardous. It’s strongly recommended to hire a licensed electrician, who will ensure everything is up to code and safe for use. Check with your local building authority for specific requirements.
For the structural repairs you mentioned, do you recommend hiring a contractor for the initial assessment, or is it possible for a small business owner with basic carpentry skills to handle the inspection and repairs themselves?
If you have basic carpentry skills, you can certainly start by inspecting your shed for obvious structural issues like rot, sagging, or water damage. However, for more complex repairs or if you’re unsure about the building’s safety, hiring a contractor for an initial assessment is a good idea. This ensures your workspace is both safe and up to code before you invest further time and resources.
Could you clarify what kind of foundation issues can be resolved by a homeowner and which ones require more extensive intervention? For example, if I notice some water pooling but no major shifting, is that a simple fix?
If you notice minor water pooling around your shed but no significant shifting or cracking, you can often address this yourself by improving drainage, adding gravel, or redirecting water flow. However, issues like uneven settling, large cracks, or noticeable movement in the foundation usually require professional assessment and more extensive repairs. Always monitor for changes, as recurring problems might indicate the need for expert help.
How long does the shed conversion process usually take from start to finish, especially if the space needs some structural repairs and electrical work?
The timeline for converting a shed varies, but if your project includes structural repairs and electrical work, you can generally expect it to take anywhere from 3 to 8 weeks. This allows time for assessing and fixing any damage, wiring and inspections, insulation, interior finishing, and final touches. Complex repairs or permit delays might extend the process, but planning ahead helps things move smoothly.
How do I make sure my shed conversion meets local building codes? Are there specific permits I should look into for adding insulation and electrical work?
To ensure your shed conversion meets local building codes, start by contacting your city or county building department. They can tell you exactly what codes apply and which permits you’ll need. In most areas, adding insulation and electrical wiring requires separate permits and inspections for safety. It’s a good idea to submit your plans before starting work to avoid issues or costly changes later.
I’m curious about the electrical work part—do you recommend hiring a professional electrician for wiring a backyard shed, or are there safe DIY options for someone with basic skills? Also, did you run into any permit issues when upgrading the power supply?
For wiring a backyard shed, hiring a licensed electrician is generally safest, especially for new circuits or if you’re unfamiliar with local codes. DIY is only an option if you have solid electrical experience and understand the safety requirements, but even then, permits and inspections are usually required. We needed to get a permit for our power supply upgrade, and local authorities checked the work. Always check your local regulations before starting.
When checking the shed’s structural integrity, how can I be sure the floor can support heavier office furniture, like filing cabinets or a large desk? Are there specific signs I should look out for or weight limits to consider?
To ensure your shed floor can handle heavier office furniture, check for solid, rot-free joists and sturdy, well-fixed floorboards with no sagging or flexing. Look for any signs of water damage or insect infestation as well. Most standard shed floors can support around 40-50 pounds per square foot, but you may want to reinforce the floor or add extra supports under heavy items like filing cabinets to be safe.
I’m a little worried about the electrical side. If my shed is far from the main house, what are some practical and safe ways to run electricity out to it, and are there any common mistakes homeowners make during this step?
Running electricity to a distant shed usually involves burying an outdoor-rated electrical cable (often called UF cable) or using conduit for extra protection. It’s important to use the right wire size for the distance, install a proper subpanel if needed, and always include a ground rod for safety. Common mistakes include using indoor wire outdoors, skipping permits, or not following local electrical codes. Hiring a licensed electrician is the safest way to ensure everything is done correctly.
How might the time frame differ for a shed conversion if you have to address structural repairs versus starting with a shed that’s already solid and dry? Any tips for speeding up the process while still getting good results?
If your shed needs structural repairs, expect the conversion to take significantly longer—sometimes adding several days or even weeks, depending on the extent of repairs like fixing the foundation, walls, or roof. To speed things up, plan your project in stages, gather all necessary materials beforehand, and handle any repairs before starting interior work. Hiring help for structural issues can also save time while ensuring safe, quality results.
When it comes to electrical work, is it usually necessary to run a new power line from the house, or are there safe ways to use existing outdoor outlets for a basic setup?
For a proper shed conversion, especially if you’ll be using computers, lighting, or other equipment, running a dedicated power line from your house is usually best for safety and reliability. Relying on existing outdoor outlets or extension cords isn’t recommended for continuous use, as they’re not designed for permanent setups and may pose safety risks. Consulting a licensed electrician is important to ensure your workspace meets electrical codes.
Based on your cost breakdown, would you say that most of the expense comes from the initial repairs and upgrades, or is furnishing and decorating usually just as significant? I’m trying to set a realistic budget before I start.
Most of the expense typically comes from the initial repairs and upgrades, especially if your shed needs structural work, insulation, or installing electricity. Furnishing and decorating can add up, but those costs are usually more flexible and easier to control based on your preferences. To set a realistic budget, focus first on the core construction and utilities, then plan your decor around what’s left.
For the insulation and interior walls, is it better to go with traditional batt insulation or have you tried spray foam for these backyard conversions? I’m curious about cost differences and comfort in summer and winter.
Both batt insulation and spray foam can work for shed conversions, but each has pros and cons. Batt insulation is generally less expensive and easier to install DIY, but spray foam provides a better air seal and higher insulation value, which means better temperature control in both summer and winter. Spray foam costs more upfront but can make your workspace more comfortable year-round and may save on energy in the long run.
When checking a shed’s suitability, you mention needing at least 80 square feet for comfort. Is there an ideal ceiling height or minimum door width I should aim for to make it feel less cramped and more usable as a daily workspace?
For a comfortable workspace, aim for a ceiling height of at least 7 feet—this helps the room feel open and prevents it from feeling cramped. For door width, 32 inches or wider is a good minimum, as it makes moving furniture and equipment easier. Higher ceilings and wider doors also improve ventilation and accessibility, making daily use much more pleasant.
If my shed floor has a few soft spots but the rest of the structure is solid, can I just repair those parts or should I consider replacing the whole floor before starting the conversion?
If only a few areas of the shed floor are soft and the rest is in good condition, you can usually just repair those patches rather than replacing the entire floor. Remove any damaged sections, check for signs of rot or moisture, and install new, treated wood in those spots. Just make sure the repairs result in a level, sturdy surface before you start your conversion project.