
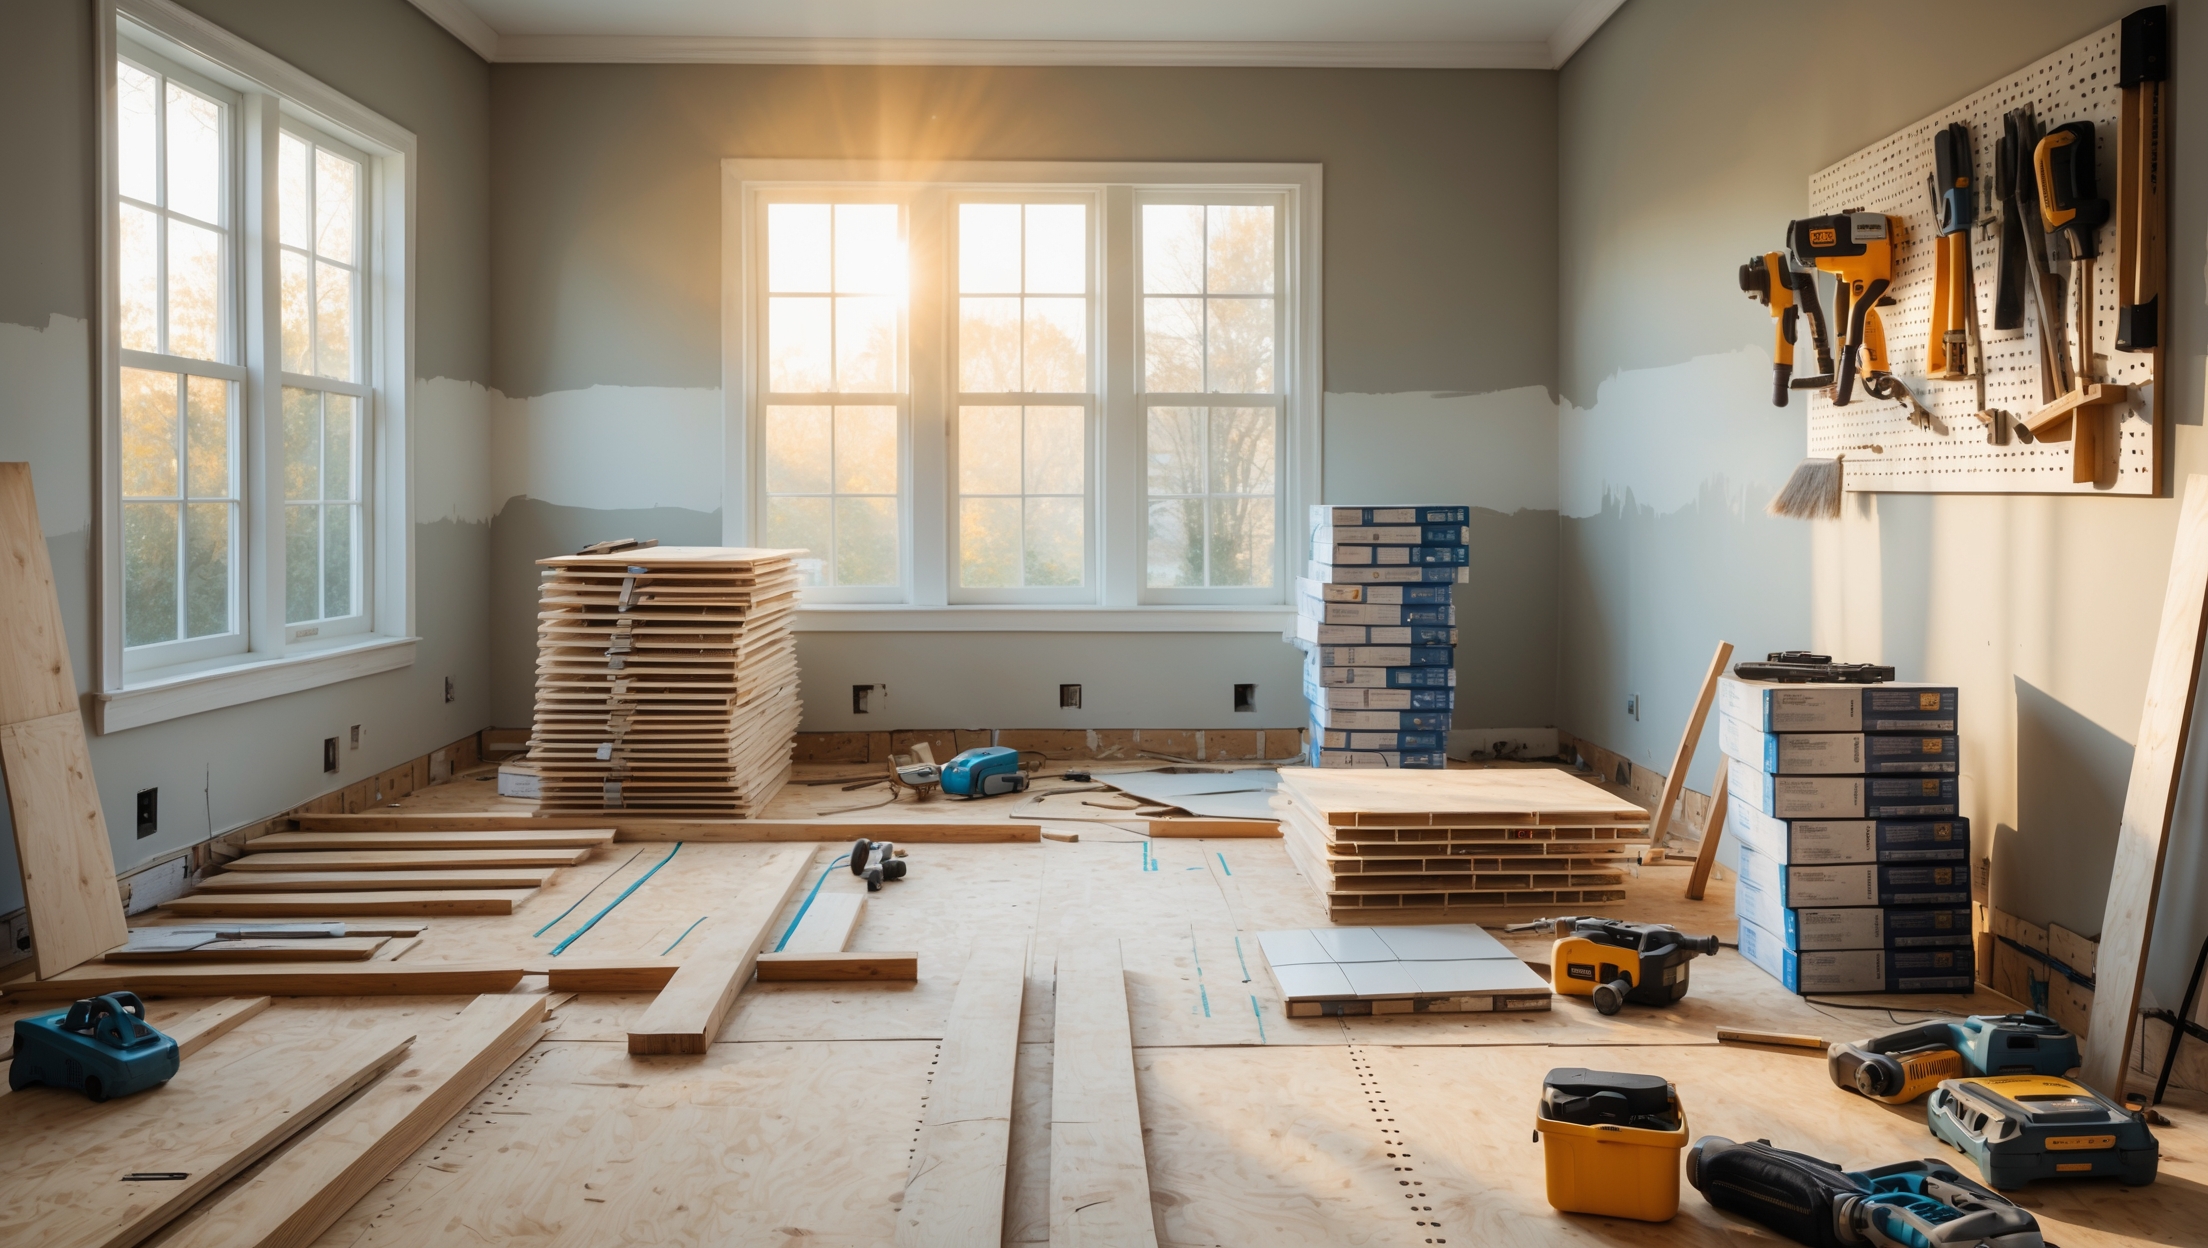
Introduction: The Unseen Side of Home Flooring Projects
Flooring upgrades are among the most popular home improvement projects, promising instant visual impact and increased value. Yet, many homeowners find themselves blindsided by hidden costs that can quickly balloon their budgets. While the price per square foot of hardwood or tile may seem straightforward, a flooring project involves a complex web of expenses—some obvious, others lurking just beneath the surface. Understanding these hidden costs is essential for setting a realistic budget, making informed choices, and avoiding unwelcome surprises mid-renovation. In this comprehensive guide, we’ll uncover the budgeting secrets that professional contractors use, walk you through every stage where unexpected expenses can arise, and provide actionable tips for keeping your flooring project on track. Whether you’re planning to DIY or hire a pro, this post will empower you to navigate your next flooring project with confidence and financial clarity.
Why Flooring Budgets Go Off Track
Common Homeowner Assumptions
Many homeowners assume that budgeting for flooring is as simple as multiplying the room’s square footage by the cost of the chosen material. This oversimplified approach overlooks a multitude of variables—such as subfloor conditions, removal and disposal fees, underlayment, tools, trim, and potential repairs—that can add 20–50% or more to the bottom line. Let’s break down where these hidden costs often arise.
Overlooked Project Phases
- Preparation: Removing old flooring, addressing subfloor issues, and prepping the space.
- Installation: Unexpected labor or tool needs, trim and transition pieces, or layout complexities.
- Finishing: Cleanup, waste disposal, and post-installation repairs.
Material Costs: What’s Not on the Sticker Price
The Real Price of Flooring Materials
The price tag on flooring samples rarely tells the full story. Here are the key material-related hidden costs to budget for:
- Waste Factor: Professional installers recommend ordering 5–15% extra material to account for cuts, pattern matching, and defects.
- Underlayment: Many flooring types (like laminate, engineered wood, or vinyl plank) require a specialized underlayment for sound, moisture, or insulation—adding $0.30–$1.00 per square foot.
- Adhesives and Fasteners: Glues, nails, or staples aren’t included in basic material pricing but are essential for installation.
- Trim and Transitions: Matching baseboards, shoe molding, and threshold strips often cost more than expected, especially for premium finishes.
- Moisture Barriers: Basements and ground-level installations may require vapor barriers to prevent future damage—an added expense.
Specialty and Custom Orders
Choosing custom stains, large-format tiles, herringbone patterns, or exotic woods? Expect longer lead times and higher shipping or minimum order fees. Ask your supplier about restocking charges if you over-order.
Preparation and Demolition: The Hidden Labor
Old Flooring Removal
Removing existing carpet, tile, or hardwood can be both labor-intensive and costly. Some key costs to consider:
- Disposal Fees: Local landfill or recycling center charges can add up, especially with heavy materials like tile or hardwood.
- Asbestos and Lead Remediation: Older homes may require professional abatement, costing $3–$8 per square foot.
- Furniture Moving: Professional movers may charge hourly rates, and some installers require all rooms to be completely cleared.
Subfloor Repairs and Preparation
Even newer homes can hide subfloor issues such as squeaks, rot, mold, or uneven surfaces. Addressing these problems before installation is non-negotiable for a quality finish, and may require:
- Patching or Replacing Subfloor: Damaged plywood or concrete repairs can add hundreds—or even thousands—of dollars.
- Leveling Compounds: Self-leveling products level out uneven concrete or wood, at $1–$3 per square foot.
- Moisture Testing: Essential for basements or slab-on-grade installations; professional tests may cost $25–$75 per room.
Installation: Labor, Tools, and Unexpected Challenges
DIY vs. Professional Installation
While DIY installation can save on labor, it introduces its own hidden costs:
- Tool Rentals or Purchases: Specialty saws, floor rollers, nailers, and spacers may need to be rented or bought.
- Mistake Factor: Improper installation can lead to wasted material and future repairs.
- Time Off Work: Large projects may require taking time off your job, an often-overlooked personal cost.
Professional Labor Costs
Even with an accurate quote, labor costs can escalate if:
- The subfloor requires more extensive repair than anticipated.
- There are complex layouts, stairs, or tricky transitions.
- Unexpected delays arise (weather, material backorders, permitting issues).
Always clarify whether the quote includes all labor related to preparation, installation, and clean-up—or just basic installation.
Permits, Inspections, and Compliance
When Permits Are Required
Most flooring projects are permit-free, but some jurisdictions require permits for:
- Structural subfloor repairs or replacements
- Radiant floor heating installations
- Major changes affecting floor load or fire safety
Permit fees can range from $50 to $500 depending on your municipality. Failing to secure permits can result in fines or issues when selling your home.
Inspections
Some flooring projects—especially in condos or historic homes—may require inspection for fire safety, soundproofing, or HOA compliance. Factor in both the initial cost and potential delays.
Post-Installation: Cleanup and Ongoing Maintenance
Cleanup and Waste Disposal
Once the new floor is in, you’ll likely face additional costs:
- Dumpster Rental: For large projects, expect to pay $250–$500 for a short-term dumpster.
- Professional Cleaning: Dust and debris from demolition and installation can require a deep clean.
Protecting Your Investment
Different flooring types require specific care products or equipment. Budget for:
- Area rugs and pads to protect high-traffic zones
- Specialty floor cleaners or sealants
- Annual maintenance or resealing for hardwood or natural stone
Bonus Budgeting Secrets and Pro Tips
1. Always Get Multiple Quotes
Prices can vary widely between contractors. Detailed, written quotes make it easier to compare true costs and avoid hidden upcharges.
2. Don’t Forget the Extras
- Door trimming or shaving (often needed after new flooring is installed)
- HVAC vent adjustments
- Repainting baseboards or touch-ups post-installation
3. Negotiate Material Pricing
Ask suppliers about volume discounts, clearance stock, or discontinued lines for significant savings—especially if you’re flexible on style or color.
4. Plan for Contingencies
Add a 10–20% contingency buffer to your budget for unexpected discoveries once demolition begins.
5. Time Your Project Wisely
Schedule flooring projects during off-peak seasons (late winter or summer) to access better pricing and contractor availability.
Sample Cost Breakdown: Real-World Scenarios
Scenario 1: 400 Sq. Ft. Living Room, Mid-Grade Engineered Hardwood
- Flooring Material (including 10% waste): $2,600
- Underlayment and Moisture Barrier: $320
- Old Carpet Removal & Disposal: $350
- Subfloor Patching: $400
- Trim and Transitions: $250
- Professional Installation: $1,600
- Cleanup and Waste Disposal: $150
- Total: $5,670
Scenario 2: 220 Sq. Ft. Kitchen, Premium Porcelain Tile (DIY)
- Tile (including 15% overage): $900
- Mortar, Grout, Leveling System: $210
- Tool Rental (wet saw, tile cutter, spacers): $135
- Subfloor Leveling Compound: $190
- Permits for Structural Subfloor Repair: $75
- Trim and Thresholds: $90
- Disposal Fees: $75
- Total: $1,675
How to Build an Airtight Flooring Project Budget
Step-by-Step Budgeting Checklist
- Measure each room and add 10–15% for waste and pattern matching.
- List all required materials: flooring, underlayment, adhesives, trim, moisture barriers.
- Get written quotes for labor, removal, and installation—including prep work.
- Ask about permit or inspection fees for your area.
- Factor in tool rentals or purchases for DIY projects.
- Budget for cleanup, waste disposal, and post-installation cleaning.
- Add a contingency fund for unforeseen issues.
Conclusion: Invest Smarter, Renovate with Confidence
Flooring upgrades can dramatically enhance your home’s comfort, style, and value—but only when approached with a clear, realistic budget. The most common pitfall for homeowners is underestimating the true cost by overlooking preparation, hidden repairs, and finishing expenses. By understanding the full scope of material, labor, compliance, and maintenance costs, you gain the power to make informed decisions and avoid budget-busting surprises. Always start your project with thorough research, multiple quotes, and a generous contingency buffer. Don’t be afraid to ask your contractor detailed questions or request line-item breakdowns in their estimates. If you’re tackling a DIY project, factor in tool costs, time investment, and the potential need for professional help should you encounter unforeseen challenges. Remember, investing a little extra time in planning will pay dividends in both your final results and peace of mind. With this guide’s budgeting secrets, you can confidently transform your flooring—and your home—without falling prey to the hidden costs that trip up so many renovators. Happy renovating!
How do material waste factors typically affect the amount of flooring I should order? Is there a general percentage I should add on top of my measured square footage for cutting and mistakes?
Material waste factors are important to consider because cutting and fitting flooring almost always leads to some loss. Most installers suggest adding 5% to 10% extra to your measured square footage for standard rooms. For rooms with irregular shapes or patterns like herringbone, you may want to increase that to 10% or even 15% to cover mistakes and tricky cuts.
How do you recommend handling old flooring removal if you find hidden subfloor issues like water damage or uneven spots? Does that usually mean hiring extra help, or are there cost-effective DIY solutions for these kinds of surprises?
If you uncover water damage or uneven areas in the subfloor, it’s important to address them before installing new flooring. Minor uneven spots can sometimes be fixed with self-leveling compound or patching, which are DIY-friendly if you feel comfortable. However, significant water damage or structural issues usually require professional help to ensure safety and durability. Always factor in some contingency budget for these surprises, as they can impact both costs and timelines.
You mention that costs can increase by 20–50% from things like trim or layout complexities. How can I figure out in advance if my home’s floor plan will make my project fall at the higher end of that range?
To estimate if your project might fall at the higher end of the cost range, look at factors like the number of rooms, unusual shapes, and whether you have stairs or lots of corners. Older homes or those with uneven subfloors often require more prep work, driving up costs. Sharing your floor plan details with contractors can help you get more accurate estimates for these potential complexities.
How do removal and disposal fees usually work? Are they charged by weight, volume, or something else? I’m trying to figure out if it would be cheaper to haul away old flooring myself or hire someone.
Removal and disposal fees for old flooring are most often charged based on the square footage of material removed rather than by weight or volume. Some contractors or waste companies might charge a flat rate for a whole room or area, while others have per-square-foot pricing. If you’re considering doing it yourself, factor in truck rental, landfill fees, and your time to compare costs accurately with professional services.
If a homeowner’s budget is already tight, which hidden costs would you suggest prioritizing or making room for, and are there any areas where it’s safer to cut back without compromising the quality of the flooring project?
When budgets are tight, it’s important to prioritize hidden costs that can’t be avoided—like subfloor repairs and moisture barriers, since neglecting these can lead to bigger problems and expenses later. You can often cut back on premium underlays, intricate patterns, or high-end trim, as these don’t usually affect the floor’s durability. Stick to crucial essentials to maintain the floor’s quality.
If I’m comparing the budget for DIY versus hiring a pro, are there any common hidden costs that tend to be worse for one option over the other, or should I expect similar surprises with both?
DIY projects can come with hidden costs like tool rentals, mistakes that require extra materials, and possible repairs if things go wrong. With a professional, the hidden costs are more likely to be in labor extras, unexpected fees, or change orders. While both options have potential surprises, DIY tends to risk higher unexpected material and correction costs, while hiring a pro may involve extra charges for prep work or unforeseen complications.
For someone trying to decide between DIY and hiring a pro, which option is most likely to run into the hidden costs you describe, especially regarding tools and waste disposal?
DIY projects are more likely to encounter hidden costs related to tools and waste disposal. If you don’t already have the right tools, purchasing or renting them can add up quickly. Waste disposal can also be a surprise expense, as pros often include haul-away services in their pricing, while DIYers need to arrange for dumpster rental or special trash pickups themselves. Hiring a professional usually means these costs are bundled in, making them less likely to catch you off guard.
If unexpected expenses arise in the middle of a flooring project, what’s the best way to handle them without derailing the entire budget or delaying the timeline?
If you face unexpected expenses during your flooring project, try to prioritize the most critical repairs or upgrades first. Adjust your budget by reallocating funds from less urgent items, or negotiate with your contractor for flexible payment options. Communicate openly with all involved parties to keep the timeline on track and avoid costly delays. Being proactive and organized can help you manage surprises without derailing your project.
You mentioned that subfloor issues can really impact the flooring budget. In your experience, what are the most common subfloor problems homeowners run into, and how can we get a sense of those costs before starting the project?
Common subfloor problems include uneven surfaces, moisture damage, rot, and squeaks. These issues often aren’t visible until old flooring is removed. To get an idea of possible costs, consider having a professional inspection before your project begins. They can check for structural soundness, moisture, and levelness. Getting this assessment upfront helps avoid unexpected expenses when the flooring work starts.
Can you give an example of how much the budget can increase if you need extra trim or transition pieces for a more complicated room layout? I’m trying to decide between a simpler or more intricate installation.
When a room layout is more complex, you may need additional trim or transition pieces for corners, doorways, or angled walls. These extras can add $2 to $8 per linear foot, depending on materials and style. For an average-sized room, this might increase your total project cost by $100 to $400 or more compared to a straightforward layout. Simpler installations usually keep these costs much lower.
If I’m comparing hardwood and tile, do the hidden costs (like removal, prep, and finishing) tend to be higher for one type over the other? I’m trying to decide which would be more cost-effective in the long run.
Hidden costs can differ quite a bit between hardwood and tile. Tile often has higher removal and subfloor prep expenses, especially if you need to remove old tile or level the floor. Hardwood may involve more costs for finishing (if unfinished) and acclimation. Tile usually has lower long-term maintenance costs, but hardwood can be sanded and refinished. Consider both installation and future upkeep when comparing total costs.
As a small business owner managing renovations, I’ve struggled with waste disposal fees popping up at the end. Do most flooring installers include cleanup and disposal in their quote, or is this usually charged separately?
Cleanup and disposal fees are often not included in the initial flooring installation quote, and many installers charge for these services separately. It’s important to ask upfront whether the quote covers removal and disposal of old materials, as well as post-installation cleanup. Some companies offer it as an add-on, while others may include it in a comprehensive package. Always get these details in writing before work begins to avoid surprise charges.
You mention that prepping the space and addressing subfloor issues can really drive up costs. How can I tell if my current subfloor will need repairs before I even start, and are there signs I should look out for when budgeting?
To check if your subfloor might need repairs, look for signs like squeaking when you walk, uneven or bouncy spots, visible water damage, or areas that feel soft underfoot. If your floor shows any of these signs or if there’s a history of leaks, you should budget for potential repairs. Lifting a corner of your current flooring, if safe, can also help you spot any obvious problems like rot or mold.
If I’m comparing hiring a professional installer versus doing the project myself, which option tends to have a higher risk of surprise costs, and at what project stage do these usually pop up?
DIY projects usually carry a higher risk of surprise costs compared to hiring a professional. These unexpected expenses often arise during the installation phase, especially if you encounter issues like subfloor problems, incorrect measurements, or the need for special tools. With professionals, most costs are clearer upfront, though occasional surprises can happen if hidden damage is uncovered during prep work.
You mentioned that waste disposal and cleanup are often forgotten in flooring budgets. Can you provide more detail on what those costs typically look like and if there are ways to reduce them, especially for larger projects?
Waste disposal and cleanup costs can vary, but you might expect to pay between $200 and $600 for a dumpster rental or professional debris removal on larger projects. Cleanup services could add another $100 to $300. To save, consider renting a smaller dumpster and making a couple of runs to local disposal sites yourself, or coordinate with your installer to see if cleanup is included in their quote. Recycling materials or donating old flooring can also reduce disposal fees.
Can you give an example of how much extra cost might come up from subfloor repairs or removal fees during a typical flooring project? I’m worried my initial estimate could be way off.
It’s wise to consider extra costs like subfloor repairs or removal fees, as these can add up quickly. For example, subfloor repairs might cost anywhere from $2 to $5 per square foot, depending on damage severity. Removing old flooring often adds another $1 to $3 per square foot. So for a 500-square-foot project, you could see an extra $1,500 to $4,000 if both issues arise. Factoring in a 10-20% buffer to your initial estimate is a good idea.
You mention that waste and extra material are common hidden costs. Is there a standard percentage I should add to my flooring order to cover overage, or does it really depend on the material and room layout?
A common rule of thumb is to add 5–10% extra material to your flooring order to cover waste, mistakes, and pattern matching. However, the exact percentage depends on the material and room layout. For example, rooms with lots of angles or complicated cuts might require more overage, while simple, rectangular rooms may need less. Always consult with your installer or supplier for the best estimate for your specific project.
I’m planning to redo my living room floor myself, and you mentioned that hidden costs can add up to 50% more than expected. Which phase tends to have the most expensive surprises for DIYers, and is there any way to estimate those extra costs before starting?
The demolition and subfloor preparation phases often catch DIYers off guard with unexpected costs, like repairing uneven surfaces, mold, or damaged joists. These issues aren’t always visible until you remove the old flooring. A good rule of thumb is to add 20-30% to your material and labor budget as a contingency for these surprises. Thoroughly inspecting your current floor and consulting home improvement resources before starting can help you set a more accurate budget.
For someone planning to DIY, which hidden costs are most often underestimated, especially regarding tools and materials that aren’t obvious upfront? Any tips to help avoid blowing the budget midway through the project?
When DIYing flooring, people often underestimate costs for tools like undercut saws, specialty adhesives, moisture barriers, and floor leveling compounds. Consumables such as blades, spacers, and protective gear can add up too. To avoid budget surprises, make a detailed list of each tool and material required for your chosen flooring type, and visit a hardware store to double-check. Buy a little extra material to account for mistakes or wastage, and set aside a contingency fund for unexpected issues.
Since you mention that even things like disposal fees and trim can add up unexpectedly, is there a recommended way to build a buffer into the initial budget so these costs don’t derail the whole project?
A smart approach is to add a contingency buffer of around 10–20% to your initial budget. This extra amount helps cover unexpected expenses like disposal fees, trim, or minor repairs. Be sure to list all possible costs in advance, including materials, labor, and extras, so your buffer is based on a comprehensive estimate. This way, surprises are less likely to disrupt your project.
With all the potential for hidden costs to add 20–50 percent or more, do you recommend homeowners set aside a specific percentage as a contingency, and if so, what’s a realistic buffer to avoid budget shock?
Setting aside a contingency fund is smart when budgeting for flooring projects, given how common hidden costs can be. A practical buffer is 15–20 percent of your total project budget. This range usually covers most unforeseen expenses without inflating your budget too much. If your home is older or you suspect underlying issues, you might consider increasing that buffer to 25 percent for extra peace of mind.
Can you give examples of cleanup or waste disposal expenses at the end of a flooring project? I’m trying to see if renting a dumpster or using local disposal services makes more sense cost-wise.
Cleanup and waste disposal costs can include renting a dumpster, which often ranges from $200 to $500 depending on size and rental period, or paying for pick-up by your local disposal service, which may charge per load or by weight. Local services might be more economical for smaller projects, while a dumpster is usually better for larger volumes of flooring debris. Always factor in permit fees and any restrictions on materials when comparing options.
How can I make sure my budget accounts for all the phases you listed, especially preparation and finishing? Is there a checklist or formula that would help me avoid underestimating costs?
To ensure your budget covers all phases, start by listing each step: removal of old flooring, subfloor repairs, material delivery, installation, finishing work, and cleanup. Assign estimated costs to each line, including a buffer (about 10-15%) for surprises. Creating a simple spreadsheet or using a detailed checklist for each phase can help you avoid missing expenses and give you a clear picture of the total expected cost.
I noticed you touched on increased costs for layout complexities during installation. For someone considering patterned tile versus straight planks, how much more should I budget for labor and potential material waste?
When choosing patterned tile over straight planks, you should expect to budget about 15-30% more for labor, since intricate patterns require more time and skill to install. Material waste also tends to increase, often by 10-20%, because of the extra cuts and precise alignment needed. Factoring in both higher labor and extra material, your overall project cost could be notably higher with patterned layouts.
I didn’t realize that removing and disposing of old flooring could impact the budget so much. Are there cost-effective ways to handle disposal myself, or is it better to include professional removal in my estimate?
Handling disposal yourself can save money, especially if you have the time and access to a suitable vehicle. You can often rent a dumpster or use local recycling centers for old flooring materials. However, some types of flooring may require special handling, and professionals are quicker and include disposal fees in their quote. If you’re comfortable with a bit of heavy lifting and have checked local disposal regulations, DIY can be cost-effective. Otherwise, budgeting for professional removal adds convenience and peace of mind.
Is there a general rule of thumb for how much over your original flooring material estimate you should budget, considering all the extra steps like underlayment and potential repairs? I’m trying to plan my finances and keep things realistic.
A good rule of thumb is to budget an extra 10–20% above your original flooring material estimate. This cushion helps cover underlayment, unexpected subfloor repairs, trim, delivery fees, and other incidentals. It’s also wise to get a detailed quote from installers to spot potential hidden costs early. Planning for this buffer keeps your project on track financially.
When you mention that unexpected expenses can add 20–50% to the budget, does that estimate include things like disposal fees and potential repairs, or does it mostly cover material overages and tool rentals?
The 20–50% estimate for unexpected expenses covers a range of costs, including not only material overages and tool rentals but also things like disposal fees, subfloor repairs, and addressing hidden damage found during installation. It’s meant to reflect all the miscellaneous and unforeseen costs that can crop up once the project is underway.
I’m worried about going over budget mid-renovation. Are there any tips for spotting potential trouble areas or common mistakes that lead to surprise expenses before I even buy materials?
Absolutely, spotting potential budget pitfalls early is key. Check for uneven subfloors, moisture issues, or hidden damage by inspecting each room thoroughly—these can lead to extra prep or repair costs. Also, measure carefully and account for waste, as underestimating materials adds unexpected expenses. Lastly, review installation requirements for your chosen flooring, since some types need special tools or underlayment that aren’t always obvious upfront.
You mentioned potential post-installation repairs and cleanup as overlooked finishing costs. How much should someone typically allocate for these tasks, and are there ways to minimize them when hiring a contractor versus doing it yourself?
Post-installation repairs and cleanup can add around 5–10% to your total flooring budget, depending on the project’s size and complexity. When hiring a contractor, ask if cleanup is included in their quote and get details in writing. Doing it yourself can save some money, but factor in the cost of supplies and your time. To minimize costs, discuss expectations up front, protect adjacent areas during installation, and address minor issues immediately before they become bigger repairs.
Does the type of flooring material, like hardwood versus tile, significantly affect which hidden costs are most likely to come up during prep and installation?
Yes, the flooring material you choose can greatly influence which hidden costs may arise. For example, installing hardwood often involves extra costs for subfloor leveling, moisture barriers, and acclimation time. Tile installations might require specialized underlayment, extra labor for cutting and layout, and sometimes reinforcing subfloors to support the weight. Each material brings its own set of prep and installation needs, so it’s wise to factor these in when budgeting.
After installation, what kind of cleanup or post-installation repairs typically catch homeowners off guard, and are there cost-saving tips to handle these final stages effectively?
After installation, leftover debris, dust, and sometimes minor damage to walls or baseboards often surprise homeowners. There might also be uneven edges or transitions that need fixing. To save money, consider doing basic cleanup yourself, using rented tools like shop vacuums, and touching up paint or caulk. Request installers include cleanup in their quote, and inspect the job before final payment to avoid surprise repair costs.
When choosing between materials like hardwood versus tile, do some options tend to have more hidden costs due to installation complexity or required preparation work? I’d like to avoid blowing my budget with unexpected expenses tied to the material itself.
Yes, some materials do come with higher hidden costs. Hardwood often requires extra subfloor preparation and can need acclimation time, which adds labor expenses. Tile installations might require leveling, moisture barriers, or special adhesives, which can increase costs as well. Always ask your installer for a detailed breakdown of prep work and materials needed for your chosen flooring to avoid surprises.
You mention trim and transition pieces as common sources of hidden expenses. Are there any types of flooring materials or installation methods that reduce the need for these extras, or are they generally unavoidable in most projects?
Trim and transition pieces are usually needed in most flooring projects to create clean edges and smooth joins between different floor types or rooms. However, with certain options like wall-to-wall carpet or large format vinyl sheets, the number of transitions or trims can be reduced, especially in open layouts. Some floating floor systems are designed with built-in transitions, but in general, at least some trims are required for a polished and safe finish.
If I find out that my project is going over budget due to surprises like subfloor repairs or missing tools, what are some practical steps I can take mid-renovation to keep spending under control without sacrificing quality?
When unexpected costs pop up, consider pausing work to reassess your priorities and budget. Get multiple quotes for any additional repairs, and see if you can tackle simpler tasks yourself. Renting tools instead of buying can save money, and sometimes choosing quality materials for high-traffic areas while opting for more affordable choices elsewhere helps balance costs without sacrificing overall quality.
When it comes to preparing a budget, how do costs differ between DIY and hiring a professional, especially regarding unexpected expenses like underlayment, tools, or trim pieces?
DIY projects often look cheaper upfront, since you save on labor costs. However, unexpected expenses can add up: you’ll need to buy or rent tools, purchase all materials like underlayment and trim pieces yourself, and cover any mistakes out of pocket. Professionals usually quote a more inclusive price, sometimes bundling materials and minor fixes. Still, you should clarify exactly what’s included so you’re not surprised by add-ons. Careful, detailed planning helps whichever route you choose.
For someone considering a DIY flooring project, what are some of the most common unexpected costs that tend to catch homeowners off guard, aside from just the materials and basic labor?
Some common unexpected costs in DIY flooring projects include renting or buying special tools, removing and disposing of old flooring, subfloor repairs if you find damage, and extra materials for mistakes or wastage. You might also encounter costs for underlayment, trim or molding, and cleanup supplies. Factoring these into your budget can help prevent surprises and keep your project on track.
For budgeting purposes, do you have any advice on estimating unexpected labor costs that might pop up during installation? I want to avoid having my project stall because I underestimated what might be required.
A good approach is to add a 10–20% buffer to your labor cost estimate to cover unexpected issues like subfloor repairs, extra prep work, or schedule changes. Also, ask your installer for a list of possible surprises based on your project and their past experience. This way, you’ll be better prepared and less likely to face costly delays.
When budgeting for waste and extra material during installation, is there a standard percentage to add based on the type of flooring (like hardwood versus tile), or does it depend more on room shape and layout?
The percentage of extra material to budget for does depend on the type of flooring, but the shape and layout of your room are just as important. For example, hardwood often requires 5–10% extra, while tile may need 10–15%, especially in rooms with lots of corners or angles. Irregular layouts or patterns can increase waste, so factor both material type and room complexity into your estimate.
You mentioned underlayment and trim as often-overlooked expenses. For someone who wants to DIY their flooring project, how should I calculate realistic amounts for these extras to avoid being caught off guard during installation?
To estimate underlayment, measure the square footage of your room and add 10% for mistakes or odd cuts. For trim, measure the total length of walls where new flooring meets a wall or another material, then add about 10% for corners and errors. Always round up to the nearest full package sold at your supplier, since packaging can affect your total purchase. This approach helps you avoid mid-project shortages and unexpected costs.
The article mentions that flooring waste can impact the overall cost. Do certain materials, like tile versus engineered wood, result in more waste, and if so, how can you minimize that during installation?
Yes, some materials create more waste than others. Tile usually results in more waste compared to engineered wood because of the need for precise cuts and matching patterns, especially in irregular rooms. To minimize waste, measure carefully, plan your layout before starting, and buy a little extra for mistakes (usually 10% for tiles, 5-7% for wood). Hiring an experienced installer can also help reduce waste significantly.
When it comes to budgeting, how much extra should I realistically set aside for things like removal and disposal fees? Do these costs differ a lot depending on the type of old flooring I have to get rid of?
It’s wise to set aside an extra 10–20% of your total flooring budget for unexpected costs like removal and disposal fees. These fees do vary based on your existing flooring. For example, removing carpet is generally quicker and cheaper than tearing out old tile or hardwood, which can be more labor-intensive and costly. It’s a good idea to get quotes specific to your current flooring type to plan accurately.
When budgeting for a DIY flooring project, what’s the best way to factor in costs like underlayment, tools, and trim? Is there a checklist or formula contractors use that you recommend for first-timers?
When budgeting for a DIY flooring project, it’s helpful to make a detailed checklist of all materials and tools you’ll need. Start by listing flooring, underlayment, trim, adhesives, fasteners, and any tools you don’t already own. Add about 10-15% extra for waste and unexpected expenses. Many contractors use spreadsheets to track these items and costs. Creating your own itemized list or spreadsheet will help ensure you don’t overlook anything.
When you mention that hidden costs can add 20–50% or more to the flooring project, does this include potential issues like uneven subfloors or water damage, or would those be considered entirely separate unexpected expenses?
The 20–50% estimate for hidden costs does generally include issues like uneven subfloors and minor water damage, since these are common surprises during flooring projects. However, if the damage is extensive or requires major repairs, those costs could go beyond this range and would be considered separate unexpected expenses. It’s a good idea to set aside an extra buffer just in case.
Can you explain more about how disposal fees and waste removal are typically charged during a flooring installation? Is this something that can be negotiated with contractors, or is it usually a fixed part of the project cost?
Disposal fees and waste removal charges can vary depending on the contractor and the scope of your flooring project. Some contractors include these costs as part of their overall quote, while others list them as separate line items. These fees are often negotiable, especially if you discuss them upfront. It’s a good idea to clarify how these costs are calculated and whether you have the option to handle waste removal yourself to save money.
Could you share any tips on how to accurately estimate the amount of waste material I might need for a complex room layout with angles or odd shapes? I’m worried about underestimating costs when buying materials.
For rooms with lots of angles or unusual shapes, it’s wise to add a higher waste allowance—typically 10–15% more than your measured area. Make a detailed sketch of the room, break it into smaller sections, and calculate each area separately. This helps account for tricky cuts and fitting. Double-check product packaging, as different materials may recommend specific waste percentages.
Regarding material waste, how much extra flooring do you recommend purchasing above the measured square footage to account for mistakes or pattern matching, especially for materials like tile or hardwood?
For most flooring projects, it’s wise to buy about 10% extra material beyond your measured square footage. This helps cover mistakes, cuts, and pattern matching, especially with tile or hardwood where alignment is important. If you’re using tiles with complex patterns or installing hardwood at angles, consider increasing the extra to 12–15%. This cushion helps avoid delays if you run short.
Can you offer any advice on how to spot potential subfloor problems before the installation starts? I’d like to avoid last-minute surprises, but I’m not sure what to look for as a homeowner.
Before installation, check your floors for uneven spots by walking around and feeling for dips or squeaks. Look for visible cracks, moisture stains, or musty odors, especially in basements or older homes. If possible, lift a small section of existing flooring to inspect for water damage or rot. If you notice any of these signs, consider having a professional do a thorough inspection before moving forward.
Could you explain more about what kinds of post-installation repairs might be needed with new flooring? If I’m hiring a contractor, should I expect them to cover those fixes, or would that usually be an extra cost for homeowners?
Post-installation repairs with new flooring can include things like fixing squeaky boards, reattaching loose tiles or planks, addressing gaps, or correcting minor surface damage that becomes apparent once the floor settles. Most contractors will fix issues that result from improper installation at no extra cost within a warranty period. However, repairs due to wear and tear, accidents, or settling over time are typically considered extra and would be an additional expense for homeowners. It’s wise to clarify what your contractor’s warranty covers before the project starts.
You mentioned that removing old flooring and addressing subfloor issues are major areas where hidden costs come up. How can I tell in advance if my subfloor might need repairs, and is there a way to get an accurate estimate before the project starts?
To spot potential subfloor issues before starting your project, look for signs like squeaking, uneven floors, soft spots, or visible water damage after you remove a section of the old flooring. The most accurate estimate comes from having a professional assess your subfloor in person. Many flooring contractors offer pre-installation inspections, so you can include any needed repairs in your budget from the start.
You mentioned trim, transition pieces, and underlayment as areas where expenses can sneak in. Are there reliable ways to calculate or estimate these additional materials upfront so I can avoid going over budget?
Absolutely, you can estimate these costs more accurately by measuring each area that will need trim or transitions before starting your project. For trim and molding, calculate the perimeter (in feet) of each room. For transition pieces, count the number of doorways or areas where flooring types meet. For underlayment, measure the total floor area (in square feet). Once you have these numbers, check local store prices and add a buffer (about 10%) for waste or mistakes. This will give you a realistic upfront estimate.
You mention that subfloor issues can add a lot to the total cost. How can a homeowner tell beforehand if their subfloor might need major repairs, or is that usually something you only find out after removing the old flooring?
It’s possible to spot some warning signs of subfloor issues ahead of time, such as squeaky spots, sagging, or uneven areas in your current floor. Water stains or a persistent musty smell can also indicate problems. However, many subfloor problems aren’t visible until the old flooring is removed, so it’s wise to budget a bit extra just in case repairs are needed.
The section about clean up and waste disposal caught my attention. What’s the best way to estimate disposal costs ahead of time, and are there any cheaper alternatives for getting rid of old flooring materials?
To estimate disposal costs, ask your installer or local waste facility about fees by weight or volume for construction debris. Measure your flooring area and check if your materials are especially heavy. For cheaper alternatives, consider renting a smaller dumpster, using city bulk pickup days, or donating reusable flooring to a salvage center or charity. Some stores also offer recycling programs for old carpet or wood.
How can I tell in advance if my existing trim and transition pieces can be reused, or will I almost always need to budget for new ones when upgrading flooring?
You can assess your existing trim and transition pieces by checking their condition and compatibility with your new flooring’s height and style. If they’re undamaged and the new flooring isn’t significantly thicker or thinner, you may be able to reuse them. However, many homeowners find at least some replacements are needed, so it’s wise to include a budget for new trim and transitions just in case.
I noticed you mentioned that hidden costs like subfloor repairs can add up fast. As a DIYer, how can I figure out if my subfloor needs work before I actually start tearing up the old floor?
To check your subfloor before removing the old flooring, look for signs like uneven spots, squeaks, or sagging areas as you walk across the floor. If you can access the subfloor from below, check for water stains, rot, or damaged wood. Press on the floor—soft or spongy areas may indicate issues. These checks can help you spot potential problems early, saving time and unexpected costs.
I’m planning to replace the floors in my living room myself, but I had no idea that underlayment and trim could add so much extra cost. Can you give an estimate of what percentage of the total project budget usually goes to these hidden materials?
Underlayment and trim can indeed be easy to overlook. Typically, these materials make up about 10% to 20% of the total flooring project budget. The exact percentage can vary based on the type of flooring and your room’s layout, but it’s wise to factor them in early so you’re not caught off guard.
When budgeting for flooring, you mention that underlayment and trim can significantly add to costs. Could you provide a ballpark percentage or dollar amount homeowners should typically set aside just for these extras beyond the base material price?
Underlayment and trim can often add about 10-20% to your overall flooring material costs. For example, if your base flooring materials are $2,000, setting aside an additional $200 to $400 is wise. These extras can vary depending on the floor type and room size, so it’s always good to get a detailed estimate from your installer before finalizing your budget.
For homeowners on a tight schedule, what are some common delays related to unexpected flooring project costs or complications, and are there ways to minimize those delays during the planning phase?
Common delays in flooring projects often come from discovering damaged subfloors, material backorders, or the need for extra prep work, all of which can increase costs and extend timelines. To minimize these risks, have a thorough inspection before starting, set aside a contingency budget, and confirm material availability early. Clear communication with your contractor about your schedule and budget can also help prevent or quickly resolve unexpected issues.
Can you give some examples of what kinds of subfloor issues might come up during the preparation phase? I want to DIY but don’t want to be caught off guard by things I’m not expecting.
Absolutely, subfloor issues can surprise many DIYers. Common problems include uneven surfaces, water damage or rot (especially near sinks or bathrooms), loose or squeaky floorboards, and old adhesive or nails left from previous flooring. Sometimes you’ll also find mold or mildew if there’s been moisture. Inspect thoroughly and be ready to level, patch, or even replace parts of the subfloor before installing new flooring.
When comparing hardwood and tile, which type tends to have more surprise costs during installation? I want to pick a material that won’t throw as many curveballs into my budget later on.
Hardwood flooring often brings more surprise costs than tile during installation. With hardwood, you may face unexpected expenses like subfloor repairs, moisture barriers, or acclimation time if your home’s humidity varies. Tile usually has more predictable costs, though if your subfloor isn’t level, extra prep might be needed. In most cases, tile tends to involve fewer budget surprises.
Could you elaborate on how homeowners can assess the condition of their subfloor before starting a flooring project, and what signs indicate that repairs might be needed? I want to avoid being caught off guard by unexpected subfloor issues during installation.
To assess your subfloor before starting a flooring project, first remove a small section of the current flooring in different areas to inspect the surface underneath. Look for signs like sagging, unevenness, soft spots, moisture stains, or a musty smell, which can indicate water damage or rot. Also, listen for squeaks or movement when you walk across the floor. If you spot any of these issues, repairs or reinforcement may be needed to ensure a stable base for your new flooring.
When budgeting, how much extra should I realistically set aside for things like trims, underlayment, and transition pieces? Is there a rule of thumb or percentage you recommend based on your experience with various flooring types?
A good rule of thumb is to add 10–15% to your base flooring material cost to cover trims, underlayment, and transition pieces. Some flooring types, like hardwood or luxury vinyl, can require more detailed or specific accessories, so leaning toward the higher end of that range is wise. Always check with your installer or supplier for any unique needs tied to your chosen flooring.
For someone trying to decide between doing a DIY install or hiring a contractor, which stage do you think tends to cause the most unexpected expenses, and are there ways to avoid those surprises with better planning?
Unexpected expenses often arise during the preparation stage—removing old flooring, fixing subfloor issues, or discovering hidden damage. DIY projects can become costly if you’re unprepared for these surprises. To avoid them, thoroughly inspect the space beforehand, budget for a contingency fund, and research common issues with your home’s type and age. Hiring a contractor may cost more upfront but they often spot and plan for these issues early, reducing surprise expenses.
If unexpected repairs or additional tools become necessary during installation, what is the best way to handle those situations without blowing the budget? Do you recommend building in a certain percentage as a contingency?
Including a contingency fund in your budget is a smart move for any flooring project. A good rule of thumb is to set aside an extra 10-15% of your total budget to cover unexpected repairs or tool needs. This cushion helps you manage surprises without overspending. If something unplanned comes up, get a clear estimate before approving extra costs, and prioritize any repairs that are essential for safety or function.
I noticed you mentioned that budgeting solely by square footage can underestimate expenses by 20–50%. Do you have any tips for creating a more realistic budget at the beginning, especially when it’s hard to predict things like trim, wastage, and disposal fees?
You’re right—budgeting by square footage alone often misses important extras. To improve your estimate, add 10–15% to your material needs for wastage and cuts. Ask your installer or supplier about trim, adhesives, and underlayment costs. Get a written quote for disposal and removal fees at the outset. It’s also smart to set aside a contingency fund (about 10% of your total) for any surprises.
If old flooring removal and disposal fees can add up quickly, how should I compare bids from contractors to be sure those costs are included? Are contractors generally upfront about those charges or do they tend to appear as surprise add-ons?
When comparing bids, ask each contractor for a detailed, itemized quote that specifically lists removal and disposal fees. Some contractors include these costs upfront, while others might add them later, so it’s important to clarify before signing anything. Don’t hesitate to request clarification about what’s included—transparency is key to avoiding unexpected expenses.
When hiring a professional for a flooring upgrade, at what stage should homeowners ask for a more detailed breakdown of possible hidden costs such as waste disposal or special underlayment requirements?
Homeowners should ask for a detailed breakdown of possible hidden costs during the initial estimate or proposal stage, before any work begins. This ensures all charges, including waste disposal and special underlayment, are discussed up front. Clear communication early on helps avoid surprises and gives you a more accurate budget for your flooring project.
The article mentions unexpected expenses during every stage, from preparation to finishing. Could you share any practical tips for how to spot potential budget busters before starting a project?
To spot potential budget busters early, start by closely inspecting your existing floors for structural issues or moisture problems—these can add unexpected costs. Ask for detailed quotes from contractors, including prep work and potential repairs. Set aside at least 10–15% extra in your budget for surprises. Also, clarify what’s included with your materials, as things like underlayment or trim are often extra. Reviewing these factors upfront helps avoid unpleasant surprises.
You mention that prepping the space and subfloor issues can drive up the cost a lot. How do I know if my subfloor is in good enough shape, and what should I look for before buying flooring materials?
To check if your subfloor is in good shape, look for signs like squeaks, soft spots, uneven surfaces, or visible moisture damage. Make sure the subfloor feels solid and doesn’t flex underfoot. Also, check for mold or water stains, which could mean hidden problems. If you’re unsure, having a professional inspect the area before you buy flooring materials can help avoid costly surprises.