Introduction: The Power Behind Upgrading Electrical Outlets
When it comes to home improvement, few upgrades offer as much daily impact as updating your electrical outlets. Whether you’re transforming a dated kitchen, making a child’s room safer, or simply accommodating the ever-growing number of devices in modern life, the humble electrical outlet is at the center of it all. Yet, many homeowners overlook the importance of proper outlet upgrades, falling prey to persistent myths, cost misconceptions, and potentially unsafe shortcuts. Even those with prior DIY experience can underestimate the complexity involved, from understanding code requirements to ensuring personal safety during installation.
This comprehensive guide is designed to cut through the confusion. We’ll debunk common myths about upgrading outlets, break down the costs you can expect, explore essential safety practices, and outline the steps to ensure your project is both compliant and long-lasting. Whether you’re considering replacing a single worn-out receptacle or modernizing every outlet in your home, this resource will equip you with the practical know-how to plan, budget, and execute your upgrade with confidence. Let’s shine a light on the real story behind home electrical outlet improvements.
Understanding Modern Electrical Outlets: Types and Key Features
Standard vs. Specialty Outlets
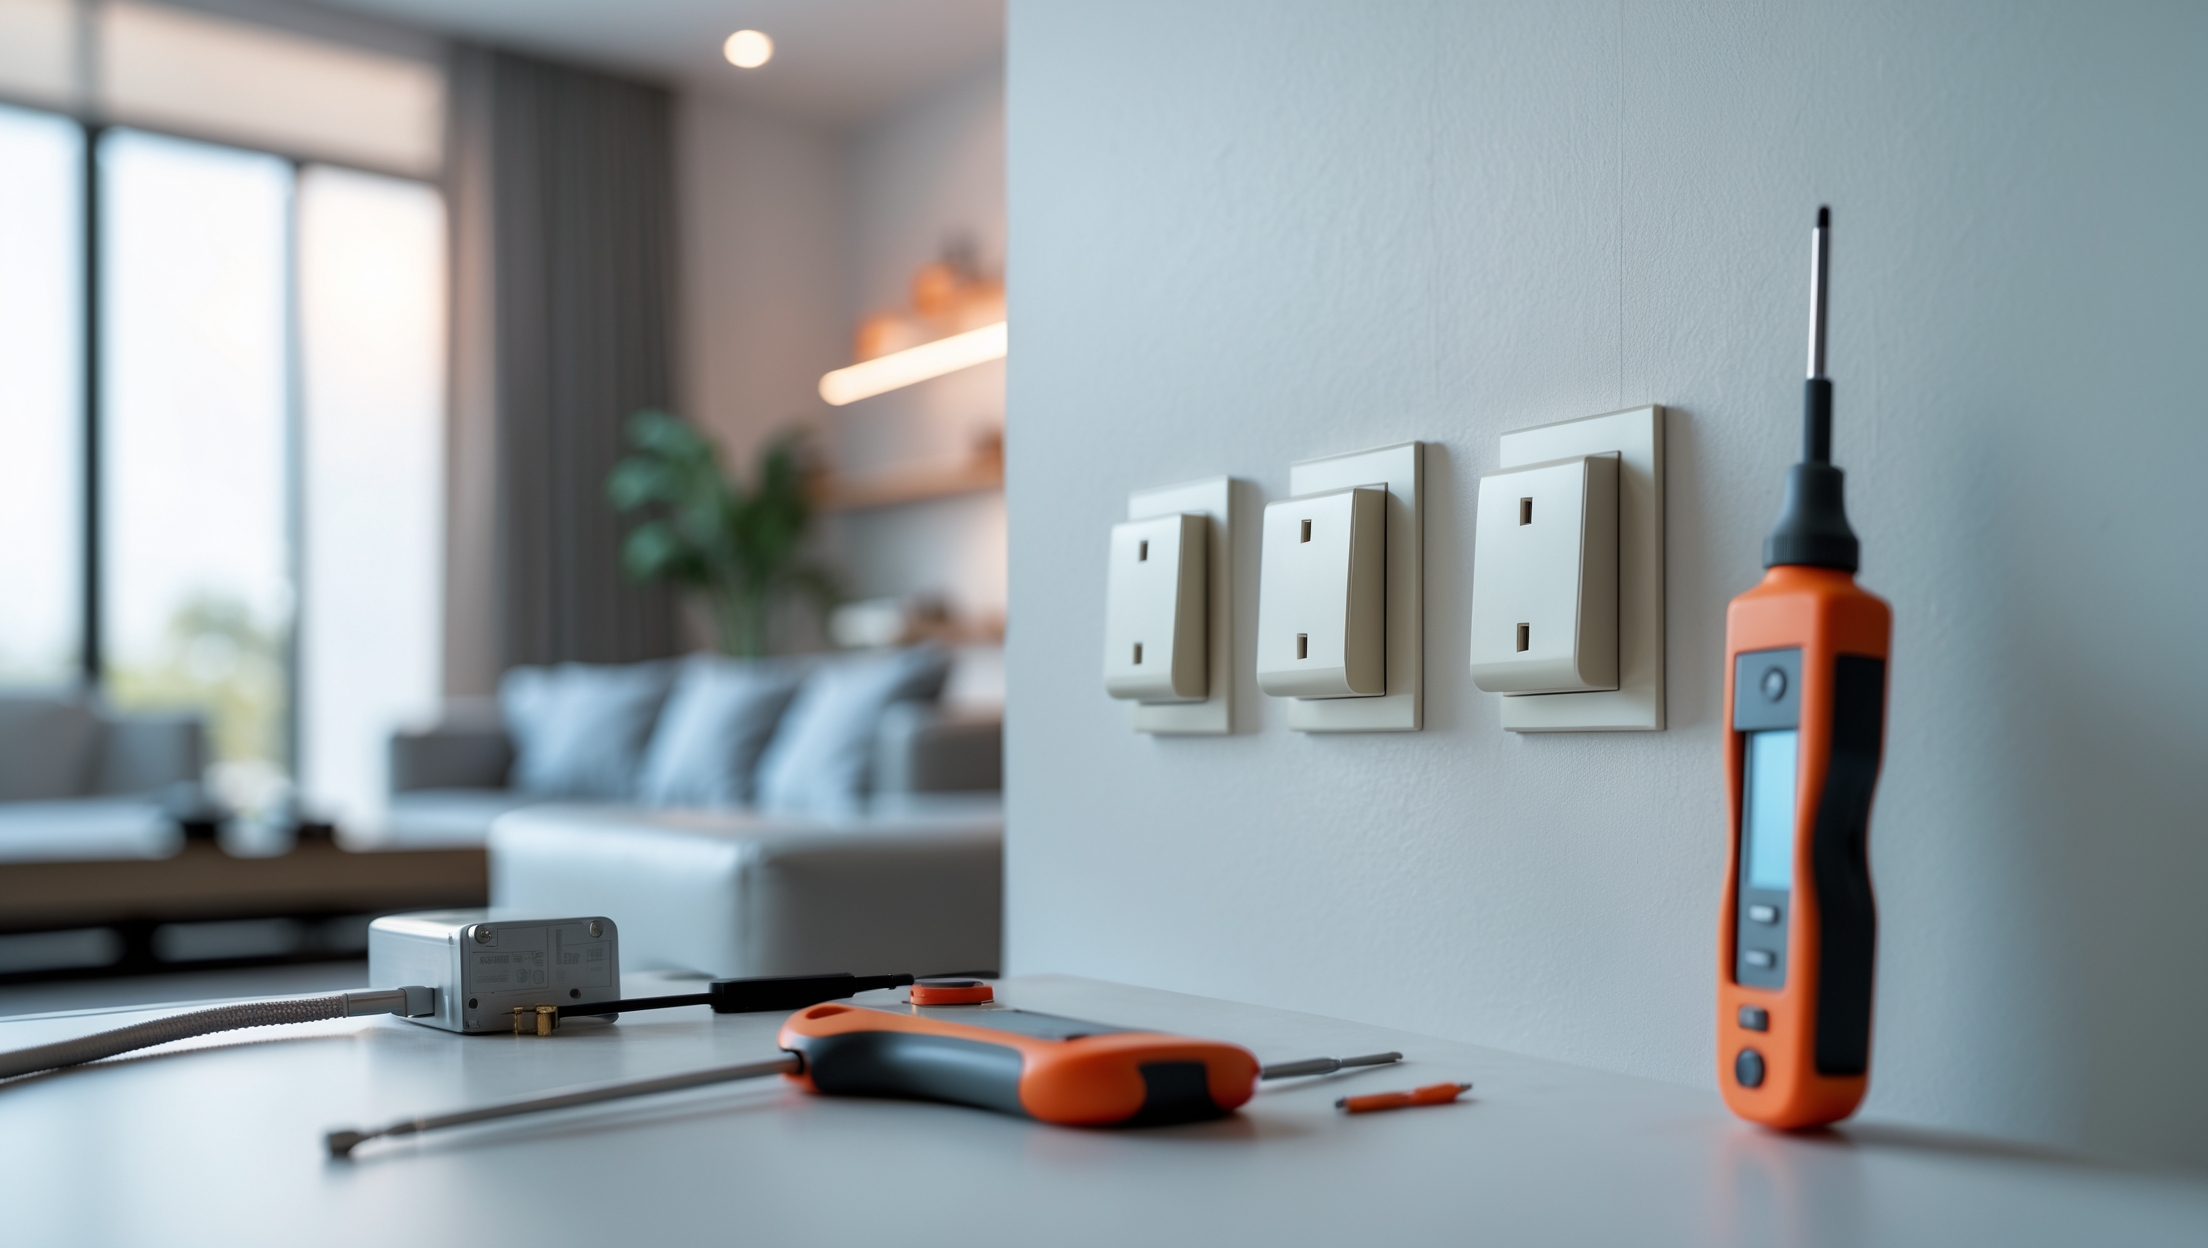
Home electrical outlets have evolved significantly over the years, offering more than just a place to plug in appliances. Here are the most common types you’ll encounter in a modern upgrade:
- Standard Duplex Outlets: The classic two-socket receptacle most homes have, now often available as tamper-resistant (TR) for added safety.
- GFCI (Ground Fault Circuit Interrupter) Outlets: Required in kitchens, bathrooms, garages, and outdoor areas, these outlets protect against electrical shock by cutting power when a ground fault is detected.
- AFCI (Arc Fault Circuit Interrupter) Outlets: Increasingly required by code in bedrooms and living areas, these outlets help prevent fires from arc faults.
- USB and Smart Outlets: Modern outlets that include built-in USB charging ports or smart connectivity features, allowing remote control and monitoring.
Why Upgrade?
- Safety: Older outlets may lack grounding, tamper resistance, or GFCI/AFCI protection—risking shock or fire.
- Functionality: New devices often require more power or direct USB charging.
- Code Compliance: Renovations often trigger code updates, especially in kitchens and bathrooms.
- Aesthetics: Modern outlets and covers can instantly refresh the look of a room.
Common Myths About Upgrading Electrical Outlets
Myth #1: “Upgrading Outlets is Always a Simple DIY Job”
While replacing a like-for-like outlet may seem straightforward, several factors complicate the process:
- Wiring in older homes may not be compatible with modern outlets.
- Upgrades to GFCI or AFCI outlets often require box size checks and precise wiring.
- In some jurisdictions, electrical work—even minor—requires a permit or inspection.
Myth #2: “You Only Need GFCI Outlets Near Sinks”
Current electrical codes require GFCI protection in many locations, including:
- Kitchens (all countertop outlets)
- Bathrooms
- Laundry areas
- Basements and garages
- All outdoor outlets
Myth #3: “Old Outlets Are Safe If They Still Work”
Functionality doesn’t guarantee safety. Outlets can become internally loose, lose grounding, or develop worn contacts—all invisible risks that may lead to shocks or fire hazards.
Myth #4: “All Outlets Are Created Equal”
Quality and features vary widely. Cheaper outlets may lack tamper resistance, solid construction, or long-term durability. Investing in well-reviewed, code-compliant products ensures safety and longevity.
Cost Breakdown: What to Expect When Upgrading Outlets
Material Costs
- Standard TR Duplex Outlets: $2 – $5 each
- GFCI Outlets: $15 – $30 each
- AFCI Outlets: $25 – $45 each
- USB/Smart Outlets: $20 – $50+ each
- Outlet Covers/Plates: $1 – $5 each (decorative types may cost more)
Tool and Equipment Costs
- Voltage Tester/Multimeter: $10 – $40 (essential for safety)
- Insulated Screwdrivers: $10 – $20
- Wire Strippers: $10 – $25
- Pliers: $10 – $20
- Electrical Tape and Wire Nuts: $5 – $10 total
Labor Costs (If Hiring a Pro)
- Per Outlet Replacement: $80 – $150 (including parts and labor)
- Multiple Outlets (Bulk Rate): $150 – $400 for 5–10 outlets
- Complex work (rewiring, adding AFCI/GFCI where none existed): Extra charges may apply
Permit and Inspection Fees
- Varies by locality: $50 – $200
- Required especially for major upgrades, kitchen/bath remodels, or new circuits
Total Project Scenarios
- DIY Replacement of 10 Standard Outlets: $70 – $150 (materials + tools, if you already own some)
- Pro Upgrade of 10 Outlets (mixed GFCI, AFCI, USB): $400 – $1,000 (parts, labor, permit)
Essential Safety Checklist for Outlet Upgrades
1. Power Off and Test
- Shut off the circuit at the main breaker box.
- Use a non-contact voltage tester to confirm no power at the outlet—test both sockets and wires.
2. Prepare the Work Area
- Clear nearby furniture and ensure adequate lighting.
- Use insulated tools and wear rubber-soled shoes.
- If replacing a GFCI, label the “line” and “load” wires before disconnecting.
3. Check for Wiring Issues
- Look for loose, frayed, or burnt wires. Discontinue work if you spot these—consult a pro.
- Verify that the outlet box is not overfilled; if so, upgrade to a larger box.
4. Grounding and Polarity
- Ensure the ground wire is present and properly attached. If not, stop and consult an electrician.
- Match wire colors (black/hot, white/neutral, bare/ground) to correct outlet terminals.
5. Secure Connections
- Tighten all terminal screws securely, but avoid overtightening which can damage the outlet or wire.
- Use wire nuts and electrical tape as needed for safe, lasting connections.
6. Test After Installation
- Once the power is restored, use a plug-in outlet tester to check for correct wiring and GFCI/AFCI function.
- If you’re uncertain, have your work inspected by a licensed electrician.
Step-by-Step Tutorial: Replacing a Standard Outlet with a GFCI
Tools and Materials Needed
- GFCI outlet
- Voltage tester
- Insulated flathead and Phillips screwdrivers
- Wire stripper
- Needle-nose pliers
- Wire nuts, electrical tape
Installation Steps
- Turn off Power: Confirm with tester before proceeding.
- Remove Old Outlet: Unscrew the cover plate and outlet. Carefully pull it from the box.
- Label Wires: Identify “line” (power from panel) and “load” (downstream outlets). GFCIs only protect outlets on the “load” side.
- Disconnect Wires: Loosen terminal screws and remove wires from the old outlet.
- Prepare New GFCI Outlet: Attach black (hot) and white (neutral) wires to the “line” terminals. If you want additional outlets protected, connect their wires to the “load” terminals.
- Secure the Ground: Attach the bare copper or green wire to the green screw on the GFCI.
- Install the Outlet: Gently fold wires into the box and screw the GFCI into place.
- Replace Cover Plate: Tighten screws without cracking the plate.
- Restore Power and Test: Use the GFCI test/reset buttons and a tester to ensure proper function.
Code Compliance and Permit Essentials
National Electrical Code (NEC) Highlights
- Tamper-Resistant (TR) Required: All new and replacement outlets in homes must be TR, protecting against child shock hazards.
- GFCI Requirements: All outlets in wet or potentially wet areas (kitchens, baths, laundry, garages, exterior) must be GFCI-protected.
- AFCI Requirements: Most living areas in new or remodeled homes require AFCI protection.
- Box Fill Calculations: Outlet boxes must have enough volume for wires, devices, and connectors—overcrowding is a code violation and a fire hazard.
When Permits and Inspections Are Needed
- Replacing a few outlets in the same location often does not require a permit in most areas.
- Upgrading to GFCI/AFCI, adding outlets, or any work involving new circuits or rewiring does require a permit and inspection in many jurisdictions.
- Check with your local building department before starting.
Maintenance Best Practices for Long-lasting Outlets
Regular Inspection
- Test GFCI and AFCI outlets monthly using their built-in test buttons.
- Check for loose-fitting plugs, discoloration, or warmth around outlets—these are signs of wear or wiring issues.
Cleaning and Care
- Unplug appliances before cleaning outlet covers; use a dry cloth—never liquid cleaners.
- Replace covers that are cracked or damaged to prevent dust and moisture ingress.
Upgrading When Needed
- Replace outlets that no longer hold plugs securely.
- Upgrade to TR, GFCI, or AFCI outlets if your home does not already have them in required locations.
- Consider smart or USB outlets for convenience as your device needs change.
Frequently Asked Questions
How many outlets can I safely replace myself?
If you have solid DIY skills and understand electrical safety, you can typically replace like-for-like outlets. For upgrades requiring GFCI/AFCI, new wiring, or circuit changes, hire a licensed electrician.
Do I need to replace every outlet with GFCI?
No—only those in locations mandated by code. However, you can add extra protection if desired.
What if my house has no ground wires?
This is common in homes built before the 1960s. Special GFCI outlets can be used, but labeling is required, and you may need to consult an electrician for a proper upgrade.
Can I upgrade to smart outlets myself?
Many smart outlets install like standard ones, but always check the manufacturer’s requirements and ensure your wiring is compatible.
Conclusion: Empowering Your Home with Safe, Smart Outlet Upgrades
Upgrading electrical outlets is a deceptively powerful home improvement project. It enhances your family’s safety, supports modern technology, and even refreshes a room’s look—all with a relatively modest investment. Yet, as we’ve explored, the process involves more than swapping out old devices for new. Understanding outlet types, code requirements, and safety essentials is critical to a successful upgrade. Avoiding common myths not only prevents costly mistakes and code violations but also ensures your improvements will stand the test of time.
Whether you choose to tackle simple replacements yourself or hire a professional for complex upgrades, always put safety first: test for power, use the right tools, and never hesitate to consult an expert if you’re unsure. Don’t cut corners with materials or ignore the need for permits—these steps protect both your property and your peace of mind.
Your home’s electrical system is the backbone of modern living. By investing in safe, code-compliant outlet upgrades now, you’ll enjoy greater convenience, efficiency, and security for years to come. Let this guide be your blueprint to a brighter, safer, and smarter home—one outlet at a time.
You mentioned safety best practices during outlet installation. If I hire a licensed electrician, what should I ask them to make sure the upgrades meet current code and stay compliant?
When hiring a licensed electrician, ask them if they are up-to-date with the latest local electrical codes and whether they will secure any required permits for the work. Request that they use only UL-listed outlets and proper GFCI/AFCI protection where required. After installation, you can also ask for a written confirmation that the upgrades are code-compliant and request an inspection report if one is provided.
I noticed you mentioned cost misconceptions around upgrading outlets. As a small business owner working with a tight budget, could you give a ballpark estimate for upgrading outlets in a commercial space versus a residential home?
Upgrading outlets in a residential home typically ranges from $100 to $250 per outlet, depending on complexity and materials. For commercial spaces, costs are usually higher—often between $200 and $400 per outlet—since code requirements and labor demands can be greater. These are general estimates, and actual pricing may vary based on your location and the specifics of your building.
Is it possible to modernize every outlet in my home a little at a time, or is it safer and more efficient to do it all at once? How long should I expect a typical outlet upgrade project to take for a busy family home?
You can modernize your outlets gradually, one room or area at a time, which can help spread out costs and minimize disruption for a busy household. However, upgrading all outlets at once is often more efficient and can ensure consistent safety improvements throughout your home. For an average-sized family home, a whole-house outlet upgrade typically takes one to three days, depending on accessibility and the number of outlets involved.
I get nervous about turning off the power at the breaker box. Are there any reliable safety checks I can use before touching outlets to make sure there’s really no electricity flowing?
It’s understandable to feel uneasy about working near electricity. After switching off the breaker, use a non-contact voltage tester to check the outlet—simply hold the tester near the outlet slots and screws. If it doesn’t light up or beep, there’s no voltage present. Always double-check the tester on a known live outlet first to confirm it’s working properly before using it on your work area.
How long should I expect a full house outlet upgrade to take if I’m hiring a professional electrician? I’m trying to plan around my family’s schedule and want to know if we’ll be without power for days or just a few hours in each room.
A full house outlet upgrade by a professional electrician usually takes one to two days for an average-sized home. Power is typically turned off only in the specific area where the electrician is working, so you might lose power in one or two rooms at a time for a few hours each rather than the whole house being without electricity for days.
The article talks about modernizing every outlet in the home. For someone who’s never tackled electrical work but is comfortable with other DIY projects, how long does it realistically take to swap out standard outlets for safer models, like tamper-resistant or GFCI, in an average-sized home?
For someone new to electrical work but skilled in other DIY projects, replacing outlets typically takes about 15 to 30 minutes per outlet, factoring in time to turn off power, remove the old outlet, and install the new one. In an average-sized home with around 20 outlets, you can expect the full project to take two or three weekends, depending on your pace and comfort. Always ensure safety by double-checking power is off before each replacement.
Your article highlighted the complexity of code compliance during installation. Are there specific steps or checklists you recommend for business owners to ensure all upgrades will pass a local electrical inspection the first time?
For business owners, it’s wise to start by reviewing your local jurisdiction’s electrical code requirements, as these can vary. Hire a licensed electrician who is familiar with commercial codes. Before inspection, verify that all outlets are properly grounded, labeled, and have the correct amperage. Make sure GFCI and AFCI protections are installed where required. Keep documentation of all permits and work, and perform a walkthrough with your electrician using a pre-inspection checklist to catch any issues.
For older homes that still have standard duplex outlets, how can I tell if I need to upgrade to GFCI or AFCI outlets to meet current code requirements? Are there simple ways to check before hiring an electrician?
To assess if you need to upgrade to GFCI or AFCI outlets, check where outlets are located. GFCIs are generally required in kitchens, bathrooms, garages, and outdoor areas; AFCIs are often needed in bedrooms and living spaces. Look for ‘Test’ and ‘Reset’ buttons on your outlets—if missing, they’re likely not GFCI or AFCI. While this gives a basic idea, only an electrician can confirm full code compliance and hidden wiring details.
For someone who’s never replaced an outlet before, what would you say are the most common mistakes to avoid during installation? I’m worried about accidentally creating a safety hazard.
It’s wise to be cautious. Some common mistakes include not turning off power at the breaker, miswiring the outlet (mixing up hot, neutral, and ground wires), or using the wrong outlet type for your needs. Also, avoid overtightening connections or failing to secure the outlet to the box. Always double-check your work and use a voltage tester before starting and after finishing.
When you mention AFCI outlets becoming increasingly required by code, does that mean older homes now have to upgrade, or is it just for new builds and major renovations? I want to make sure I’m staying compliant if I start swapping outlets.
AFCI outlet requirements typically apply to new construction and major renovations, not to existing outlets in older homes unless you’re doing significant electrical work. If you’re just swapping out a standard outlet for another in an older home, you usually aren’t required to upgrade to AFCI. However, if you’re making bigger changes or pulling permits, it’s a good idea to check with your local building department for specific compliance rules.
You mention cost misconceptions with outlet upgrades. What is a rough cost estimate for replacing standard outlets in an average-sized kitchen with GFCI and tamper-resistant models, including labor if hiring an electrician?
For an average-sized kitchen with about 6 to 8 outlets, upgrading to GFCI and tamper-resistant models typically costs between $40 and $60 per outlet for materials and professional installation. This means your total could range from $240 to $480, depending on local labor rates and accessibility. Always get a few quotes from licensed electricians for a precise estimate in your area.
I’m interested in the safety practices you mentioned—are there particular risks homeowners commonly overlook when installing tamper-resistant versus regular duplex outlets?
One common risk homeowners overlook is improper wiring, which can lead to loose connections and potential fire hazards, regardless of outlet type. With tamper-resistant outlets, people sometimes force plugs in and damage the internal shutters, reducing safety. Another overlooked point is failing to turn off the circuit breaker before installation. Always check local codes and, if uncertain, consider hiring a licensed electrician to ensure safe installation.
If I want to upgrade outlets in my shop but can’t afford to do everything at once, which areas should I prioritize for safety and compliance—kitchen, bathrooms, or sales floor? Is it okay to phase upgrades like this?
Phasing your outlet upgrades is absolutely fine, and many business owners do it to manage costs. For safety and compliance, prioritize outlets in areas with water, such as kitchens and bathrooms, first. These locations require GFCI protection by code to reduce shock risk. After those, move on to high-use areas on the sales floor. Upgrading in stages is a practical and acceptable approach.
When upgrading outlets in a busy area, are there best practices to minimize downtime for my business operations? Any tips on scheduling or phasing the work to keep things running smoothly?
To minimize downtime during outlet upgrades in a busy area, consider scheduling the work during off-hours or times when business activity is lowest. You can also phase the upgrades, tackling one section at a time so that other areas remain operational. Communicate the schedule clearly with both your staff and the electrician to coordinate smoothly and avoid unexpected disruptions.
The article talks about modernizing every outlet. How long does a whole-home outlet upgrade usually take for an average-sized house if I plan to tackle it myself over weekends? Is this realistically a one-weekend project or more of a multi-week commitment?
For an average-sized house, upgrading every outlet yourself is usually a multi-weekend project rather than something you can finish in one weekend, especially if you’re working only on weekends. Factors like the number of outlets, your experience level, and any unexpected wiring issues can add time. Most homeowners should plan for several weekends to complete the project safely and thoroughly.
After replacing an old receptacle myself, is there an easy way to confirm I did the installation correctly and everything is safe, besides just checking if it works?
Absolutely, there are a couple of important checks you can do. Use a plug-in outlet tester, which is an inexpensive tool available at hardware stores. It will confirm proper wiring, grounding, and polarity. Also, double-check that the outlet is firmly secured in the box and that no bare wires are exposed. If you have a GFCI outlet, test its built-in safety function using the test and reset buttons.
Could you clarify whether tamper-resistant (TR) outlets are now required throughout the entire house or just in specific rooms, and how this impacts the cost of upgrading an older home?
Tamper-resistant (TR) outlets are now required by the National Electrical Code (NEC) in almost all areas of a home, not just specific rooms. This includes living rooms, bedrooms, kitchens, and hallways—essentially anywhere regular outlets are installed. For older homes needing upgrades, this means more TR outlets will need to be installed, which can increase both material and labor costs compared to replacing outlets in only select locations.
For a quick upgrade, is it safe for a handy homeowner to replace standard outlets with modern tamper-resistant receptacles themselves, or are there hidden risks or code issues you would advise us to watch out for?
Swapping standard outlets for tamper-resistant ones is a straightforward project for a handy homeowner, as long as you turn off the circuit breaker and verify no power at the outlet. However, hidden risks include older homes with outdated wiring, ungrounded boxes, or aluminum wires, which may require special handling. Make sure your work complies with local codes and, if unsure, consult an electrician to avoid potential hazards.
When budgeting for a full home outlet upgrade, what are some hidden costs that people often overlook? You mention breaking down costs, but are there common surprises beyond the price of the outlets themselves?
Beyond the cost of the outlets themselves, people often overlook expenses like hiring a licensed electrician, patching or repainting walls after installation, upgrading electrical panels if your current system can’t handle the load, and potential permit fees if required by local codes. You might also need to pay for disposal of old outlets and materials or for unexpected repairs if outdated wiring is discovered during the upgrade.
You mention code requirements and safety considerations when upgrading electrical outlets. As a small business owner, how often do electrical codes change, and how can I make sure I’m staying compliant if I’m renovating an older commercial property?
Electrical codes, such as the National Electrical Code (NEC), typically update every three years, though local jurisdictions may adopt them on different schedules. To stay compliant during your renovation, always check with your local building authority for the current code version they enforce. Working with a licensed electrician familiar with commercial requirements is also a smart way to ensure your upgrades meet both code and safety standards.
I was surprised to read about the hidden complexities and potential pitfalls with DIY outlet upgrades. What are some common mistakes small business owners like me should watch out for, especially when updating older wiring in a commercial space?
When updating older wiring in a commercial space, common mistakes include overloading circuits, using the wrong outlet types, or failing to properly ground outlets. Small business owners often overlook the need to match new outlets to the building’s existing wiring capacity. Another pitfall is not adhering to local electrical codes, which can create safety risks and potential liability issues. It’s always best to consult a licensed electrician for upgrades in a commercial setting.
You brought up that some homeowners underestimate the complexity because of code requirements. How do I find out exactly which codes apply in my area, especially if I want to upgrade all my outlets to tamper-resistant or AFCI types?
To find out which electrical codes apply in your area, contact your local building department or permitting office—they can tell you about specific requirements for tamper-resistant or AFCI outlets. Many areas follow the National Electrical Code (NEC), but some have added local amendments. A licensed electrician in your area is also a great resource, as they’ll be familiar with both national and local codes.
You mentioned tamper-resistant outlets as a safety upgrade, especially for kids’ rooms. Is replacing all bedroom outlets with tamper-resistant ones something I can safely DIY, or should I call an electrician?
Replacing standard outlets with tamper-resistant ones is a relatively straightforward DIY project if you’re comfortable turning off the power at the breaker and following basic electrical safety steps. However, if you’re unsure about wiring or have older outlets without a ground wire, it’s safest to consult an electrician. Safety should always come first, especially in bedrooms where children are present.
When you mention that even experienced DIYers can underestimate the complexity of electrical outlet upgrades, what are some of the most common code requirements people tend to overlook during these projects?
Some common code requirements people often overlook include the need for GFCI outlets in kitchens, bathrooms, and other wet areas, ensuring proper grounding of outlets, and using the correct wire gauge for the circuit’s amperage. Another frequent oversight is the spacing of outlets along walls and the use of tamper-resistant outlets in homes with children. These details are important for both safety and code compliance.
I’m hoping to update the outlets in my kid’s bedroom to tamper-resistant ones, but I’m unsure if that’s enough for safety. Should I also be considering AFCI or other specialty outlets in bedrooms, or do those mostly apply to kitchens and bathrooms?
Installing tamper-resistant outlets in your child’s bedroom is an excellent step for safety, as they help prevent kids from inserting objects. In addition, current electrical codes often require Arc-Fault Circuit Interrupter (AFCI) protection in bedrooms. AFCIs detect dangerous arcing that can cause fires, adding another layer of safety. While GFCI outlets are usually required in kitchens and bathrooms, AFCI protection is recommended or required in bedroom circuits, so it’s wise to consider both measures.
When planning to modernize every outlet in my house, what would be a reasonable budget range for a professional installation, especially if I need several GFCI and AFCI upgrades as discussed?
For a whole-house outlet upgrade with several GFCI and AFCI installations, expect a professional electrician to charge between $100 and $250 per outlet, depending on factors like home age, accessibility, and local labor rates. For a typical 2,000-square-foot home with 20–30 outlets, your total budget might range from $2,000 to $7,500. Costs can vary, so getting multiple estimates is recommended.
If I only want to update a couple of worn-out receptacles in my house for now, are there compatibility issues I should watch out for when mixing old and new outlet types on the same circuit?
If you’re replacing just a few worn-out receptacles, compatibility is generally not a problem as long as you use outlets with the same voltage and amperage rating as your existing ones. However, if your home has older wiring or ungrounded outlets, make sure the new receptacles are suitable for that setup. Also, avoid mixing GFCI and regular outlets on the same circuit unless you understand the wiring, and always turn off the power before working.
I run a small coffee shop in an older building and I’m looking into upgrading some outlets to GFCI for safety. Is it always required by code in commercial spaces like kitchens, or are there exceptions I should know about?
In commercial spaces like coffee shop kitchens, GFCI outlets are typically required anywhere there’s a risk of water exposure, such as near sinks, prep areas, or dishwashing stations. However, local codes can vary, and there may be exceptions depending on how the area is used or if older wiring is involved. It’s best to check with your local building inspector or a licensed electrician to be sure your upgrades meet current regulations.
In the section about costs, could you give more detail on how much a full-house outlet upgrade typically runs, including both labor and materials? I’m trying to decide if it’s something I can budget for all at once or need to tackle in stages.
A full-house electrical outlet upgrade usually costs between $2,000 and $4,500, depending on your home’s size, the number of outlets, and local labor rates. This range includes both labor and materials. Older homes needing extra wiring or code updates might be at the higher end. If that’s outside your budget, it’s common to upgrade outlets room by room over time.
How do safety practices differ when upgrading outlets in a child’s room versus other parts of the house? Are tamper-resistant outlets enough, or are there additional precautions I should be taking?
When upgrading outlets in a child’s room, tamper-resistant (TR) outlets are essential, as they help prevent children from inserting objects. However, you should also ensure outlets are covered with safety plates or sliding covers and avoid placing furniture where a child can easily access an outlet. It’s wise to check that all outlets are properly grounded and avoid using extension cords, which can be a tripping or fire hazard. These steps provide extra safety beyond just installing TR outlets.
If my house still has a few old two-prong outlets, what are the exact steps to safely upgrade them to modern three-prong ones with proper grounding, especially if I run into metal boxes and older wiring?
To upgrade two-prong outlets, first turn off power at the breaker. Remove the old outlet and check if a ground wire (bare or green) exists in the box. If a ground is present and properly connected to the metal box, you can install a three-prong outlet. If not, run a new ground wire to the panel or replace with a GFCI outlet labeled ‘No Equipment Ground.’ Always use a voltage tester and, if unsure, consult a licensed electrician for safety.
What steps should I take if I’m planning to upgrade my outlets myself but run into old wiring that doesn’t seem to match current outlets or codes? Is this something a typical homeowner can troubleshoot, or is it safer to call an electrician right away?
If you discover old wiring that doesn’t match current outlets or codes, it’s safest to pause your project. Outdated wiring can be hazardous and may not meet safety standards. While some homeowners can handle simple upgrades, mismatched or unknown wiring is best left to a licensed electrician. This ensures your safety and makes sure your home stays up to code.
Does replacing older outlets with new AFCI or GFCI ones cause any interruptions to business operations, and how long does a typical upgrade take per outlet or room? I need to plan around customers and store hours.
Upgrading to AFCI or GFCI outlets usually requires temporarily shutting off power to the area being worked on, which can interrupt any devices or lighting in that space. On average, replacing a single outlet takes 15–30 minutes, while an entire room might take 1–2 hours depending on the number of outlets and the wiring condition. Scheduling during off-hours or slower business periods helps minimize disruption to your customers.
What are the main safety best practices I should keep in mind if I decide to replace an old two-prong outlet with a more modern one myself?
If you’re replacing a two-prong outlet yourself, always turn off power at the breaker before starting any work. Use a voltage tester to confirm no electricity is present. Make sure to use a UL-listed outlet and, if upgrading to a three-prong, ensure the box is properly grounded—otherwise, consider installing a GFCI outlet for added safety. Double-check all wire connections, and if you’re unsure about grounding, consult a licensed electrician.
If I replace a single worn-out receptacle myself, are there particular steps or safety checks I should follow to avoid common mistakes outlined in your guide? I worry about missing something important during installation.
Before replacing a receptacle, always turn off power at the circuit breaker and double-check with a voltage tester to ensure the outlet is dead. Take note of how the wires are connected to the old receptacle, matching them on the new one. Make sure wire connections are tight, no copper is exposed outside the terminals, and the device is grounded. Once installed, carefully screw the outlet back in, attach the cover plate, and restore power. Test the outlet to confirm it’s working correctly and there are no sparks or unusual heat.
If I want to replace all my existing outlets with modern versions throughout my house, do I need to shut off power to the entire property or just to the rooms where I’m working? What’s the safest approach for a DIYer?
For safety, you only need to shut off power to the specific circuits or rooms where you’ll be replacing outlets. Before starting, switch off the relevant breakers at your electrical panel and use a voltage tester to confirm the power is off at each outlet. If you’re unsure which breakers control which rooms, shutting off the main breaker is safest, but it will turn off power to the whole house. Always prioritize safety and consider consulting a licensed electrician if you’re uncertain.
Could you explain a bit more about the cost breakdown for upgrading outlets? For example, how much more should I expect to pay if I switch from standard duplex outlets to GFCI or AFCI outlets in multiple rooms?
Upgrading from standard duplex outlets to GFCI outlets usually costs about $15–$25 per outlet for materials, while AFCI outlets are a bit higher at $25–$40 each. Labor can add $50–$100 per outlet, depending on your location and electrician rates. If you’re upgrading several rooms, the total will scale with the number of outlets, but sometimes electricians offer a reduced rate for larger projects. AFCI outlets are generally pricier due to their added protection features.
You mentioned breaking down the costs for upgrading outlets—how much of a price jump should I expect if I decide to go with tamper-resistant or GFCI outlets throughout my house compared to just standard ones? Trying to budget realistically for a full home upgrade.
Upgrading to tamper-resistant outlets typically adds about $1–$3 per outlet compared to standard ones. GFCI outlets are a bigger jump, usually costing $15–$25 each versus $2–$5 for standard outlets. If you’re doing a full home upgrade, expect a noticeable increase if you use GFCI throughout, but you don’t usually need GFCIs in every room—mainly kitchens, bathrooms, and outdoor areas for code compliance.
Once the upgraded outlets are installed, is there a recommended way to test both standard and GFCI outlets to make sure they’re working correctly and safely before putting everything back in place?
Yes, it’s important to test outlets after installation. For standard outlets, use a plug-in outlet tester, which checks for wiring issues. For GFCI outlets, press the ‘Test’ button; the outlet should shut off. Then press ‘Reset’ to restore power. You can also use the outlet tester on GFCIs to confirm correct wiring. This ensures everything is safe before finishing up.
Could you provide more detail on the average costs involved in upgrading all the outlets in a typical three-bedroom home? I want to make sure I set a realistic budget before starting.
Upgrading all the outlets in a typical three-bedroom home usually costs between $1,000 and $2,500. This range depends on the number of outlets (usually 20–30), the labor rates in your area, and whether any rewiring or upgrades like GFCI/AFCI protection are needed. If you have older wiring or want USB outlets, expect costs on the higher end. Getting a few local electrician quotes will help you set a more accurate budget.
You mentioned tamper-resistant outlets being available as standard now. Are those required by code throughout the entire house, or just in certain rooms like kids’ bedrooms? I want to make sure I’m not missing an important safety step while upgrading.
Tamper-resistant outlets are required by the National Electrical Code in most areas of a home, not just in kids’ bedrooms. This includes living rooms, bedrooms, kitchens, hallways, and even common areas—basically anywhere a regular outlet would go. They’re intended to protect children everywhere in the house, so if you’re upgrading, it’s a good idea to use them throughout for safety and code compliance.
The article talks about common myths and cost misconceptions with outlet upgrades. As a business owner trying to budget, could you clarify what the most common hidden expenses are when upgrading multiple outlets at once?
When upgrading multiple outlets, hidden expenses often include the cost of necessary permits, unexpected wiring repairs if existing wires are old or damaged, and fees for bringing outlets up to current code. If your walls need patching after the upgrade or if you require new circuit breakers, those can add to the total. Budgeting for a small contingency can help cover these surprises.
I’ve done some simple outlet swaps before, but this article points out the complexity of code compliance. What are some clear signs that a job is too risky to DIY and it’s better to call a licensed electrician?
If you encounter old wiring, outlets near water (like kitchens or bathrooms), multiple wires in a box, aluminum wiring, or need to upgrade from two-prong to three-prong, it’s best to call a licensed electrician. Also, if you’re unsure about local code requirements or need to upgrade your circuit breaker, professional help is safest.
What kind of safety checks should I do before starting a DIY outlet upgrade, especially if I suspect the wiring in my house is a bit outdated? Are there specific warning signs that I should look for to avoid bigger issues?
Before starting a DIY outlet upgrade, turn off power at the breaker and use a voltage tester to confirm the outlet is de-energized. If your wiring looks frayed, cracked, or has cloth insulation, that’s a warning sign of outdated or unsafe wiring. Also watch for discoloration around outlets, a burning smell, or outlets that feel warm—these all suggest bigger electrical issues. If you notice any of these, it’s safest to consult a licensed electrician before proceeding.
If I’m updating outlets in an older building, are there common safety issues or code violations I should watch out for that might not be obvious until the project is underway?
Yes, there are several hidden safety issues and code violations you might encounter in older buildings. Common surprises include ungrounded wiring, outdated knob-and-tube wiring, or overloaded circuits that no longer meet current code. You might also find junction boxes buried behind walls or outlets without GFCI protection in wet areas. It’s wise to turn off power and check wiring behind each outlet, and consider having a licensed electrician inspect for hidden hazards before completing the upgrade.
For homeowners updating outlets to support modern devices, is there a way to test if the current wiring can handle newer outlets, or should this always be checked by a professional before starting the project?
You can use outlet testers or a voltage meter to do some basic checks, like confirming grounding or polarity, but these tests won’t reveal if your wiring can safely handle higher loads or sensitive electronics. For safety and code compliance, it’s best to have a licensed electrician inspect your wiring before installing new outlets, especially if your home is older or you’re adding higher-demand devices.
You mentioned that GFCI outlets are required in areas like kitchens and bathrooms for safety, but are there any situations where AFCI outlets are also required in those same spaces, or do they serve completely separate purposes? How can I tell which type I actually need when upgrading?
AFCI outlets are designed to prevent fires caused by electrical arcs, while GFCI outlets protect against electric shock from water contact. In many regions, recent electrical codes require both GFCI and AFCI protection in certain areas, including kitchens and laundry rooms. To know which you need, check your local electrical code or ask a licensed electrician. Sometimes, dual-function outlets that combine both protections are available for required locations.
When upgrading older outlets to tamper-resistant or GFCI models, is it necessary to upgrade the wiring as well, or can you usually keep the existing wires if they are in good shape? I’m curious how this impacts both safety and cost.
If your existing wiring is in good condition and meets current code requirements, you can usually upgrade to tamper-resistant or GFCI outlets without replacing the wires. However, if the wiring is outdated (for example, ungrounded or damaged), upgrading it may be necessary for both safety and compliance. Keeping the existing wiring can help lower costs, but always have an electrician check the wiring first to ensure it’s safe to use with modern outlets.
How much time should I set aside to upgrade all outlets in a typical three-bedroom house, and are there steps I can take to minimize disruption to daily living during the process?
Upgrading all outlets in a typical three-bedroom house usually takes between one and three days, depending on the home’s size and any complications. To reduce disruption, consider scheduling work in stages, clearing access to outlets in advance, and working room by room so other areas remain usable. Let family members know the schedule so they can plan around any power interruptions.
How do you determine when it’s time to replace outlets versus when a repair might suffice? For instance, if a receptacle feels warm but still works, is that always a sign it needs upgrading, or could there be another issue?
A warm outlet can indicate several issues, such as a loose connection, overloaded circuit, or aging components. While it doesn’t always mean a full replacement is needed, it’s important not to ignore it. If tightening terminal screws or reducing load doesn’t solve the warmth, upgrading the outlet is safest. Any signs of sparking, discoloration, or persistent heat call for immediate replacement rather than repair.
You mention that some people underestimate the costs involved in upgrading outlets. Could you give a ballpark range for what a small business might expect to spend upgrading, say, a dozen outlets to tamper-resistant or GFCI types?
Upgrading a dozen outlets in a small business to tamper-resistant or GFCI types typically costs between $500 and $1,200. This estimate includes both materials and professional electrician labor. The price can vary depending on location, access to outlets, and the existing wiring condition. GFCI outlets are generally a bit more expensive than tamper-resistant models. It’s always smart to get a few quotes from licensed electricians to get a more accurate estimate for your specific situation.
I’m curious about the cost breakdown you mentioned, especially when considering modern outlets like GFCI or AFCI versus just replacing standard duplex ones. In your experience, how much more should homeowners realistically budget per outlet for these specialty types, including labor if hiring a pro?
When upgrading to specialty outlets like GFCI (Ground Fault Circuit Interrupter) or AFCI (Arc Fault Circuit Interrupter), homeowners can expect to pay roughly $20–$40 more per outlet for the hardware compared to standard duplex outlets. With professional installation, labor typically adds another $50–$100 per outlet, depending on your location and complexity. So, per outlet, budgeting about $70–$140 for GFCI or AFCI upgrades is realistic.
When modernizing every outlet in an older house, are there any signs or common issues that indicate underlying wiring problems I should address before just swapping out the receptacles?
Absolutely, there are several signs you should watch for before upgrading outlets in an older home. Look out for discolored or charred outlets, frequent tripped breakers, loose or brittle wiring, and outlets that feel warm to the touch. Also, if you have ungrounded two-prong outlets or aluminum wiring, these need special attention. Addressing these issues first ensures your electrical system is safe and up to code.