Introduction: The Power—and Pitfalls—of Painting Kitchen Cabinets
Painting kitchen cabinets is one of the most impactful and budget-friendly ways to update your kitchen’s look. Whether you’re craving a dramatic color change or seeking a fresh, clean feel, a well-executed cabinet painting project can transform your space for a fraction of the cost of a full remodel. Yet, many DIYers dive in unprepared, underestimating the time, budget, and precision required for a pro-quality finish. From improper prep work to choosing the wrong paint or skipping crucial steps, common pitfalls can turn your dream kitchen into a costly disappointment. In this expert guide, we’ll cover everything you need to avoid those mistakes—breaking down essential budgeting considerations, step-by-step preparation and painting techniques, and proven maintenance practices that keep your cabinets looking flawless for years. Whether this is your first DIY painting project or you’re seeking to level up your results, you’ll find practical, actionable advice to ensure your kitchen cabinets become a source of pride, not regret.
Budget Breakdown: Realistic Costs for Painting Kitchen Cabinets
Estimating Supplies and Materials
Painting kitchen cabinets isn’t just about paint and brushes. Here’s what you’ll need, with cost ranges for a standard 10×10 kitchen:
- Degreaser/Cleaning Supplies: $10–$20
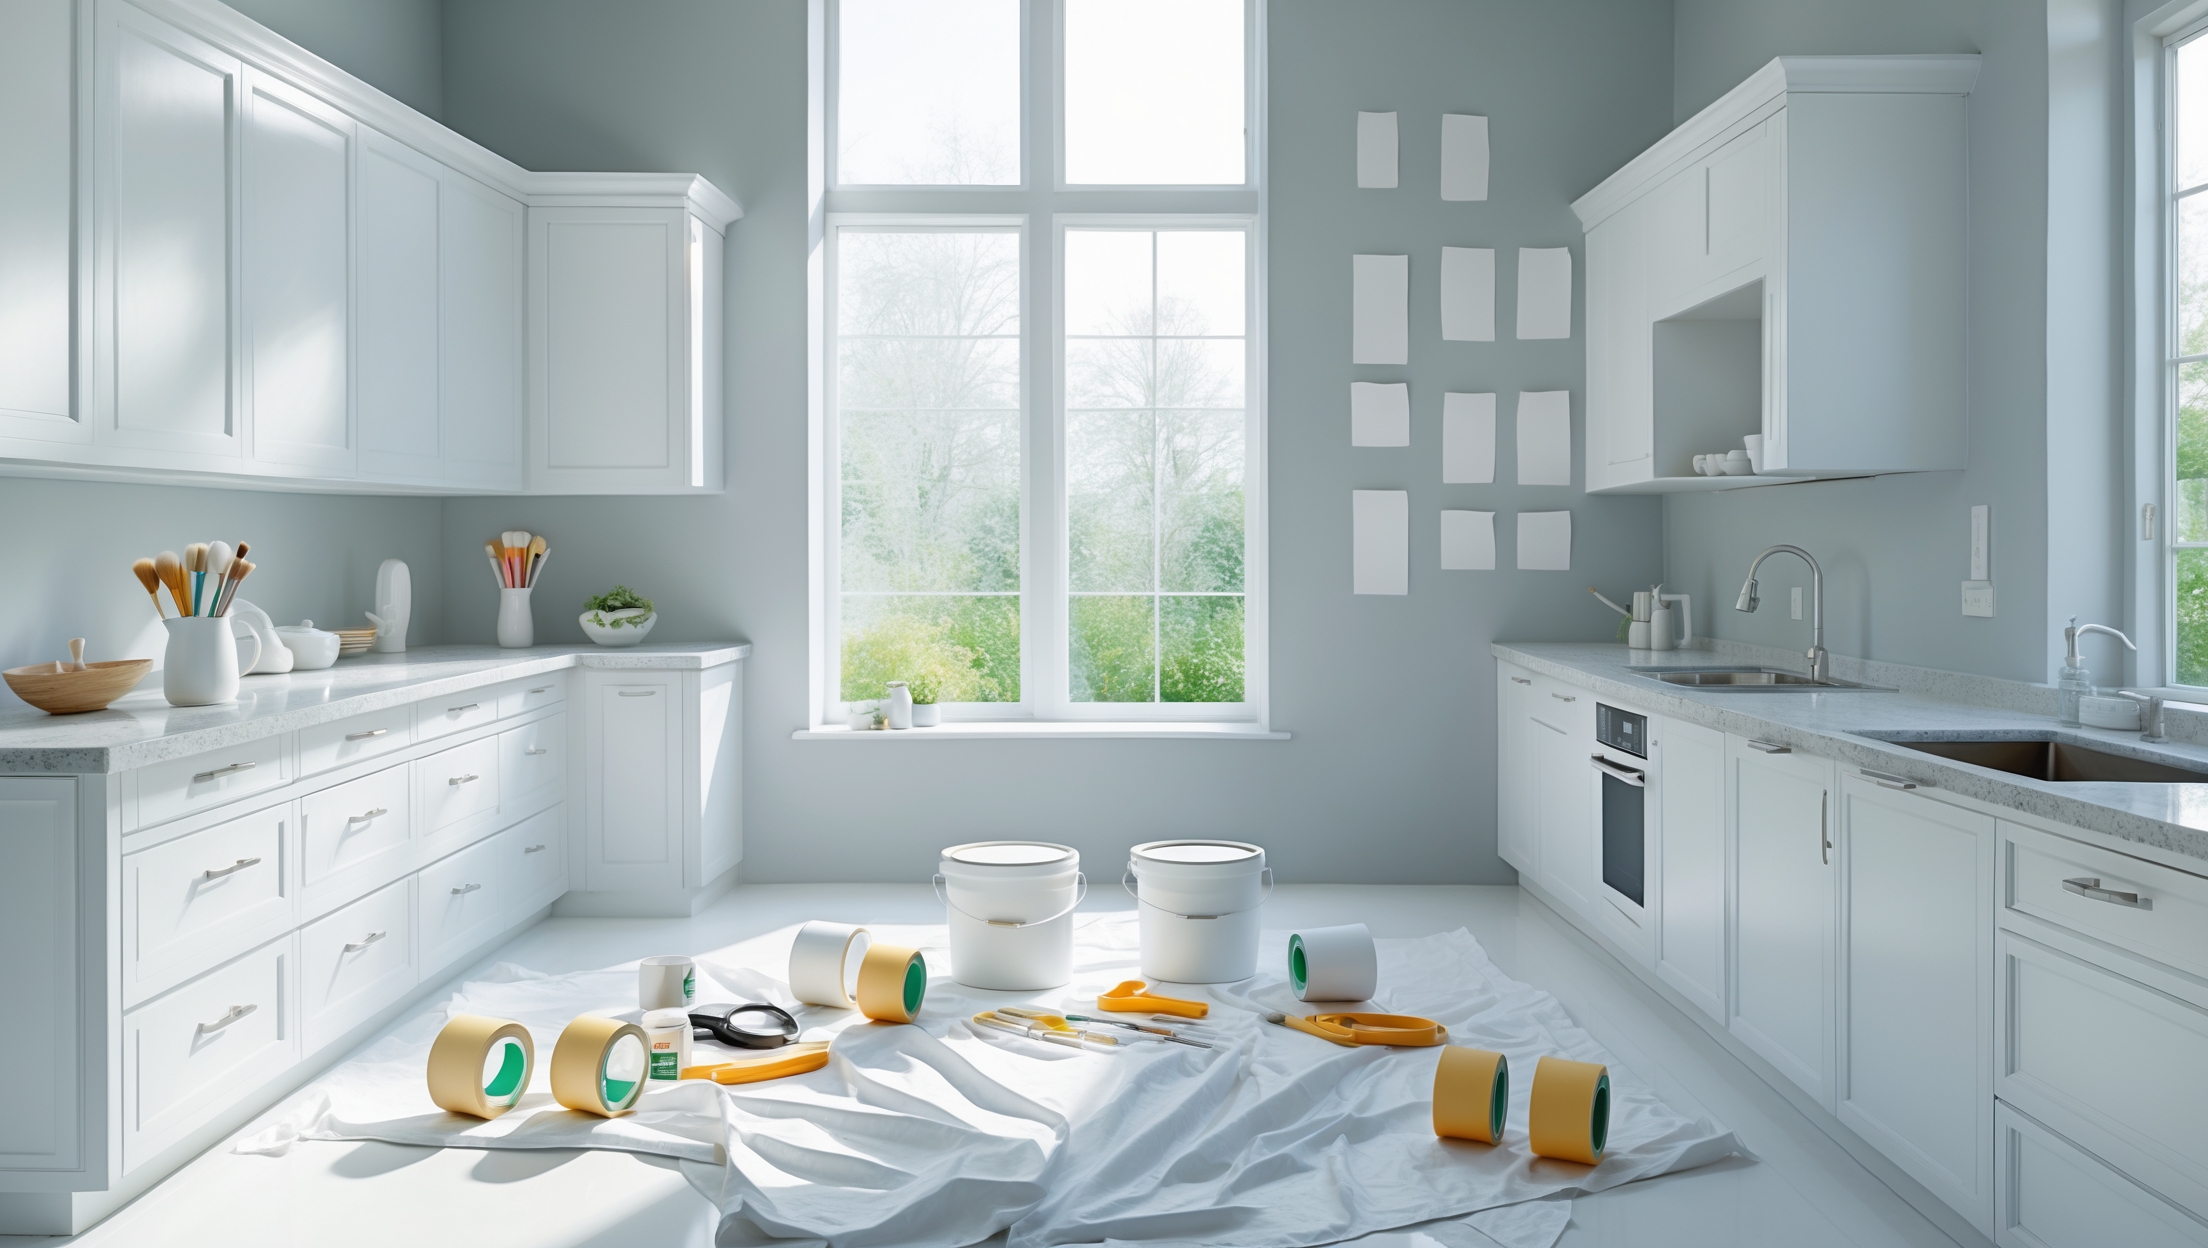
- Painter’s Tape & Plastic Sheeting: $15–$30
- Sandpaper & Sanding Blocks: $10–$20
- Quality Primer: $20–$40
- Cabinet Paint (2 quarts–1 gallon): $30–$80
- High-quality Brushes & Rollers: $15–$40
- Paint Sprayer (optional, rental): $40–$60/day
- Drop Cloths: $10–$20
- New Hardware (optional): $50–$150
Total Estimated DIY Cost: $110–$400, depending on whether you invest in new hardware or rent a sprayer.
Labor Costs: DIY vs. Professional
If you’re considering hiring a professional, expect to pay $1,200–$8,000, depending on kitchen size, cabinet condition, and paint quality. DIYers save significantly on labor but must budget for time—set aside at least 3–5 full days for the complete process, including drying time between steps.
Hidden Expenses to Plan For
- Repairs: Fixing damaged doors or frames can add to costs.
- Ventilation Equipment: Fans or respirators ($20–$50) may be needed for safe indoor work.
- Unexpected Delays: Budget a cushion for extra supplies or touch-ups.
Preparation: The Crucial Foundation for Success
Why Prep Matters
The leading cause of peeling, chipping, or streaky cabinet paint jobs? Skimping on prep. No matter how expensive your paint, results will only be as good as your surface preparation. Cabinets—especially in kitchens—are exposed to grease, fingerprints, and cleaning products that can sabotage paint adhesion.
Step-by-Step Prep Checklist
- Remove All Cabinet Doors, Drawers, and Hardware: Label each door and its hardware for easy reassembly. Use zip bags for screws and hinges.
- Clean Thoroughly: Use a degreaser or TSP substitute to remove all grime and oils. Rinse with clean water and dry completely.
- Repair Damage: Fill dents, holes, and scratches with wood filler. Sand smooth when dry.
- Sand Surfaces: Use 120–150 grit sandpaper to scuff all surfaces. Don’t skip this—even factory-finished cabinets need it.
- Vacuum and Wipe Down: Remove all dust with a vacuum and tack cloth. Residual dust can ruin a paint job.
- Protect Your Kitchen: Cover counters, floors, appliances, and adjacent walls with plastic sheeting and painter’s tape.
- Ensure Good Ventilation: Open windows and use fans to prevent paint fumes from lingering.
Choosing the Right Paint and Tools
Paint Types: What Works Best for Cabinets
- Acrylic Latex: Durable, easy to clean, and lower in VOCs. Works well for most wood and laminate cabinets.
- Alkyd (Waterborne): Hybrid formula offers a hard, smooth finish similar to oil-based paints but with easier cleanup and fewer fumes.
- Oil-Based: Extremely durable but high in VOCs, with longer drying times and tricky cleanup. Usually not recommended for DIYers.
Recommended Sheens: Semi-gloss or satin finishes are both durable and easy to clean.
Primer Selection
A bonding primer is essential—especially for glossy factory finishes, oak grain, or laminate cabinets. Skipping primer is a critical mistake that leads to peeling and uneven color.
Brush, Roller, or Sprayer?
- Brushes: Best for detail work and edges. Use high-quality synthetic bristles.
- Foam Rollers: Excellent for flat surfaces, minimizing brush marks.
- Paint Sprayer: Delivers a factory-smooth finish but requires masking off large areas and good ventilation.
Many DIYers combine brush and roller for the best results.
Common Beginner Mistakes to Avoid
- Not Labeling Doors/Hardware: Leads to frustrating mix-ups during reassembly.
- Rushing the Prep: Incomplete cleaning or sanding will ruin adhesion.
- Skipping Primer: Paint may peel, chip, or show stains through the finish.
- Applying Thick Coats: Results in drips, uneven color, and longer drying times. Always use thin, even coats.
- Neglecting Dry Time: Cabinets must fully cure between coats and before reinstallation—don’t rush!
- Painting Hinges/Hardware: Paint on metal hardware chips quickly and looks unprofessional. Remove hardware before painting.
- Ignoring Ventilation: Paint fumes are hazardous—always work in a well-ventilated area.
Step-by-Step Cabinet Painting Process
1. Remove and Label Everything
Take off all doors, drawers, shelves, and hardware. Label each piece to match its location. Photograph tricky hinge arrangements for reference.
2. Clean and Repair
Degrease all surfaces, rinse, and patch any damage with wood filler. Sand patched areas smooth.
3. Sand and Dust
Lightly sand all surfaces to dull gloss and create a bond for primer. Remove all dust with a vacuum and tack cloth.
4. Protect and Mask
Use painter’s tape and plastic sheeting to shield floors, countertops, and appliances. Mask off any areas you don’t want painted.
5. Prime
Apply a high-quality bonding primer with a brush for edges and a foam roller for flat surfaces. Let dry per manufacturer’s instructions, usually 4–6 hours. Sand lightly with 220-grit sandpaper and wipe clean.
6. Paint
Apply the first coat of cabinet paint using thin, even strokes. Allow to dry completely—typically overnight. Lightly sand and wipe clean before applying a second (and, if needed, third) coat. Let each layer cure fully for the longest-lasting finish.
7. Allow to Cure
After the final coat, let doors and drawers cure in a clean, dust-free area for 3–5 days before reinstalling. This prevents fingerprints and smudges.
8. Reinstall Hardware and Doors
Carefully reattach hardware and doors in their original locations. Make any necessary adjustments to align doors and drawers.
Long-Term Maintenance for Painted Cabinets
Cleaning Tips
- Use only mild soap and water for cleaning. Avoid abrasive pads or strong chemicals, which can scratch or dull the finish.
- Dry surfaces immediately after cleaning to prevent water damage.
- For tough spots, gently rub with a soft-bristled brush and rinse thoroughly.
Preventing Chips and Scratches
- Add soft-close bumpers to doors and drawers to reduce impact.
- Use care when handling pots, pans, and utensils around cabinets.
- Address chips promptly—touch up with leftover paint to prevent moisture intrusion.
Managing Humidity and Temperature
Excess moisture and temperature swings can cause paint to crack or peel. Use exhaust fans while cooking, and avoid prolonged direct sunlight on painted surfaces.
When to Repaint or Refresh
Well-maintained painted cabinets can last 5–10 years before needing a refresh. Signs it’s time to repaint include widespread chipping, fading, or visible stains that resist cleaning. For small blemishes, spot-sand and touch up with matching paint.
Conclusion: Achieving Durable, Beautiful Results
Painting kitchen cabinets is a rewarding home improvement project that can dramatically refresh your kitchen’s appearance on a realistic budget. However, it’s a task where shortcuts can lead to costly headaches—poor adhesion, chipping paint, and a less-than-professional finish. By carefully budgeting for quality materials and tools, dedicating time to meticulous preparation, and following a proven step-by-step process, you can achieve results that rival those of a professional painter. Remember: patience is your best ally. Allow each coat to dry thoroughly, and don’t rush reinstallation. With ongoing care—gentle cleaning, quick touch-ups, and attention to humidity—your newly painted cabinets will stay vibrant and resilient for years. Approach your project with diligence and the right know-how, and you’ll enjoy a kitchen transformation that adds value, beauty, and satisfaction every time you walk in the door.
I noticed you recommend renting a paint sprayer as an optional cost. Would using a sprayer over high-quality brushes or rollers make a big difference for a beginner in terms of finish quality or time saved?
Using a paint sprayer can give you a smoother, more professional finish compared to brushes or rollers, especially on cabinet doors and panels. It also tends to be faster when covering large surfaces. However, there is a learning curve for beginners, and setup, masking, and cleanup take more time. Brushes or rollers can still provide good results if you use high-quality products and take your time, especially for smaller projects or if you’re new to painting.
How much extra time should I budget for proper prep work, like sanding and priming, before I even get to painting the cabinets? I’m worried I might underestimate how long the whole process will take, especially with a busy schedule.
For proper prep work like sanding and priming, it’s smart to set aside at least two to three full days, depending on the size and number of your cabinets. This includes cleaning, removing hardware, sanding, patching, priming, and letting everything dry fully. Prep usually takes longer than expected, but it really pays off in the final result. Spreading the work out over several evenings or a weekend can help if your schedule is tight.
You mention that improper prep work is a common pitfall. What are the most frequently overlooked prep steps, and how can I make sure I’m not missing any crucial details before I start painting my cabinets?
Some of the most frequently missed prep steps include thoroughly cleaning the cabinets to remove grease, lightly sanding all surfaces for better paint adhesion, and filling in dents or cracks. People also often forget to label doors and hardware for reassembly. To stay on track, make a checklist: clean, remove hardware, label parts, sand, fill imperfections, and prime. Double-check each cabinet before you start painting to ensure you haven’t missed anything.
Could you clarify how much time I should realistically set aside for a DIY cabinet painting project in a standard 10×10 kitchen? I’m trying to plan around business hours and don’t want to rush the process.
For a standard 10×10 kitchen, you should set aside about 4 to 7 days for a thorough DIY cabinet painting project. This accounts for removing hardware, cleaning, sanding, priming, painting (including drying time between coats), and reassembling. Most of this time is spent waiting for coats to dry, so try to schedule the work in manageable blocks around your business hours rather than rushing through steps.
I noticed that the supply cost estimates vary quite a bit, especially if you end up renting a paint sprayer. In your experience, is it possible to get a durable, professional-looking finish using only brushes and rollers, or is a sprayer worth the extra investment for most DIYers?
You can absolutely achieve a durable, professional-looking finish with good quality brushes and rollers, especially if you use a high-density foam roller for smooth surfaces. The key is in careful prep, applying thin coats, and sanding lightly between them. A sprayer can offer a smoother finish and save time on larger projects, but for many DIYers, brushes and rollers are more budget-friendly and still yield great results with patience and the right technique.
If I invest in high-quality primer and paint as you recommend, do I also need to splurge on expensive hardware right away, or will the refreshed cabinets still look noticeably updated with the existing handles and knobs?
You don’t have to replace your hardware immediately to see a dramatic improvement. Fresh paint and primer can make your cabinets look completely renewed, even with existing handles and knobs. If your current hardware is in good condition, it will still look great with the updated finish. You can always upgrade the hardware later if you want an extra touch, but it’s not necessary for a refreshed look.
If I’m on a tight budget and want to skip buying new hardware, do you have any tips for making old handles and hinges look updated when I repaint the cabinets?
Absolutely! You can give your old handles and hinges a fresh look by cleaning them thoroughly and using a metal spray paint or specialty hardware paint in a modern finish like matte black, brushed nickel, or brass. Be sure to remove the hardware before painting, and let it dry completely before reattaching. This way, your existing hardware can look new and stylish without the cost of buying replacements.
You mention that the estimated DIY cost for painting kitchen cabinets can range from $110 to $400, but might that budget change significantly if I have a larger kitchen or custom cabinet features? How should I adjust the estimates provided for kitchens that are not a standard 10×10 size?
Yes, the estimated DIY cost can definitely increase if your kitchen is larger than a standard 10×10 or if your cabinets have custom features like intricate molding or extra panels. To adjust the estimate, try calculating the cost per cabinet or per linear foot, then multiply by the number or length in your kitchen. Don’t forget to account for extra paint, primer, and supplies for unique features, as these often require more time and materials.
When you talk about common pitfalls, what are the most frequent mistakes people make during the prep stage specifically, and what are some simple ways to avoid them if I’m doing this on weekends?
During the prep stage, skipping cleaning and not removing grease are common mistakes, as is failing to sand the cabinets properly. Rushing through labeling hardware or not taping off edges can also cause issues later. To avoid these, set aside time each weekend to clean with a degreaser, lightly sand surfaces, label all pieces, and use painter’s tape on areas you don’t want painted. Breaking these tasks into small weekend sessions helps keep the process manageable and ensures better results.
If my cabinets are already painted but the finish is chipping, does following your preparation steps change at all? Should I be sanding down to bare wood, or just smoothing out the rough spots?
If your cabinets are already painted and the finish is chipping, you don’t need to sand down to bare wood unless the old paint is in really bad shape. Focus on sanding the chipping areas until they’re smooth and feather the edges where paint remains. Clean thoroughly and follow the rest of the prep steps before repainting for the best results.
Are there particular types of paint or primer you’d recommend for high-traffic kitchens that see a lot of cooking and moisture, given the wide price range mentioned in your budget breakdown?
For high-traffic kitchens with lots of cooking and moisture, it’s best to use a high-quality, stain-blocking primer—an oil-based or shellac-based type works well to prevent stains and improve adhesion. For paint, choose a durable acrylic enamel or alkyd-based paint in a satin or semi-gloss finish. These resist moisture, grease, and repeated cleaning much better than standard latex paints.
For a student living in an apartment, are there low-odor paint options you recommend for cabinets, or would ventilation still be a big issue? I’d like to avoid lingering fumes if possible.
Low-odor paint options like water-based latex or acrylic paints labeled as low-VOC or zero-VOC are a good choice for apartment settings and help reduce fumes. However, even with these paints, some ventilation is still important to speed up drying and minimize any lingering smell. If possible, keep windows open or use a fan to improve airflow during and after painting.
In your estimate, you include the cost of new hardware as optional. Is replacing hardware usually recommended when repainting cabinets, or are there cases where keeping the existing hinges and handles is just fine?
Replacing hardware isn’t always necessary when repainting cabinets. If your existing hinges and handles are in good shape and still match your updated style, you can definitely keep them, which saves money. However, if they’re worn, outdated, or don’t fit the new look, swapping them out can make a big difference. It really depends on their condition and your design preferences.
The cost range you provided covers a 10×10 kitchen, but my kitchen is a bit larger. Is there a quick way to estimate how much more paint and supplies I’ll need, or should I just budget for the higher end of your estimate?
You can get a fairly good estimate by measuring the total square footage of your cabinet surfaces, including doors and drawer fronts, and comparing it to the 10×10 kitchen size. If your kitchen is about 20% larger, expect to need about 20% more paint and supplies. It’s smart to budget toward the higher end of the estimate to cover any unexpected needs, but calculating based on your actual cabinet area will give you a more accurate budget.
I see the total DIY cost estimate is $110 to $400, but how much time should a beginner expect to spend on the whole project for a 10×10 kitchen, including prep, painting, and cleanup? I want to know if it’s manageable with my class schedule.
For a beginner, painting kitchen cabinets in a 10×10 kitchen usually takes 3 to 5 full days from start to finish. This includes time for prepping (removing doors, cleaning, sanding), priming, painting multiple coats (with drying time between each), and cleanup. You can spread out the work over evenings or weekends, but it’s definitely a time commitment, especially if you have a busy class schedule.
You mention a professional paint job can run up to $8,000, which is a huge difference compared to DIY. For busy families, how much time should I realistically expect to spend on each step of the DIY process for a standard 10×10 kitchen?
For a standard 10×10 kitchen, the DIY painting process usually takes about 2-3 days if you work steadily. Here’s a general breakdown: removing doors and hardware (1-2 hours), cleaning and prepping surfaces (3-4 hours), sanding (2-3 hours), priming (1-2 hours plus drying time), painting (2-4 hours per coat, usually two coats), and reassembling (1-2 hours). Drying times between steps may add extra time, so plan for the project to span over a weekend or several evenings.
Can you clarify what kind of prep work is most often skipped by DIYers that leads to disappointing results later on? I want to make sure I don’t miss anything crucial before I start.
One of the most commonly skipped steps is thoroughly cleaning and degreasing the cabinets before sanding or priming. Residue from cooking oils or cleaners can prevent paint from sticking well. Skipping sanding or not using a good primer are also frequent mistakes—they’re crucial for paint adhesion and a smooth finish. Be sure to remove all hardware, label doors, and fill any dents or holes for best results.
For budgeting purposes, does your estimate cover any repair materials for fixing dents or scratches in cabinet doors, or should those be calculated separately? If repairs are needed, what’s a realistic added cost to expect?
The estimate in the article mainly focuses on painting costs, so materials for repairing dents or scratches—like wood filler or putty—should be budgeted separately. If minor repairs are needed, you can typically expect to spend an extra $20 to $50 on materials, with more extensive fixes possibly increasing that amount. Labor costs could also rise if you hire someone for repairs.
The labor cost difference between DIY and hiring a pro is huge, but what kinds of problems have you seen DIYers run into most often that could end up negating those savings?
One common issue DIYers face is inadequate surface prep, like not cleaning or sanding enough, which can cause paint to peel or chip early. Other frequent problems include streaky finishes from improper brush or roller use, uneven paint application, and missing crucial steps such as priming. Fixing these mistakes often means buying more materials or even starting over, which can eat into the savings compared to a professional job.
I’m curious about the maintenance aspect—can you give more detail on how often cabinets should be touched up or re-painted to keep them looking fresh after following your painting and prep recommendations?
After following the painting and prep steps in the article, you can usually expect your cabinets to stay fresh for about 3 to 5 years before needing a full repaint. Touch-ups for minor dings or chips can be done as needed—typically once a year. Regular cleaning and gentle use will help preserve the finish longer, so full repainting shouldn’t be necessary very often.
The article lists a wide range for professional labor costs. What are the main factors that push cabinet painting projects toward the higher end of that $8,000 estimate? Is it mostly about cabinet material or paint type, or do other issues come into play?
Several factors can drive cabinet painting costs toward the higher end of the range. While the material and paint type do matter, the main contributors are usually the size and complexity of the kitchen, the amount of prep work needed (like repairing damage or heavy cleaning), intricate cabinet designs, and special finishes or techniques requested. Labor costs also increase if removing previous finishes or installing new hardware is involved.
If I want to save as much as possible, are there any steps in your listed process where cutting corners won’t affect the end result much, or is every step really essential for a long-lasting finish?
Every step in the process has a role in ensuring a durable, professional finish, but you can be smart about some areas. For example, you might save by using budget brushes or rollers for primer coats, as long as the finish coats get more attention. However, skipping cleaning, sanding, or priming will almost always lead to problems. Focus your budget and effort on surface prep and quality paint, since those make the biggest difference.
After painting, what specific maintenance steps do you recommend for keeping cabinets looking fresh? For example, are there particular cleaning products or routines that help prevent dings and discoloration over time?
To keep your painted cabinets looking fresh, regularly wipe them with a soft, damp cloth and mild dish soap—avoid harsh chemicals or abrasive scrubbers, which can damage the finish. Quickly clean up spills and splatters to prevent staining. For high-touch areas, consider applying a gentle furniture wax every few months for added protection. Also, try to avoid slamming doors or drawers, as this can chip the paint over time.
What’s the best way to maintain freshly painted cabinets so they actually stay looking flawless for years like you mention? Are there specific cleaning products or routines you recommend to prevent scratches or chipping?
To keep your painted cabinets looking flawless, wipe them regularly with a soft, damp cloth and mild soap—avoid harsh chemicals or abrasive sponges, as these can damage the finish. Always dry surfaces afterward to prevent moisture buildup. For tough spots, use a gentle, non-ammonia cleaner. Try to open doors gently and use handles to minimize fingerprints and wear. Placing felt pads on doors and drawers can also help prevent chips or scratches.
If my cabinets already have a bit of peeling paint and the surfaces aren’t totally smooth, do your suggested prep steps change at all, or is there something extra I need to do so the new paint sticks well and lasts?
If your cabinets have peeling paint and rough spots, you’ll need to spend extra time on prep. Start by scraping off any loose or peeling paint with a putty knife. Then, sand the surfaces thoroughly to smooth out rough areas and feather the edges around any peeled spots. After that, clean the cabinets and use a good quality primer before painting. This will help the new paint stick properly and ensure a longer-lasting finish.
I noticed the estimated cost for new hardware ranges from $50 to $150. Do you think updating hardware is essential for a fresh look, or can repainting the existing ones usually work out well?
Updating the hardware isn’t always essential. If your current handles and knobs are in good shape, repainting them to match your cabinets can give a fresh, cohesive look without much extra cost. However, if the old hardware is outdated, damaged, or doesn’t suit your new color scheme, replacing it can really elevate the final result. It depends on your budget and design goals.
I see the labor cost for professionals can be as high as $8,000. What exactly are they doing differently from a typical DIY approach to justify that price—does it mostly come down to quality of finish or is there more involved?
Professional cabinet painters often justify higher costs through several factors beyond just a smoother finish. They handle extensive prep work, like removing doors, labeling hardware, sanding, and repairing imperfections. Pros also use specialized equipment and paint products for durability, apply multiple coats with expert techniques, and ensure proper curing. Plus, they manage workspace setup and cleanup, minimizing mess in your home. The quality, time saved, and long-lasting results all contribute to the higher price.
You listed optional new hardware as part of the total budget. If I decide to keep my existing hardware, are there any recommended cleaning or prep steps to make sure it still looks good with the newly painted cabinets?
If you’re keeping your existing hardware, it’s a good idea to remove all knobs and handles before painting. Clean them thoroughly with warm, soapy water to remove grease and grime, then dry them completely. For any stubborn residue, a gentle scrub with a soft brush or a diluted vinegar solution can help. Once clean and reattached, your hardware should look refreshed and complement your newly painted cabinets nicely.
If my cabinets already have some minor chipping and peeling, do I need to do more prep than just sanding and using degreaser? Or would that add significant extra cost or steps beyond your estimate?
If your cabinets have minor chipping and peeling, you’ll need to do a bit more prep than just sanding and degreasing. You should scrape or sand off any loose paint, fill in chips with wood filler, and then sand smooth before priming. These extra steps shouldn’t add significant cost—mostly a bit more time and some inexpensive supplies like filler and a putty knife.
Your budget breakdown mentions a big price range for professionals—up to $8,000. What factors actually push a paint job to the higher end? Is it mostly kitchen size, or do other things like cabinet shape or paint choice have a big impact?
Several factors can push the cost of professional cabinet painting toward the higher end besides just kitchen size. Complex cabinet shapes, ornate details, and intricate hardware can increase labor time and costs. The type of paint or finish you select—such as premium, durable paints or specialty finishes—also adds to the expense. If your cabinets need significant prep work or repairs, that can raise the price as well.
I noticed the budget breakdown lists new hardware as optional. In your experience, is it usually worth updating the hardware at the same time, or does it make sense to wait until you see the finished paint job?
Updating your hardware really depends on your preferences and current hardware condition. Many people find it helpful to wait until after painting to see how the cabinets look first; sometimes the old hardware suits the new color perfectly. However, if your existing knobs and pulls are worn or outdated, updating them alongside painting can give your kitchen a more cohesive, refreshed feel. Both approaches work, so it comes down to your budget and style goals.
For the budget breakdown, do you have any tips on where it makes sense to save versus where I shouldn’t skimp, like is it okay to go for cheaper primer or should I always get the best brushes?
It’s smart to prioritize your spending. Don’t skimp on primer—a high-quality primer ensures better adhesion and a smoother finish, especially in kitchens where durability matters. Investing in good brushes or rollers is also worth it, as they leave fewer streaks and last longer. You can save on things like drop cloths, basic sandpaper, and painter’s tape, but it pays off to use top-notch products for the primer and applicators.
The article talks about common mistakes like improper prep and skipping crucial steps. What is the number one prep mistake you see homeowners make, and how can I double-check my own work before painting?
The most common prep mistake is not thoroughly cleaning and degreasing the cabinets before sanding or priming. Residual grease or grime can cause paint to peel or not adhere properly. Before painting, make sure you clean every surface with a degreaser, rinse, let dry completely, and then inspect by running your hand over the surface—it should feel clean and smooth, not sticky or greasy.
Based on your budget breakdown, how many days should I realistically plan for the whole process, from prep to the final coat and letting everything cure, if I’m doing this on weekends?
If you’re working only on weekends, the entire cabinet painting process will typically take about 3 to 4 weekends. That covers prep (cleaning, removing hardware, sanding), priming, applying two coats of paint, drying time between coats, and at least a few days for curing before using your cabinets. Spreading it out helps ensure the best results without rushing any steps.
In the budget section, you mention that renting a paint sprayer is optional. For someone on a tighter budget, is it really worth renting one or can I still achieve a smooth finish without it by just using brushes and rollers?
You can absolutely achieve a smooth finish using high-quality brushes and rollers without renting a paint sprayer. For best results, use a foam roller for flat surfaces and an angled brush for edges and details. Take your time with prep and apply thin, even coats to minimize brush marks. Renting a sprayer can speed things up, but it’s not essential if you’re careful and patient.
You mention new hardware as an optional expense. Is it usually possible to reuse the old hardware, or do most people end up needing to buy replacements once they start the project?
Reusing your old cabinet hardware is often possible, especially if it’s still in good condition and you like the style. Many people successfully clean and reinstall handles and hinges after painting. However, if the hardware is damaged, outdated, or doesn’t match your new cabinet look, you might decide to replace it. It really comes down to the condition and your personal preference.
I’m not sure if I should try spraying or just stick with brushes and rollers. The article mentions renting a paint sprayer, but for someone who’s never used one, is it worth the extra cost and effort? Are the results noticeably better on kitchen cabinets?
Spraying can give cabinets a smoother, more professional finish with fewer brush marks, which is especially noticeable on flat cabinet surfaces. However, it does require extra prep and cleanup, and there’s a learning curve if you haven’t used a sprayer before. If you’re aiming for the best finish and are comfortable practicing, renting a sprayer could be worthwhile. Otherwise, high-quality brushes and rollers can still give great results with careful technique.
For a 10×10 kitchen, realistically how many days should I set aside for a DIY paint job if I’m doing it around a full-time job? I want to plan so I don’t end up with a half-finished kitchen for too long.
For a 10×10 kitchen, painting cabinets yourself while working full-time usually takes about 7 to 10 days. You’ll need to factor in time for prepping, priming, painting multiple coats, and allowing for drying between each step. Working a few hours each evening and extra on weekends is a realistic approach. Setting aside one to two weeks will help you avoid living with a half-finished kitchen.
The article mentioned that skipping steps can lead to costly mistakes. Which step do you most often see DIYers cut corners on, and what’s the impact on the finished cabinets?
DIYers most often rush or skip the prep work, especially cleaning and sanding the cabinets thoroughly. When this happens, paint may not adhere well, leading to peeling, uneven texture, or visible imperfections. Taking time with prep ensures a smooth, durable finish and helps your cabinets look professionally done.
For step-by-step preparation, is there a way to tell if my existing cabinet finish needs extra sanding or a special primer? I want to avoid peeling or chipping later but am not sure how to assess my cabinets’ current condition.
To assess if your cabinets need extra sanding or a special primer, gently scratch a hidden area with your fingernail—if the finish flakes or peels, it will need thorough sanding and possibly a bonding primer. Glossy or laminate finishes usually require extra sanding and a primer made for slick surfaces. Always clean the surface first. If paint beads up during a water droplet test, that’s another sign more prep is needed.
If I end up with brush marks or uneven paint in some spots, what is the best fix to get a smoother finish without having to completely start over?
You can smooth out brush marks or uneven spots without starting over. First, lightly sand the affected areas with fine-grit sandpaper until smooth. Wipe away dust, then carefully touch up those spots with a small roller or high-quality brush, applying thin coats of paint. Let it dry fully between coats to achieve a more even finish.
For ongoing cabinet maintenance after painting, what practical steps do you recommend to prevent paint chipping or fading over time, especially in a busy kitchen with a lot of daily use?
To maintain your painted kitchen cabinets, regularly clean them with a soft cloth and mild soap to remove grease and grime. Avoid using abrasive cleaners or scrubbing pads, as they can damage the finish. Use cabinet door bumpers to soften impacts and prevent chipping. Also, quickly wipe up spills and moisture, and consider applying a clear protective topcoat if the cabinets see heavy use. These habits will help keep your cabinets looking fresh and prevent premature wear.
For maintenance after painting, what’s the best way to keep cabinets looking flawless long-term? Are there specific cleaning products or techniques that help prevent chips and wear, especially in busy kitchens?
To keep your painted cabinets looking great, regularly wipe them down with a soft, damp cloth and mild dish soap—avoid harsh chemicals or abrasive pads, as these can damage the finish. Gently blot spills right away to prevent staining. For busy kitchens, consider adding felt bumpers to doors and drawers to soften impacts. Touch up any small chips quickly with matching paint to prevent them from spreading.
If I want to avoid the extra expense of renting a paint sprayer, can I still achieve a smooth, durable finish with just high-quality brushes and rollers, or are there any techniques that help mimic the look of sprayed cabinets?
You can definitely achieve a smooth, durable finish using high-quality brushes and rollers. Choose a dense foam roller for flat surfaces and a fine, synthetic brush for edges and details. Lightly sand between coats and use thin, even layers of paint. Adding a paint conditioner can help the paint level out, reducing visible brush marks and helping to mimic the sprayed look.
After painting, what kind of maintenance routines would you suggest to keep cabinets looking fresh, especially in a high-traffic kitchen where spills and fingerprints are constant issues?
To keep your painted cabinets looking fresh, wipe them regularly with a damp, soft cloth to remove fingerprints and spills. Avoid harsh cleaners; mild soap and water work well. Quickly clean up any spills to prevent staining. Consider using cabinet bumpers to reduce paint wear from frequent opening and closing. Periodically check for chips or scratches and touch them up promptly with leftover paint to maintain a smooth, clean finish.
After painting, what kind of maintenance do you recommend to keep the cabinets looking new without damaging the finish, especially in households with kids or heavy kitchen traffic?
To keep painted cabinets looking fresh, regularly wipe them down with a soft, damp cloth to remove fingerprints and splatters. Avoid harsh chemicals or abrasive sponges, as these can dull or damage the finish. Use gentle, non-abrasive cleaners if needed. For households with kids or high traffic, consider adding soft-close bumpers and remind everyone to use handles instead of touching painted surfaces directly. Touch up any chips as soon as you notice them to prevent further peeling.
You mentioned maintenance practices to keep cabinets looking flawless. What regular cleaning or touch-up routines would you recommend to prevent paint from wearing down or yellowing over time, especially in a busy kitchen?
To keep your painted cabinets looking fresh, wipe them regularly with a soft, damp cloth and mild dish soap to remove grease and spills—avoid harsh cleaners or abrasive pads. Dry cabinets thoroughly after cleaning. For touch-ups, keep a small amount of your cabinet paint on hand; quickly address chips or scratches to prevent further peeling. Also, ensure good kitchen ventilation to minimize moisture and cooking fumes, which can cause yellowing over time.
You list degreaser, primer, and quality paint as essential materials. Are there specific brands or types that you recommend for kitchen cabinets to ensure durability, particularly in high-traffic small business break rooms where cabinets get daily use?
For high-traffic areas like small business break rooms, it’s worth investing in durable products. For degreasing, Krud Kutter is a popular choice. For primer, Zinsser BIN or KILZ Adhesion primers work well on cabinets. For paint, Benjamin Moore Advance and Sherwin-Williams Emerald Urethane Trim Enamel are both highly recommended for their durability and easy cleaning. These options can help cabinets withstand daily use and frequent cleaning.
I noticed your budget breakdown includes new hardware as optional. If I want to keep my existing hardware, do you have tips for making old knobs and pulls look refreshed without spending much?
You can definitely give your old hardware a fresh look without much expense. Try cleaning knobs and pulls thoroughly with soap and water, and use a bit of vinegar for any stubborn grime. If you want a new finish, spray paint made for metal works well—just remove the hardware, sand lightly, and apply a couple of thin coats. Let everything dry completely before reinstalling.
You mention that renting a paint sprayer is optional and costs around $40–$60 per day. For someone with basic DIY skills, is it usually worth the extra rental expense for a smoother finish, or do quality brushes and rollers work just as well for cabinets?
Renting a paint sprayer can give you a very smooth, professional look, especially on cabinet doors and panels. However, with a bit of patience and the right technique, high-quality brushes and foam rollers can also produce excellent results for most DIYers. If you’re comfortable taking your time and doing some careful sanding between coats, you can save the rental fee and still end up with a great finish.
Could you clarify whether renting a paint sprayer for just one or two days typically speeds up the process enough to offset its extra cost, especially for a smaller 10×10 kitchen?
Renting a paint sprayer for a small 10×10 kitchen can definitely speed up the painting process, especially when it comes to applying even coats quickly. For a small space, one or two days of rental should be enough to handle all spraying tasks. While the rental does add to your costs, the time saved on application and achieving a smooth, professional finish can be worth it, especially if you value efficiency or want the best possible result.
Can you elaborate on maintenance routines to keep cabinets looking fresh after painting? I’m curious about how often touch-ups or thorough cleanings are needed, especially in a busy family kitchen.
To keep your painted kitchen cabinets looking fresh, wipe them down weekly with a soft cloth and a mild soap solution to remove grease and fingerprints. Avoid harsh cleaners that might damage the paint. Plan for a thorough cleaning every few months, especially around handles and high-traffic spots. Touch-ups are usually needed once or twice a year—inspect for chips or scuffs and quickly dab on matching paint to prevent further wear.
If my kitchen is a bit larger than the standard 10×10 size listed here, how much should I budget for extra supplies, particularly paint and primer? Is there a simple way to estimate the cost based on cabinet square footage?
To estimate extra costs for a larger kitchen, start by measuring the total square footage of your cabinet surfaces (including doors and drawer fronts). Most paint and primer cans indicate how many square feet they cover—divide your total cabinet area by that coverage to calculate how many cans you’ll need. Then, multiply by the price per can for a clear budget. It’s wise to add 10–15% extra for touch-ups and errors.
Once the cabinets are freshly painted, what maintenance routines do you recommend to keep them looking good long-term? Are there cleaning products or habits to avoid that could damage the new finish?
To keep your freshly painted cabinets looking great, wipe them regularly with a soft, damp cloth and mild soap if needed. Avoid abrasive sponges, harsh chemicals, or ammonia-based cleaners, as these can dull or damage the finish. Quickly clean up spills and splatters to prevent staining. Also, try to minimize moisture exposure, especially around sinks and dishwashers, and use gentle, non-abrasive cleaners when deeper cleaning is necessary.
The material costs seem to vary a lot depending on whether I upgrade hardware and rent tools. Are there particular areas where it’s truly worth spending more for durability, or is mid-range usually good enough for a home kitchen?
Upgrading certain materials can make a noticeable difference in durability. Investing a bit more in high-quality primer, paint designed for cabinets, and sturdy hinges or drawer slides tends to pay off long-term. For handles or knobs, mid-range options often look and last just fine. Renting tools is often cost-effective unless you plan to use them regularly. Prioritize your budget on paint quality and frequently used hardware for the best balance.
If cabinets are already painted with an oil-based paint, do the prep and paint recommendations in your article change at all, or are there specific steps or products needed for repainting over oil-based finishes?
If your cabinets already have an oil-based paint, you’ll need to take a few extra prep steps. First, thoroughly clean and then lightly sand the surface to remove gloss and help the new paint adhere. If you plan to use a water-based (latex) paint over the oil-based finish, it’s important to apply a high-quality bonding primer first. This will ensure proper adhesion and durability of your new paint job.
When it comes to prepping cabinets, do you find that using a liquid degreaser is just as effective as sanding to remove old grease and residue, or is it really best to do both steps for a lasting paint job?
A liquid degreaser is excellent for removing grease and surface residue, but it doesn’t replace sanding. Degreasing first ensures the surface is clean, while sanding helps the new paint adhere better and smooths out imperfections. For the best, longest-lasting results, it’s recommended to do both steps: clean with a degreaser, let dry, then sand before painting.