
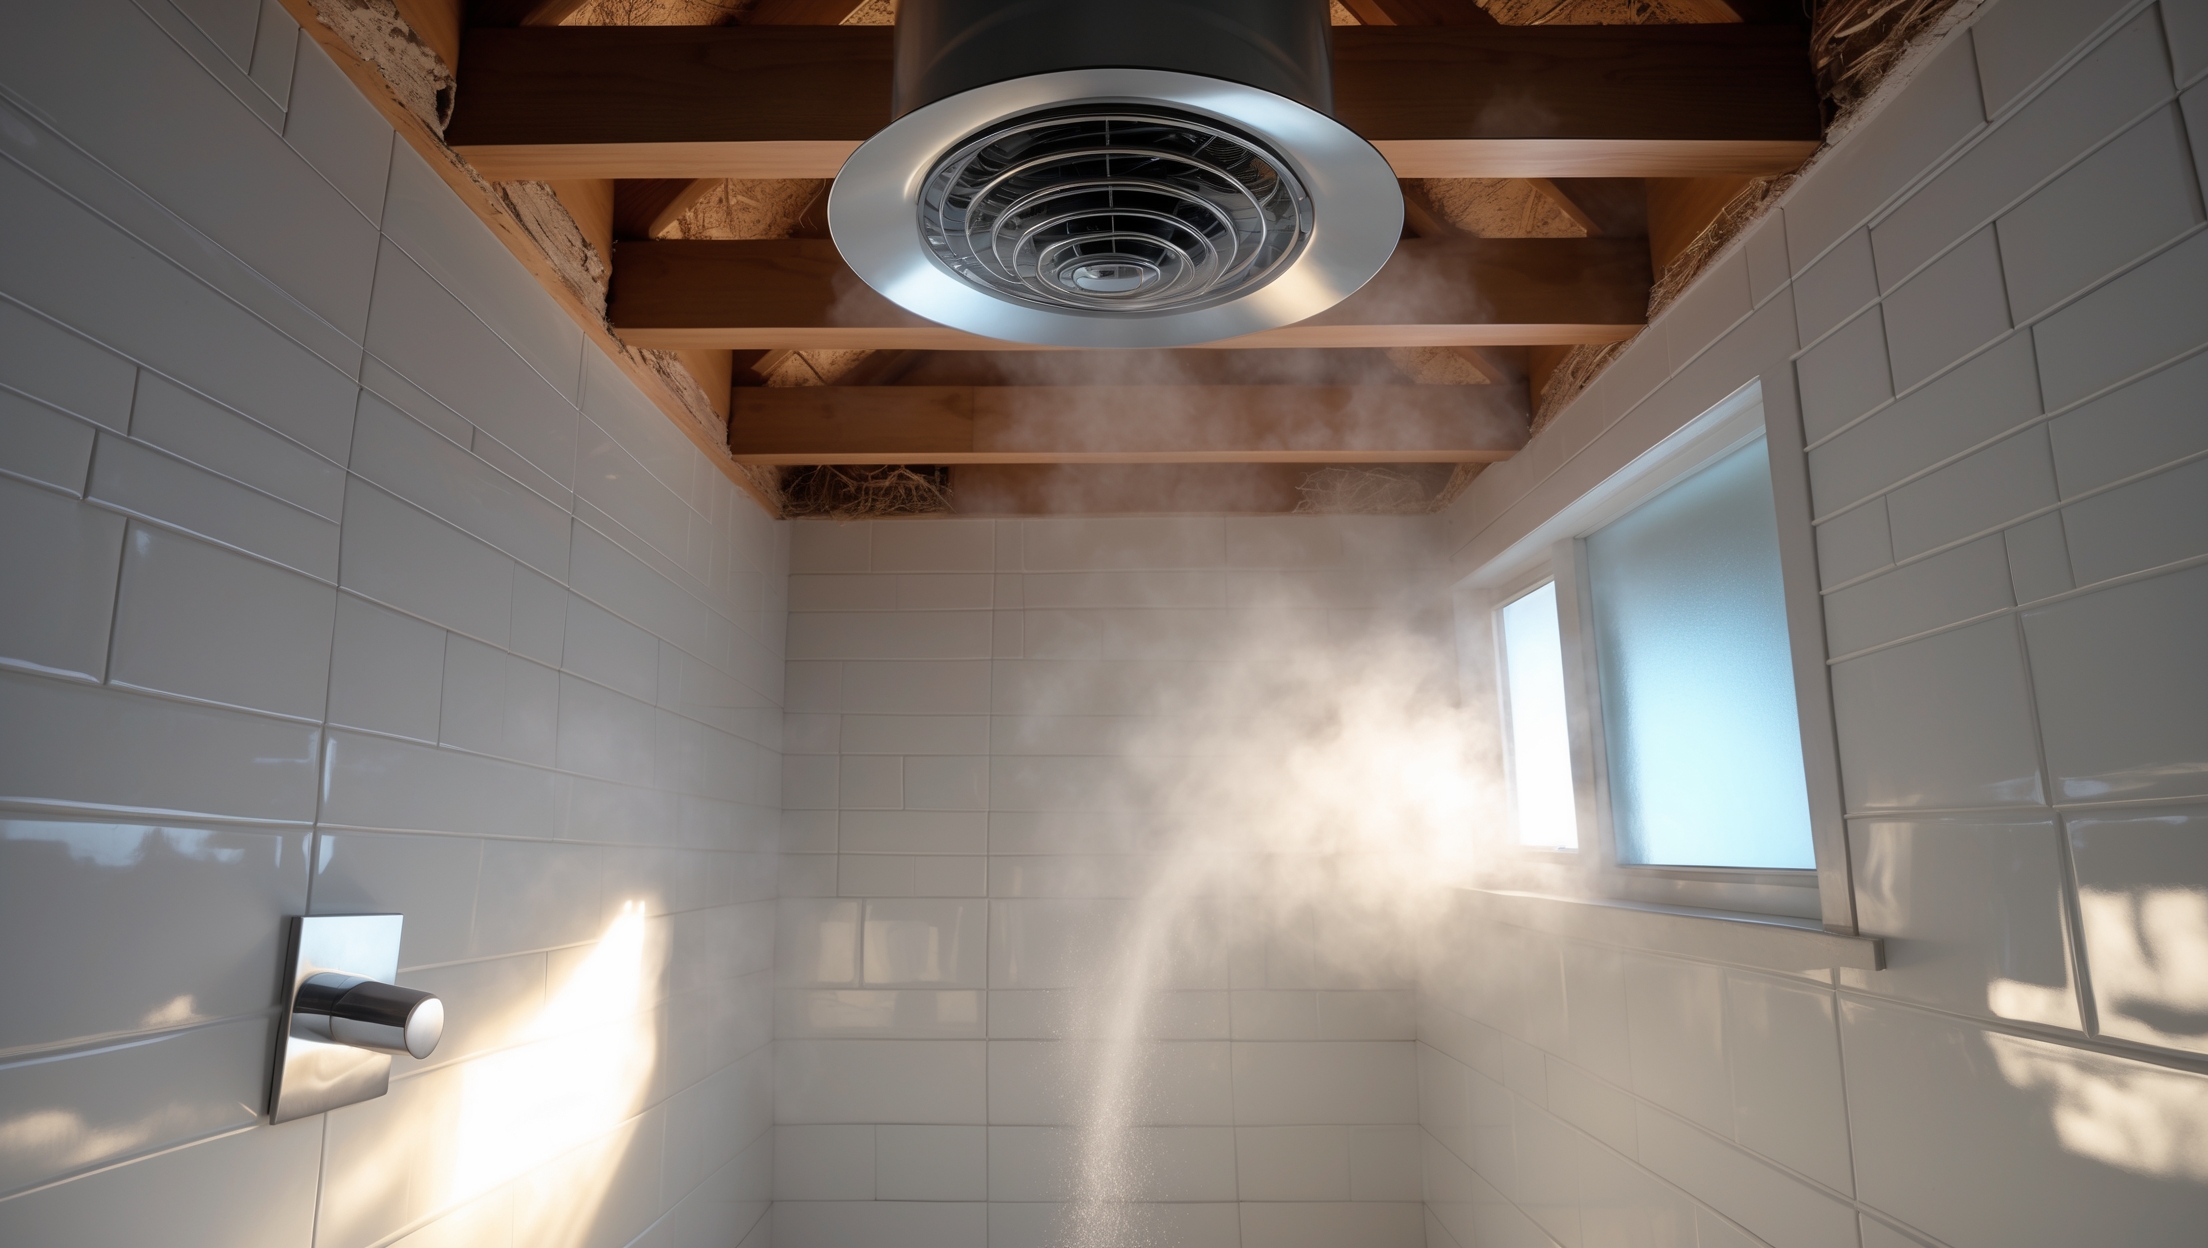
Introduction: Why Bathroom Ventilation Upgrades Matter
Proper bathroom ventilation is far more than a matter of comfort. It’s a critical aspect of home improvement that protects your investment, ensures occupant health, and prevents costly long-term damage. Upgrading an outdated or insufficient bathroom exhaust system is one of the most impactful—and often overlooked—home projects. Yet, many homeowners underestimate the complexity involved, leading to expensive mistakes, compliance headaches, and persistent maintenance issues. Whether you’re tackling a simple fan replacement or planning a full ventilation overhaul, understanding the nuances of this project can save you money, frustration, and even structural repairs down the line. This guide dives deep into the practical details of bathroom ventilation upgrades: avoiding beginner mistakes, budgeting accurately, ensuring compliance with codes, and establishing a maintenance routine that keeps your air fresh and your bathroom mold-free for years to come.
Understanding Bathroom Ventilation: The Basics
How Bathroom Ventilation Works
Bathroom ventilation systems are designed to remove humid air, odors, and airborne contaminants. A properly installed exhaust fan draws moist air from the bathroom and expels it outside through a dedicated duct. This process reduces condensation on walls and ceilings, inhibits mold growth, and protects paint, drywall, and wooden elements from deterioration.
Common Types of Bathroom Ventilation Systems
- Ceiling-Mounted Exhaust Fans: The most common option, installed directly into the ceiling and connected to a duct that vents outside.
- Wall-Mounted Exhaust Fans: Useful when ceiling access is limited; vents directly through an exterior wall.
- Inline (Remote) Fans: The fan unit is located remotely (usually in the attic), which reduces noise in the bathroom. Ideal for multi-bathroom setups.
- Combination Units: Ventilation fans combined with lights, heaters, or humidity sensors for added convenience.
Beginner Mistakes to Avoid in Bathroom Ventilation Upgrades
1. Ignoring Proper Sizing and Capacity
Many homeowners install a fan based on price or appearance, not realizing that underpowered fans won’t adequately remove moisture. Fan capacity is measured in cubic feet per minute (CFM). Bathrooms under 50 sq. ft. require at least 50 CFM; larger or multi-fixture bathrooms need more. Failing to size your fan correctly leads to persistent humidity and mold growth.
2. Poor Ductwork Placement and Installation
Improperly routed or undersized ductwork is a leading cause of ineffective ventilation. Common errors include running ducts too far (reducing efficiency), using flexible ducting with sharp bends, or venting into attic spaces instead of outdoors. These mistakes can create moisture problems elsewhere in your home.
3. Overlooking Local Building Codes and Permit Requirements
Many municipalities have strict codes governing bathroom ventilation. These can include minimum CFM ratings, required duct materials, and direct venting to the outside. Skipping permits or ignoring codes can lead to failed inspections, fines, or forced rework.
4. Failing to Address Electrical Safety
Bathroom environments are wet, and installing electrical equipment in these areas requires GFCI protection and proper wiring. DIY mistakes can create shock hazards or fire risks. Always shut off power at the breaker, and if in doubt, hire a licensed electrician.
5. Neglecting Maintenance Access
Fans and ducts need periodic cleaning to remove dust and prevent mold. Installing a fan in a difficult-to-reach spot or sealing it in with inaccessible ductwork makes future maintenance almost impossible, leading to premature failure.
Budgeting for Bathroom Ventilation Upgrades
Cost Factors
- Fan Unit: $50–$300+ depending on features (basic, quiet, light/heater combos, smart sensors)
- Ductwork and Termination: $30–$100 for materials (rigid or insulated duct, roof/wall cap, backdraft damper)
- Electrical Supplies: $20–$60 (GFCI outlets, wiring, junction boxes)
- Labor: $150–$500+ depending on accessibility, attic work, and electrical upgrades
- Permit Fees: $50–$200 (varies by location)
DIYers can expect total costs from $100–$400 (materials only), while professional installations typically range from $400–$1,200+ for more complex projects.
Hidden and Unexpected Costs
- Repairing drywall, tile, or ceiling damage after installation
- Upgrading electrical circuits for higher-wattage fans or added heaters
- Removing or replacing mold-affected materials discovered during the upgrade
- Roof or siding repairs if vents must be added or moved
Smart Budgeting Tips
- Get multiple quotes for professional work, and ask for itemized pricing
- Factor in permit and inspection fees early in your planning
- Choose a fan with features you’ll actually use—don’t overspend on bells and whistles
- Set aside a contingency fund (10–15%) for surprises
Permits, Compliance, and Code Considerations
When Permits Are Required
Most jurisdictions require permits for electrical work, new vent penetrations, or significant changes to mechanical systems. Even simple fan replacements may require inspection if wiring is altered. Check with your local building department before starting.
Key Code Requirements
- Direct Venting: Fans must vent to the exterior, not into the attic, crawlspace, or soffit (to prevent hidden moisture buildup).
- Minimum CFM: Codes generally require at least 50 CFM for bathrooms up to 100 sq. ft. Larger rooms or those with multiple fixtures may require more.
- Electrical Safety: All wiring must meet National Electrical Code (NEC) standards, including GFCI protection where required.
- Duct Materials: Some codes specify rigid or insulated ducts to minimize condensation and mold in colder climates.
Common Compliance Pitfalls
- Using old or undersized wiring for new, higher-power fans
- Failing to seal duct joints, leading to air leaks and reduced efficiency
- Installing roof or wall caps in prohibited locations (e.g., too close to windows or vents)
- Skipping required inspections, which can delay the sale of your home later on
How to Stay Compliant
- Request and review your city or county’s code requirements before purchasing materials
- Document your installation with photos and receipts for future reference
- If you’re unsure about any aspect of the installation, consult with a licensed contractor or building inspector
Step-by-Step Setup: Upgrading Your Bathroom Ventilation
1. Planning and Assessment
- Measure your bathroom to determine required fan size (use the formula: length × width × height × 0.13 = minimum CFM)
- Identify the best venting route—short, straight runs are most efficient
- Check for attic or exterior access for duct installation
- Turn off electrical power at the breaker before any work begins
2. Removing the Old Fan (if present)
- Remove the fan grill and disconnect wiring
- Unscrew or pry out the old fan housing
- Inspect for any hidden moisture or mold issues
3. Installing the New Fan
- Dry-fit the new fan to ensure it fits your existing opening (enlarge or patch as needed)
- Secure the housing to ceiling joists per manufacturer instructions
- Install vibration isolators or sound-deadening strips for quieter operation
4. Running and Securing the Ductwork
- Use rigid or insulated ducting to minimize condensation and noise
- Limit bends and keep duct runs as short as possible
- Seal all joints with foil tape (not duct tape)
- Route duct to roof or wall cap, ensuring no sagging or kinks
5. Connecting Electrical Wiring
- Match wiring to the new fan’s specifications (consult the wiring diagram)
- Install a GFCI breaker or outlet if required by code
- Test for secure connections before closing up the ceiling
6. Installing the Exterior Vent Cap
- Cut an exterior opening if needed (use a template for accuracy)
- Install the vent cap with a backdraft damper to prevent outside air and pests from entering
- Seal all edges with exterior-grade caulk
7. Testing and Final Inspection
- Restore power and test the fan for proper operation and airflow
- Check for air leaks at all duct connections
- If required, schedule an inspection with your local building authority
Maintenance Best Practices for Bathroom Ventilation Systems
Routine Cleaning
- Clean fan grills every 3–6 months to prevent dust buildup
- Vacuum or wipe down the fan motor and housing yearly
Duct and Exterior Cap Inspection
- Inspect ducting and vent caps annually for blockages (lint, nests, debris)
- Check for signs of condensation or mold on attic ductwork
- Ensure the backdraft damper opens and closes freely
Performance Monitoring
- If mirrors fog up quickly or persistent odors remain, check for reduced airflow
- Listen for unusual noises, which may indicate motor or duct issues
Long-Term Upkeep Tips
- Replace older fans (10+ years) with energy-efficient, quieter models
- Upgrade to fans with built-in humidity sensors for hands-free operation
Case Studies: Real-World Bathroom Ventilation Upgrades
Case 1: Hidden Mold from Improper Venting
A homeowner discovered persistent ceiling stains and odors despite running a bathroom fan daily. Investigation revealed the old fan vented directly into the attic, not outside. Moist air led to extensive mold growth in insulation and rafters. After correcting the ductwork to vent directly outdoors and replacing the fan with a higher CFM model, the issues were resolved—but at a remediation cost of over $3,000.
Case 2: Budget-Friendly Upgrade with Lasting Results
Another homeowner tackled a DIY fan upgrade in a small bathroom. By carefully sizing the fan, using insulated ductwork, and following local code guidelines, the total cost was kept under $250. Improved air quality and quieter operation were immediate benefits, and the project passed inspection on the first try.
Conclusion: Invest in Smart Bathroom Ventilation for a Healthier Home
Upgrading your bathroom ventilation system is one of the best investments you can make for your home’s longevity, your family’s health, and your property’s resale value. By avoiding common mistakes—such as underpowered fans, poor ductwork, and non-compliance with codes—you ensure that your bathroom remains a fresh, healthy, and mold-free space. Accurate budgeting prevents unpleasant surprises, while understanding permit and inspection requirements keeps your project on the right side of the law. The step-by-step upgrade process may seem daunting, but with careful planning and attention to detail, even DIYers can achieve professional-quality results. Most importantly, establishing a solid maintenance routine ensures your system continues to perform at its best year after year. Don’t let bathroom ventilation be an afterthought—make it a priority, and your home will thank you with clean air, dry walls, and peace of mind for decades to come.
You said maintenance prevents mold, but how often should I be cleaning or checking the bathroom fan and its duct? Are there common warning signs I should watch for that might mean it’s not working right?
It’s best to clean and check your bathroom fan and its duct every 6 to 12 months. Look for signs like unusual noises, weak airflow, lingering moisture or odors, and visible dust buildup. If you notice mold around the fan or on bathroom surfaces, it could mean the ventilation isn’t working properly and needs attention right away.
You mention establishing a long-term maintenance routine for the ventilation system. What are the key steps involved in this, and how often should a homeowner perform checks or cleaning to prevent mold and operational issues?
To keep your bathroom ventilation system working efficiently and prevent issues like mold, you should clean the vent cover and fan blades every 6–12 months. Inspect the ductwork for blockages or dust buildup at least once a year. Also, check that the fan is operating smoothly and quietly, and replace filters if your model has them. Regular attention like this will help you spot problems early and extend the life of your system.
I live in an older home and worry about compliance. Since you mention code issues, is there a specific checklist or set of permissions I should look into before upgrading my bathroom ventilation, or does it vary a lot by state?
Building codes and permit requirements for bathroom ventilation upgrades do vary by state and sometimes even by city. Generally, you’ll want to check with your local building department to see if a permit is needed, and ask them about specific ventilation requirements, like duct sizing and exterior venting. Some areas provide a checklist or guidance for these projects, so it’s worth requesting that directly from your local authority before starting any upgrades.
I’m interested in the combination units you mention that include lights or humidity sensors. Are those generally more challenging to install or maintain compared to standard ceiling-mounted exhaust fans?
Combination units with built-in lights or humidity sensors can be a bit more involved to install than basic exhaust fans, mainly because they require additional wiring and sometimes a larger ceiling opening. Maintenance is usually straightforward, though: you might need to replace light bulbs or clean the sensor occasionally. Overall, the added complexity is manageable for most homeowners or a qualified electrician.
For a small business operating in an older building, how can I accurately estimate the cost difference between replacing a basic ceiling-mounted fan versus upgrading to a combination unit with humidity sensors, especially when considering potential code compliance updates?
To estimate the cost difference, start by checking the price of basic ceiling fans compared to combination units with humidity sensors. Then, factor in labor costs, which may be higher for combination units if rewiring or new ductwork is needed. For code compliance, consider possible expenses for bringing older wiring and venting up to current standards. Consulting with a licensed electrician or HVAC contractor will provide specific figures tailored to your building’s condition and local codes.
The article mentions budgeting accurately for ventilation upgrades. Could you give some ballpark figures or examples of hidden costs that might surprise homeowners during a project like this?
Homeowners often expect to pay for the fan and installation, but hidden costs can include upgrading old or inadequate ductwork, electrical work to meet code, repairing wall or ceiling damage after installation, and potential mold remediation if issues are found. Ballpark figures vary widely, but extra expenses can range from $200 to $1,000 or more depending on what surprises are uncovered during the project.
Is it generally more cost-effective over time to install a combination unit with humidity sensors, or would a basic fan with scheduled maintenance be enough to keep a bathroom mold-free?
A combination unit with humidity sensors tends to be more cost-effective over time. It automatically runs when needed, helping prevent mold without relying on regular human intervention. While a basic fan can work if you follow a strict maintenance and usage schedule, there’s a higher risk of forgetting or running it insufficiently, which can lead to mold and costly repairs. The initial investment in a sensor-equipped unit often pays off by reducing maintenance needs and improving long-term protection.
You mention budgeting for upgrades—can you give a ballpark estimate for swapping out a basic ceiling exhaust fan with a more advanced combination unit that includes a heater and humidity sensor, factoring in professional installation?
Swapping a basic ceiling exhaust fan for an advanced combo unit with a heater and humidity sensor usually costs between $350 and $900, including professional installation. The price range depends on the brand, features, and any extra electrical work required. Labor tends to account for $150–$400 of the total. Always get a detailed quote from your installer to avoid surprises.
What are the most common compliance issues homeowners run into when upgrading bathroom ventilation, and are there any practical tips for avoiding unexpected permitting delays or inspection failures during the process?
Homeowners often face compliance issues like improper duct sizing, venting into attics instead of outdoors, and using unapproved materials. Missing out on required permits or installing non-code-compliant fans are also common problems. To avoid delays or inspection failures, review your local building codes before starting, secure all necessary permits early, and use a licensed contractor familiar with current regulations. Documenting the installation process and scheduling inspections in advance can also help things go smoothly.
Could you share some tips on budgeting for a bathroom ventilation overhaul? I’m struggling to figure out typical costs, and I don’t want to be surprised by unexpected expenses like ductwork or electrical upgrades.
When budgeting for a bathroom ventilation upgrade, start by getting quotes from at least two contractors so you can compare prices. Typical costs range widely, but you should account for not just the fan itself, but also possible ductwork modifications and any required electrical upgrades. Ask your contractor to break down costs for each component. Set aside a contingency fund, about 10–20% of your total budget, to cover any surprises that might arise during the project.
For maintenance, do you have suggestions on an easy-to-follow routine for keeping the exhaust ducts and fans working efficiently? I’d like to avoid the long-term issues you described, but I can’t afford to hire professionals every year.
Absolutely, keeping your bathroom exhaust fan and ducts in good shape is manageable on your own. Aim to clean the fan grille and blades every six months—just turn off the power, remove dust with a vacuum or damp cloth, and gently wipe down all accessible parts. For ducts, annually check for dust buildup at the vent openings and clear out any visible debris. Make sure the exterior vent flap isn’t blocked by leaves or dirt. This simple routine will help prevent reduced airflow and moisture problems.
What’s the best way to ensure my new bathroom ventilation system will meet local building codes? Should I check with my city first, or will licensed contractors handle all the compliance issues for me?
It’s wise to do both. Start by checking with your city or local building department to understand specific ventilation requirements, since codes can vary. Then, when hiring a licensed contractor, ask them directly about their experience with local code compliance and request that they secure any required permits. This way, you stay informed and ensure all codes are met during your project.
If someone is planning a full ventilation overhaul versus a simple fan replacement, how much extra time might the more complex project usually take for a hands-on homeowner?
A full ventilation overhaul typically takes quite a bit more time than just swapping out a fan. While a simple fan replacement could take a few hours for a handy homeowner, a full overhaul—like upgrading ductwork, installing new vents, or rerouting exhaust—might take several days depending on complexity and unexpected issues. Planning for at least a weekend or two is wise, especially if you’re learning as you go.
I noticed the article mentions different types of bathroom fans like ceiling-mounted, wall-mounted, and inline fans. How do you decide which type is best for a small, windowless bathroom in an older house?
For a small, windowless bathroom in an older house, the best fan type usually depends on your bathroom’s layout and existing ductwork. Ceiling-mounted fans work well if there’s attic space above, while wall-mounted fans are ideal if venting directly through an exterior wall is easier. Inline fans are quieter and suitable for tight spaces or complex layouts, but may require more installation work. Checking your available space and how easily you can run ducting to the outside will help you choose the most efficient option.
If my bathroom doesn’t have ceiling access, are there major drawbacks to using a wall-mounted exhaust fan compared to a ceiling-mounted one, especially in terms of effectiveness and long-term maintenance?
Wall-mounted exhaust fans can be just as effective as ceiling-mounted models when properly sized and installed, especially if vented directly outside. The main difference is that wall units may be more noticeable and could require more frequent cleaning if they’re closer to splashes or steam. For long-term maintenance, access for repairs is generally easier with wall units, but make sure the wall location allows effective moisture removal.
I’m planning to upgrade the bathroom fans in our shop, but I’m not sure how to determine if the existing ducting is compliant with current codes. Are there common mistakes business owners make during this step that I should watch out for?
When checking if your existing ducting is code-compliant, be sure to look at duct size, material, and the route it takes—codes often require smooth, rigid ducts with minimal turns and direct venting outdoors. A frequent mistake is reusing old, undersized, or flexible ducts that don’t meet airflow or fire safety standards. Also, make sure all joints are properly sealed and supported. Consulting recent local building codes or a professional can help you avoid these common issues.
The article mentions budgeting accurately for bathroom ventilation upgrades—do you have any recommendations for estimating installation costs, particularly when dealing with older homes where ductwork may be outdated or hard to access?
When estimating installation costs for bathroom ventilation in older homes, it’s wise to budget for potential surprises like inaccessible ductwork or asbestos. Get quotes from at least two licensed contractors after they inspect your space—this allows for hidden issues to be identified early. Factor in possible repairs or upgrades to electrical wiring and insulation, as older homes often require extra work. Adding a 15–20% contingency to your estimate can help cover unexpected expenses.
In your guide you mentioned the importance of compliance with building codes during ventilation upgrades. As a small business owner operating from a converted older home, what are the most common code violations I should watch out for when replacing ceiling-mounted exhaust fans?
When replacing ceiling-mounted exhaust fans in a converted older home, common code violations to watch for include insufficient duct sizing, improper venting (like venting into attics instead of directly outdoors), lack of backdraft dampers, and using unapproved electrical connections. Also, ensure any new fan meets local noise and energy efficiency standards. Always double-check local code requirements, as older homes may need specific updates to wiring or fire safety features.
When budgeting for a bathroom ventilation upgrade, how much cost difference should I expect between a basic ceiling-mounted fan replacement and installing an inline (remote) fan for quieter operation in a multi-bathroom scenario?
You can generally expect a ceiling-mounted fan replacement to cost less, typically ranging from $100 to $300 for standard models plus basic installation. Installing an inline (remote) fan system for quieter operation, especially if you’re venting multiple bathrooms, usually ranges from $400 to $900 or more due to additional ductwork, wiring, and labor. The exact difference depends on your home’s layout and whether new ducts are needed, but inline systems are a significant step up in both quiet performance and installation cost.
I’m trying to budget for a full ventilation overhaul in an older home. Do you have advice on estimating hidden costs, like dealing with existing mold or replacing parts of the ceiling or wall that might be damaged during installation?
When budgeting for a full ventilation overhaul in an older home, it’s wise to set aside extra funds for surprises like hidden mold, water damage, or the need to repair walls and ceilings after installation. Consider getting a thorough inspection before starting, as this can reveal issues like deteriorated ductwork or electrical upgrades. Adding a 15–25% contingency to your budget helps cover these potential hidden costs.
When upgrading to an inline (remote) fan setup for less noise, are there specific code compliance challenges to be aware of compared to a standard ceiling-mounted fan, especially regarding ducting through an attic in older homes?
Yes, inline fans can present unique code compliance considerations, especially in older homes. Ductwork must be properly insulated and supported when routed through attics to prevent condensation and meet local building codes. Pay attention to duct length, size, and the type of exhaust vent used to ensure adequate airflow and safe moisture removal. Also, some codes require fire-rated ducting or dampers when passing through certain spaces. It’s wise to check with your local building department before beginning the upgrade.
If my home is older and I’m unsure about its current compliance with modern bathroom ventilation codes, what steps do you recommend to ensure my upgrade won’t run into inspection or permitting problems?
Since your home is older, it’s a good idea to first check with your local building department to learn about current bathroom ventilation codes. Consider having a licensed contractor or inspector evaluate your existing setup for compliance issues. Before starting upgrades, submit your plans for permit approval if required. This way, your project is more likely to meet inspection standards and avoid costly delays or corrections.
If I’m replacing a basic ceiling-mounted fan with a more advanced inline setup to reduce noise, are there special installation steps or pitfalls I should be aware of to avoid costly mistakes or compliance issues?
When switching from a basic ceiling-mounted fan to an inline setup, pay close attention to duct routing—inline fans often require more space and can need longer duct runs. Make sure the new system is properly sized for your bathroom and meets local code for airflow and electrical safety. Use appropriate duct materials and secure airtight connections to prevent leaks. Also, ensure the fan is accessible for future maintenance and check if your area requires a permit or inspection for this upgrade.
What are some typical budget ranges for upgrading an outdated bathroom fan to something like an inline remote fan, especially if attic access is needed for installation? I’m trying to get a sense of the cost difference.
Upgrading to an inline remote bathroom fan, especially with attic access needed, typically costs between $400 and $1,200. The price depends on factors like fan quality, installation complexity, and local labor rates. Basic DIY swaps might be less, but professional installs with attic work and electrical upgrades can reach the higher end. Inline fans are pricier than standard ones, but they offer quieter performance and more flexible placement.
You mention combination ventilation units that include humidity sensors. How reliable are those for maintaining air quality and keeping the bathroom mold-free over the years compared to just a standard exhaust fan?
Combination ventilation units with built-in humidity sensors tend to be more effective over time than standard exhaust fans. The sensors automatically activate the fan when moisture levels rise, ensuring consistent air circulation and reducing the chance of mold growth. They take the guesswork out of when to run the fan, which can improve long-term air quality, provided the unit is maintained and the sensor stays clean.
I know you mentioned budgeting for upgrades, but do you have a ballpark idea of what a typical full ventilation overhaul might cost, including permits and installation, for a standard bathroom?
A full ventilation overhaul for a standard bathroom, including permits and professional installation, typically ranges from $600 to $2,000. The final cost depends on factors like the fan’s quality, ductwork complexity, and local permit fees. It’s wise to get quotes from licensed contractors in your area, as prices can vary depending on labor rates and code requirements.
I understand that poor ventilation can lead to structural damage and mold issues. If I’ve just started noticing some paint peeling and a musty smell, is it already too late to prevent major repairs, or can a fan upgrade still help fix those problems?
It’s not too late to address the issue. Upgrading your bathroom fan can significantly improve ventilation and help stop further moisture buildup, which should prevent more serious damage. However, you’ll also want to repair any existing mold or damaged areas and repaint with mold-resistant paint after the space has dried out. Prompt action now can help you avoid major repairs down the road.
I’m curious if upgrading to a combination unit with humidity sensors is worth the investment for an older home, or if a standard ceiling fan is usually sufficient as long as it’s sized correctly.
Upgrading to a combination unit with humidity sensors can offer better moisture control, which helps prevent mold and damage, especially in older homes that may have less effective ventilation. While a properly sized standard fan is usually sufficient for basic needs, the added features of a humidity-sensing unit can make maintenance easier and reduce long-term issues. The investment often pays off if you’re concerned about excess humidity or want a more hands-off solution.
If I want to replace my current ceiling-mounted exhaust fan with a combination unit that has a heater and humidity sensor, are there any extra steps I should know about for installation or maintenance?
When upgrading to a fan with a heater and humidity sensor, you’ll likely need dedicated electrical circuits since heaters draw more power. Check if your current wiring supports this load. The unit may also need extra clearance in your ceiling and possibly a larger duct size for venting. For maintenance, clean both the fan and heater components regularly, and periodically check the humidity sensor for dust buildup to ensure accurate performance.
I’m a bit confused about the different types of fans mentioned. For an older house with limited attic access, would a wall-mounted fan be easier to install and maintain compared to a ceiling-mounted one?
For an older house with limited attic access, a wall-mounted fan is usually easier to install and maintain than a ceiling-mounted one. Wall-mounted fans can often be fitted directly through an exterior wall, so you avoid the challenge of running ductwork through the attic. This also makes future maintenance simpler since the fan and vent are more accessible.
After installing a new bathroom vent, what kind of ongoing maintenance should I plan for to make sure the system stays effective and doesn’t start causing problems down the road?
To keep your new bathroom vent running efficiently, plan to clean the vent cover and fan blades every few months to prevent dust buildup. Check the ductwork annually for obstructions or moisture issues, and ensure the exterior vent flap opens and closes properly. Replacing or cleaning any filters as recommended by the manufacturer is also important for long-term performance.
Could you clarify what kind of ongoing maintenance a homeowner should expect once the new ventilation system is in place? Are there specific parts that tend to need frequent attention?
Once your new bathroom ventilation system is installed, ongoing maintenance mainly involves cleaning or replacing the fan cover and filters every few months to prevent dust buildup, which can affect performance. It’s also important to check for any signs of mold or moisture around the vent area, and make sure the ductwork remains clear and properly connected. The fan motor and moving parts usually last several years, but you should listen for unusual noises as a sign they may need attention.
I’m interested in combining ventilation and lighting for my small bathroom update. Are there specific code requirements or issues I should be aware of when installing one of these combination units?
When installing a ventilation and lighting combo unit, check that it meets your local building code requirements for bathroom exhaust fans, particularly the minimum CFM (cubic feet per minute) rating for your bathroom size. Also, ensure the unit is rated for use in damp or wet locations, especially if installed above a shower. Electrical wiring should always be completed in accordance with code—often requiring a dedicated circuit and GFCI protection. It’s a good idea to have installation reviewed or performed by a licensed electrician.
What kind of problems could come up if the new fan isn’t properly vented outside? Is venting into an attic or crawl space ever allowed, or is that a common mistake people make during renovations?
If a bathroom fan isn’t vented directly outside, moist air can build up in attics or crawl spaces, leading to mold growth, wood rot, and possible structural damage. Venting into these spaces is not allowed by building codes and is a frequent renovation mistake. Always ensure the fan vents outdoors to avoid expensive repairs and maintain healthy indoor air quality.
I’m planning to upgrade the ventilation in my shop’s restroom, but I’m wondering how to accurately budget for unexpected compliance costs, like permits or code updates. Are there typical hidden expenses small business owners should expect during this type of project?
When budgeting for a restroom ventilation upgrade, it’s wise to set aside extra funds for permit fees, inspections, and possible electrical or ductwork adjustments required by updated codes. Some small business owners also encounter costs for asbestos testing in older buildings, or need to upgrade to meet new energy efficiency standards. Consulting your local building department early can help you identify these hidden expenses and avoid surprises.
When budgeting for a bathroom ventilation upgrade, are there any hidden costs that homeowners often overlook, especially when replacing an old ceiling-mounted fan with a more advanced combination unit?
Homeowners often miss a few hidden costs when upgrading to a more advanced combination unit. These can include electrical rewiring or upgrades for higher power requirements, resizing or rerouting ductwork, patching or repairing the ceiling after removing the old fan, and sometimes upgrading switches or controls. Depending on your local codes, you might also need permits or inspections, which add to the total cost.
I’m considering a combination fan with a humidity sensor. Are these generally more reliable over the long term, or do they tend to require more maintenance compared to standard ceiling-mounted fans?
Combination fans with humidity sensors can be very effective at automatically managing moisture, which helps prevent mold. Generally, they are reliable, but the humidity sensor is an extra component that may need occasional calibration or cleaning to work accurately. Overall, maintenance is only slightly higher than standard ceiling-mounted fans, mainly due to ensuring the sensor stays clean and functional.
The article mentions budgeting accurately for ventilation upgrades. Could you share some ballpark costs for the different types of bathroom ventilation systems, especially if professional installation is needed for things like inline or combination units?
For standard ceiling-mounted exhaust fans, professional installation usually ranges from $150 to $400, depending on features and complexity. Inline fans, which are often quieter and more powerful, typically cost $300 to $800 installed. Combination units with lights or heaters are on the higher end, often $400 to $1,000 including installation. Actual costs can vary based on your local labor rates, wiring needs, and venting requirements.
You mention that proper venting to the outside is crucial. What are some common mistakes homeowners make that result in improper venting, and how can these be avoided during a DIY installation?
Common mistakes include venting bathroom fans into attics, crawl spaces, or soffits instead of directly outside, which can lead to moisture damage and mold. Homeowners sometimes use flexible ducting with too many bends, reducing airflow, or fail to seal duct joints properly. To avoid these issues, always use smooth, rigid ducting routed directly outdoors, minimize bends, seal all joints tightly, and ensure the exterior vent hood is installed correctly with a backdraft damper.
For older homes where ceiling or wall access is difficult, how does an inline system compare cost-wise and installation-wise to traditional exhaust fans? Would this be a practical upgrade for a single small bathroom?
Inline systems can actually be a smart choice for older homes with challenging access, since the fan can be mounted remotely in the attic or another accessible space. This often reduces the need for major ceiling or wall work. Installation might cost more than a basic exhaust fan due to extra ducting and the remote fan unit, but for a single small bathroom, the higher upfront cost can be offset by quieter operation and less structural disruption.
Once the ventilation upgrade is done, what are the most important maintenance routines to follow so I don’t run into mold or fan problems later on? I’m trying to avoid any issues that might slip under the radar.
After upgrading your bathroom ventilation, make sure to clean the fan cover and blades every few months to prevent dust buildup. Check that the fan is operating efficiently and listen for unusual noises. Inspect and clean or replace filters if your system has them. Also, periodically look for signs of moisture or mold around vents and ceilings. Running the fan during and after showers will help keep humidity in check and reduce mold risk.
Can you elaborate on how to maintain a ceiling-mounted exhaust fan to keep it running efficiently and prevent mold? I want to set a good routine but am not sure how often to clean or what parts need regular attention.
To keep your ceiling-mounted exhaust fan efficient and prevent mold, clean the fan cover and blades every three to six months. Turn off power, remove the cover, and use a vacuum or damp cloth to clear dust from the cover, blades, and motor housing. Check for any blockages in the vent duct as well. Make sure the fan runs for at least 15–20 minutes after showers to remove moisture. Regularly inspect for unusual noise or reduced airflow, which could signal deeper issues.
The article mentions budgeting for a bathroom ventilation upgrade, but what are some common hidden costs homeowners should watch out for during installation and compliance checks?
Some hidden costs to look out for include unexpected wiring or electrical upgrades, repairing damage if old fans or ducts are difficult to remove, and fixing any issues found during inspections (like mold or water damage). Sometimes, you may also need to upgrade ductwork to meet current building codes, which can add to the expense. Permits and post-installation compliance checks can also come with fees.
You mentioned the importance of compliance with codes during ventilation upgrades. What are some common mistakes homeowners make that cause code issues, and how can I double-check that my installation will pass inspection?
Common mistakes include installing ducts that are too small, venting fans into attics instead of outside, using improper materials, or not providing enough airflow per code requirements. To double-check your installation, review your local building codes, use manufacturer instructions, and consult with your inspector before and after installation. Taking photos during key steps can also help document compliance.
Could you elaborate on what the most common compliance issues are when upgrading from a basic ceiling-mounted exhaust fan to something like an inline or combination unit? I want to avoid any setbacks with inspections for my remodeling clients.
When upgrading from a standard ceiling-mounted exhaust fan to inline or combination units, common compliance issues include incorrect duct sizing, inadequate venting to the exterior rather than into attics or crawlspaces, lack of backdraft dampers, and improper electrical connections. Also, ensure noise levels and airflow rates meet local code requirements. Double-check labeling, manufacturer specs, and local code updates before inspections to avoid delays.
The excerpt discusses ceiling-mounted, wall-mounted, and inline fans. Is there a noticeable difference in how effective these options are at controlling humidity and preventing mold, especially in bathrooms with limited space?
Ceiling-mounted and inline fans generally move air more efficiently because they can be placed near the shower or central bathroom area, which helps manage humidity and mold risk better. Wall-mounted fans work well for smaller bathrooms or where attic access is limited, but their effectiveness can depend on the fan’s power and placement. Inline fans are especially useful for tight spaces since the motor is located outside the bathroom, reducing noise and saving space.
For an older house that only has a window and no existing fan, what would be the first step to bring the ventilation up to standard without a huge renovation?
For an older house with just a window, the first step is to assess if a window alone meets your local building codes for ventilation. If not, consider installing a through-the-wall exhaust fan, which usually requires less renovation than ceiling-mounted options. This approach improves ventilation and can often be retrofitted without major structural work. Remember to choose a fan rated for the bathroom size and check electrical requirements.
I’m about to upgrade my bathroom exhaust fan and noticed you mention code compliance as a common pitfall. What are the most important local or national code requirements I should double-check before starting the project?
Before upgrading your bathroom exhaust fan, be sure to check that the fan vents directly outdoors—not just into the attic or another space. Make sure the fan meets the minimum airflow rate, usually at least 50 CFM for bathrooms. Also confirm that the wiring and electrical connections follow local electrical codes, and that the installation meets any specific requirements for fire safety and moisture control. Local codes may have additional rules, so a call to your building department can be helpful.
You noted compliance headaches with bathroom ventilation projects. What specific building codes or permits should I check for before replacing an old exhaust fan in an older home?
Before replacing an old bathroom exhaust fan, check your local building codes for requirements on fan size (measured in CFM), venting methods (usually to the outside, not just the attic), and proper electrical connections. Many areas require a permit for electrical work, even for fan replacements. It’s also wise to see if your municipality has specific rules about fire-rated ducting or noise limits for older homes.
In the section about compliance headaches, could you clarify which specific building codes or permit requirements small business owners should be most aware of when upgrading a bathroom ventilation system in a commercial space?
Small business owners should pay close attention to local building codes regarding ventilation rates (measured in CFM), which often follow standards like ASHRAE 62.1 for commercial spaces. Permits are typically required for electrical or ductwork changes, so check with your city or county permitting office. Also, be aware of fire safety requirements, such as using fire-rated ducts in certain locations, and always ensure exhaust is vented outside, not into ceilings or attics.
You mention that budgeting accurately is crucial for a successful ventilation upgrade. Are there any hidden costs that tend to surprise homeowners when replacing an old fan or adding ductwork to meet code requirements?
Yes, there are some hidden costs that often catch homeowners off guard. These can include electrical upgrades if your current wiring isn’t sufficient for a new fan, repairing or replacing drywall after installation, and potential roof or exterior wall repairs when new ductwork is added. Also, if your home has complex layouts or older construction, labor costs might increase due to additional work needed to access tight spaces or correct previous installations.
If someone is planning a combination unit that includes a humidity sensor, are there common compatibility or installation issues to watch out for compared to installing a basic exhaust fan?
When installing a combination unit with a humidity sensor, wiring can be more complex than with a basic fan. Ensure your electrical setup supports the sensor’s needs, and double-check compatibility with existing switches or smart home systems. Some units require specific duct sizes or airflow rates, so verify these before purchase. Always follow manufacturer instructions to avoid improper operation or false triggering of the sensor.
I noticed you listed several types of fans, including inline fans and combination units. Is there a big price difference between these options, and how do you know which one is most cost-effective for a small bathroom?
Inline fans tend to be a bit more expensive than simple ceiling-mounted fans because they’re usually quieter and can ventilate multiple areas. Combination units, which include features like lights or heaters, also cost more upfront. For a small bathroom, a basic ceiling-mounted or a simple combination unit is often most cost-effective, especially if you don’t need extra features. Consider your budget and whether you want added functions like heating or lighting before deciding.
For combination units that include features like humidity sensors and heaters, are there additional maintenance considerations or long-term costs I should be aware of compared to standard exhaust fans?
Combination units with humidity sensors and heaters do have a few extra maintenance needs compared to standard exhaust fans. The sensors may require occasional cleaning to keep them working accurately, and the heater elements should be checked for dust buildup to prevent overheating or reduced efficiency. Replacement parts, such as sensors or heater components, can add to long-term costs if they fail. Regular cleaning and annual inspections help keep these features working well and can minimize unexpected expenses.
For a homeowner who just wants to do a simple fan replacement, is it necessary to establish a routine maintenance plan, or is this more crucial for more complex systems like combination units or inline fans?
For a basic bathroom fan replacement, routine maintenance is still beneficial, though it doesn’t have to be complex. Simple tasks like cleaning the fan grill and checking for dust buildup every few months can maintain performance and extend lifespan. More advanced maintenance routines are generally more important for complex systems like combination units or inline fans, which have more components and higher usage demands.
You mentioned budgeting accurately for a bathroom ventilation upgrade. Could you give examples of unexpected costs that homeowners might overlook during the process?
Some unexpected costs homeowners often overlook include electrical upgrades if the existing wiring can’t support a new fan, repairing drywall or ceiling after installation, and potential mold remediation if previous ventilation was inadequate. You might also need to budget for new ductwork or roof venting if your current setup doesn’t meet code. It’s wise to set aside a contingency fund for these surprises.
When budgeting for a bathroom ventilation overhaul, what hidden costs are frequently overlooked? For example, do upgrades often require upgrading electrical wiring or replacing old ductwork that isn’t up to current standards?
When budgeting for a bathroom ventilation upgrade, people often overlook costs like upgrading electrical wiring to handle more powerful fans, replacing outdated or undersized ductwork, repairing or patching walls and ceilings after installation, and bringing vents up to current code requirements. Sometimes, unexpected mold or moisture damage is also discovered during the process, which can increase expenses.
I’m planning to upgrade my old bathroom fan and I’m a bit confused about code compliance. Are there specific rules I should watch for regarding duct length or venting direction, especially if I switch from a ceiling-mounted to a wall-mounted exhaust fan?
When upgrading your bathroom fan, it’s important to ensure the duct runs straight to the outdoors—never vent into attics or crawl spaces. Most codes limit duct length (often around 25 feet, less with bends), and require smooth, rigid ducts for efficiency. If you switch to a wall-mounted fan, make sure the vent hood is properly sealed and positioned away from windows or intakes. Always check your local building codes, as requirements can vary by area.
After upgrading to a new combination unit with heat and humidity sensors, what kind of maintenance routine should I follow to keep it running well and prevent mold or odor issues from developing later?
To keep your new combination unit running smoothly and avoid mold or odor issues, make sure to clean or replace the filters every few months, wipe down the vent covers, and vacuum any dust from the intake and exhaust grilles. Test the humidity and heat sensors periodically to ensure they’re responsive, and check for any unusual noises or decreased airflow. Scheduling a professional inspection once a year can also help catch potential problems early.
The article mentions ceiling-mounted, wall-mounted, and inline fans. For a small bathroom with a lot of moisture, is there a noticeable difference between installing a ceiling vs. a wall-mounted exhaust fan in terms of effectiveness and long-term maintenance?
For a small, moisture-prone bathroom, both ceiling- and wall-mounted exhaust fans can be effective, but there are some differences. Ceiling-mounted fans are usually best at removing steam directly above showers and baths, especially if vented straight outside. Wall-mounted fans are easier to install if venting through the roof isn’t practical. In terms of maintenance, both types need regular cleaning, but wall-mounted units can be a bit easier to access. Choose based on your bathroom’s layout and where you can vent the air most efficiently.
You mention that combination units can come with humidity sensors. Do these sensors actually help reduce maintenance needs or just add more things that can break down over time?
Humidity sensors in combination units can be quite helpful for reducing maintenance related to mold and excess moisture, since they automatically activate the fan when needed. This can keep your bathroom drier with less effort. However, they are an additional electronic component, so there’s a small chance they could require repair eventually. Generally, the benefits in convenience and improved air quality outweigh that risk for most users.
The article mentions ensuring compliance with codes during bathroom ventilation upgrades. Could you clarify which specific building codes or best practices homeowners should be aware of when installing or replacing exhaust fans, especially in older homes?
When upgrading bathroom ventilation, homeowners should check their local building codes, which often follow the International Residential Code (IRC). The IRC typically requires exhaust fans to vent outdoors (not into attics), specify minimum airflow (usually 50 CFM), and include proper electrical wiring and GFCI protection. For older homes, double-check that wiring is up to current standards and ensure ducts are upgraded to prevent moisture damage. Always consult your local permitting office, as local codes may have additional requirements.
How do I know if my current exhaust fan is venting properly outside? I want to avoid humidity problems but I’m not sure what signs to look for before investing in an upgrade.
To check if your exhaust fan is venting properly outside, look for signs like no steam or lingering odors after showers, which indicate effective moisture removal. You can also check the exterior vent while the fan is running—feel for airflow and listen for the fan. If you see moisture buildup, mold, or peeling paint in the bathroom, that’s a sign the fan may not be venting effectively and could need attention or upgrading.
I’m considering an inline fan since noise is a big concern for my customers. Does installing an inline (remote) fan take more time or disrupt business operations longer than a regular ceiling-mounted exhaust fan?
Installing an inline (remote) fan can take a bit more time compared to a standard ceiling-mounted exhaust fan. This is mainly because the inline fan is typically placed in an attic or a remote location, requiring additional ductwork and careful planning for the fan’s placement. However, with good scheduling and coordination, disruption to business operations can be minimized, especially if work is done during off-hours.
If I want to upgrade my bathroom ventilation myself, how do I make sure the new fan is actually compliant with current building codes? Are there common code issues people run into that I should watch out for during installation?
To ensure your new bathroom fan complies with building codes, start by checking your local code requirements—these often cover minimum airflow (CFM), proper duct sizing, and venting to the exterior. Common issues include using ducts that are too small, venting into attics instead of outside, and improper electrical connections. Carefully follow manufacturer instructions and consider getting your work inspected for peace of mind.
How difficult is it to switch from a wall-mounted exhaust fan to a ceiling-mounted one? The article lists both, but I’m not sure which is better for preventing condensation in a small bathroom.
Switching from a wall-mounted to a ceiling-mounted exhaust fan can be a bit challenging, especially if new ductwork or electrical wiring is needed through the ceiling and roof. Ceiling fans generally do a better job at removing warm, moist air directly upwards, which helps prevent condensation, especially in small bathrooms. However, installation complexity and cost are higher for ceiling units. If you’re concerned about condensation, a ceiling-mounted fan is usually more effective, but you may want to consult a professional for installation.
You mentioned combination units with humidity sensors—are these actually more effective for preventing mold, or do they just offer convenience compared to standard exhaust fans?
Combination units with humidity sensors can be more effective at preventing mold because they automatically turn on when moisture levels rise, ensuring excess humidity is quickly removed. This proactive operation helps maintain a drier bathroom environment compared to standard fans that rely on manual use. While they do add convenience, their main advantage lies in reducing the chance of mold growth by responding directly to humidity changes.
When planning out my budget for a bathroom ventilation upgrade, what hidden costs should I look out for? The article mentions avoiding expensive mistakes, so I want to make sure I don’t miss anything major that could come up during installation.
Some hidden costs to watch for include the need for unexpected electrical upgrades if your wiring isn’t up to code, possible repairs to walls or ceilings after fan installation, and the cost of extending or rerouting ductwork to reach an exterior vent. You might also need permits, which can add to the overall expense. Having a professional inspection before starting can help you identify these potential costs ahead of time.
You mentioned that a lot of homeowners underestimate the complexity of upgrading bathroom ventilation. What are some hidden compliance issues or code requirements that tend to catch people by surprise during these upgrades?
One issue that often surprises people is the requirement for venting exhaust fans directly outdoors, not just into an attic or crawl space, which is a common code violation. Many codes also specify minimum duct sizes and limit the length or number of bends in the ductwork. Some areas require fans with specific energy ratings or humidity sensors. Homeowners can also overlook the need for permits or inspections, which your local authority might require.
The article mentions that homeowners often underestimate the complexity and compliance requirements of bathroom ventilation upgrades. Can you explain what some of the most common code violations are when installing a new exhaust fan?
Some common code violations when installing a new bathroom exhaust fan include venting the fan into an attic or crawl space instead of directly outdoors, using undersized or improper ductwork, failing to install a backdraft damper, and not providing the required electrical disconnect. Also, many forget to use GFCI protection when necessary. Ensuring proper installation and following local building codes can help avoid these issues.
In situations where humidity has already caused some damage to drywall or wood trim, is it usually better to address those repairs before or after upgrading the exhaust system? Wondering about the best sequence to avoid recurring issues.
It’s best to upgrade or repair the exhaust system first to make sure you’re properly controlling humidity moving forward. That way, any new repairs to drywall or trim won’t be exposed to further moisture damage. Once the ventilation is working well, you can safely address existing damage, knowing the problem is much less likely to return.
You talked about code compliance being a common headache during bathroom ventilation upgrades. Can you clarify what some of the most overlooked local code requirements are that could trip up a first-time homeowner?
Some often-overlooked local code requirements include the minimum duct size for the fan, the type of duct material allowed, and where the vent exhausts. For example, many codes prohibit venting directly into attics or crawl spaces; the exhaust must terminate outside. Also, some areas require fans to have specific CFM ratings based on the bathroom’s size, and certain jurisdictions may require a permit or inspection after installation.
For a bathroom without any current exhaust system, what are the most common mistakes homeowners make during a first-time installation, especially when it comes to meeting code requirements in older houses?
Homeowners often underestimate the importance of proper vent placement and sizing, leading to poor moisture removal. In older houses, a common mistake is venting into attics or crawlspaces instead of directly outdoors, which can cause mold or structural damage. Another issue is failing to upgrade electrical wiring to safely support the fan. Always check local code for minimum airflow rates and ensure the exhaust path is short, sealed, and terminates outside.
If I’m trying to budget for replacing my old ceiling-mounted fan, what kind of hidden costs should I watch out for besides the fan unit itself? Are there typical surprises that come up during installation?
When budgeting for a new ceiling-mounted bathroom fan, keep in mind potential hidden costs like upgrading outdated wiring, repairing or replacing ductwork, patching drywall, or adding a new exterior vent if the current one is inadequate. Sometimes, installers discover moisture damage or mold that needs fixing. Be prepared for labor charges to rise if the attic is hard to access or if the fan size requires enlarging the ceiling opening.
The article talks about establishing a good maintenance routine after upgrading. Could you share some practical tips on what tasks should be done and how often to keep the new ventilation system working efficiently?
To keep your upgraded bathroom ventilation system running efficiently, clean or replace the fan filter every 3–6 months, depending on dust buildup. Wipe fan blades and covers with a damp cloth quarterly to prevent mold and grime. Check the vent duct annually for blockages or debris, and make sure the exterior vent flap moves freely. Test the fan’s airflow periodically by holding tissue near it—if suction is weak, it may need cleaning or professional servicing.