
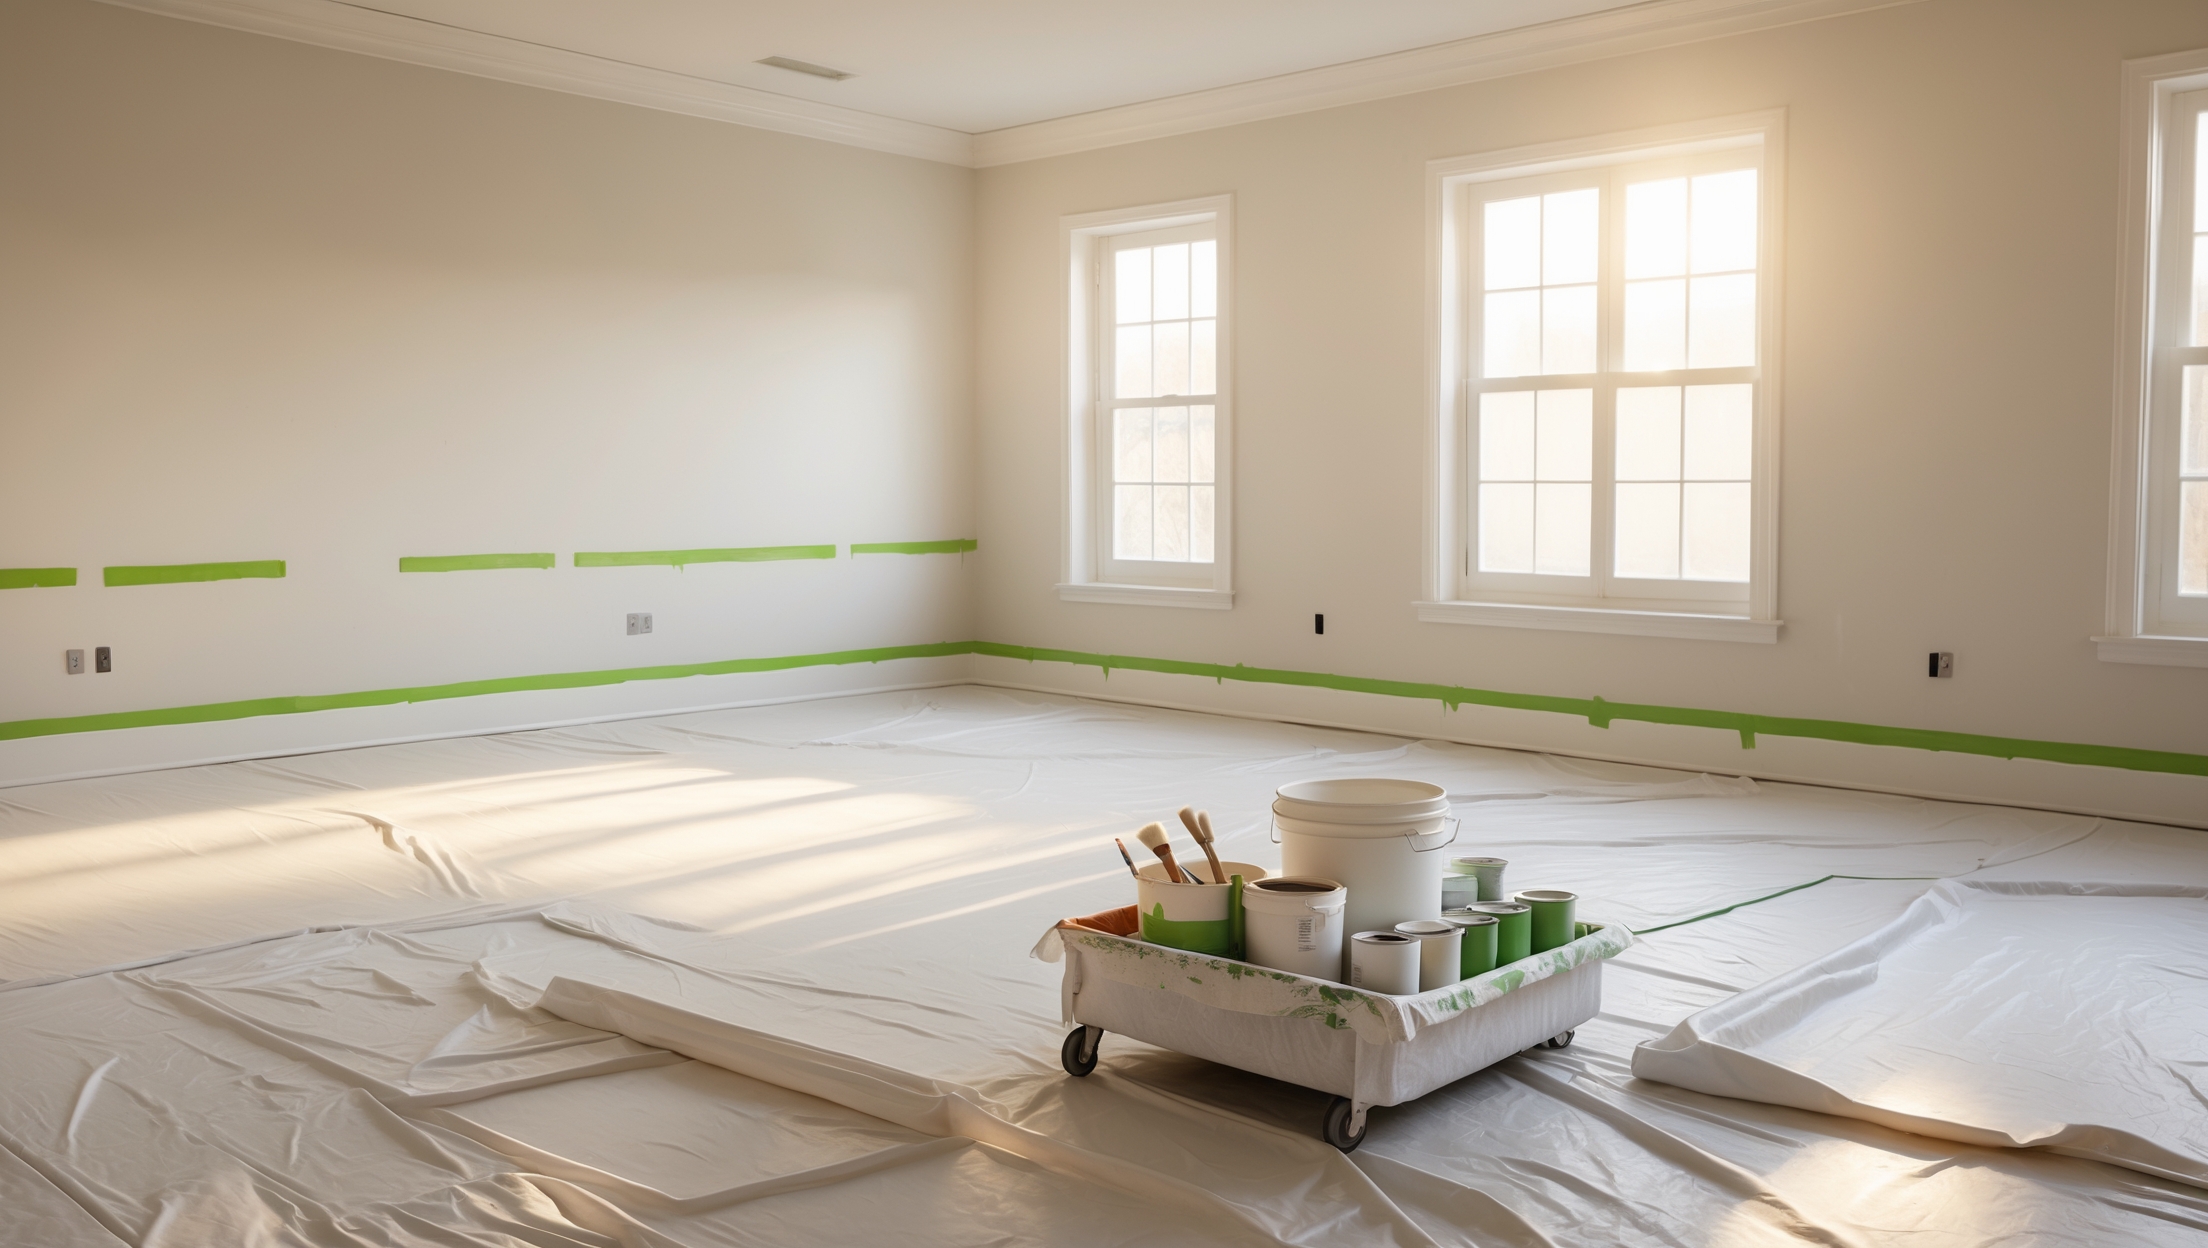
Introduction: Why Paint Prep Makes or Breaks Your Interior Walls
It’s tempting to rush straight to the fun part of painting your home’s interior—choosing colors, rolling on coats, and transforming your space. However, any seasoned home improver will tell you that the real secret to a flawless, long-lasting finish lies in careful preparation. Paint prep is often underestimated, especially by beginners, leading to frustrating results: peeling, uneven coverage, visible patches, and paint that just doesn’t stick. This guide is designed to help you avoid those costly and time-consuming mistakes by focusing on what really matters before you even open a can of paint. Whether you’re tackling a single accent wall or refreshing your entire home, mastering prep techniques is crucial. We’ll break down the step-by-step process, highlight common pitfalls to avoid, and provide expert advice on tools, materials, and safety. By the end, you’ll be equipped to achieve a professional-grade finish that stands the test of time—and you’ll save money, time, and energy in the process.
Understanding the True Cost of Skipping Prep
Many DIYers view prep work as optional or secondary, but skipping steps can add significant costs down the line. Here’s what’s at stake if you cut corners:
- Reduced Paint Adhesion: Without a clean and primed surface, paint may not bond properly, leading to peeling and flaking.
- Visible Imperfections: Cracks, nail holes, and old stains will show through even high-quality paint, ruining your finish.
- Wasted Materials: Paint applied to poorly prepped walls requires more coats, increasing costs.
- Premature Redos: You may have to repaint far sooner than expected, multiplying your investment of time and money.
Proper preparation is a smart investment. It protects your effort and ensures your newly painted walls look crisp and stay that way.
Essential Tools and Materials for Paint Prep
Before you start, having the right tools and supplies will make the job faster and more effective. Here’s what you’ll need:
- Drop cloths or plastic sheeting (to protect floors and furniture)
- Painters tape (for crisp edges and protecting trim, outlets, and fixtures)
- Spackling compound and putty knife (for filling holes and cracks)
- Sandpaper (120-220 grit) and/or sanding block
- Wall cleaner or mild detergent (such as TSP substitute)
- Sponge and clean rags
- Primer (appropriate for your wall material and stains)
- Step ladder
- Dust mask and safety goggles (for sanding and cleaning)
- Vacuum or tack cloth (for dust removal)
Step-by-Step Paint Prep: Professional Results Every Time
1. Clear and Protect the Area
Move furniture out of the room if possible. If not, cluster it in the center and cover with plastic sheeting or drop cloths. Protect floors with drop cloths, taping them to the baseboards to prevent shifting. Remove wall hangings, outlet and switch covers, and window treatments. The more thorough your prep, the easier and cleaner your painting will be.
2. Inspect and Repair Wall Surfaces
- Scan for Damage: Look for holes, dents, cracks, peeling paint, and nail pops.
- Fill Holes and Cracks: Use a putty knife to apply spackling compound to small holes and cracks. For deeper imperfections, apply in layers, letting each dry before adding more.
- Repair Nail Pops: Hammer popped nails back in or replace with new drywall screws slightly below the surface, then cover with compound.
- Address Water Damage or Mold: Stains from leaks or mold must be fully resolved before painting. Clean with a mold remover and allow the area to dry thoroughly; replace damaged drywall if necessary.
3. Sand for Smoothness
Once repairs are dry, sand the patched spots until flush with the surrounding wall. Then, lightly sand the entire wall with 120- or 150-grit sandpaper. This removes minor bumps and helps new paint adhere. Don’t skip sanding—even new drywall and previously painted surfaces benefit from it.
- Use a sanding block for flat surfaces and corners.
- Wear a dust mask and goggles during sanding.
4. Remove Dust and Debris
After sanding, wipe all surfaces with a damp sponge or tack cloth. Dust can ruin your paint’s finish and prevent proper adhesion. Don’t assume vacuuming is enough—walls must be clean to the touch.
5. Clean the Walls
- Wash walls with a solution of mild detergent (or TSP substitute) and warm water.
- Pay special attention to areas near kitchens, bathrooms, and switches where grease or fingerprints accumulate.
- Rinse with clean water and let dry completely.
6. Tape Off Trim and Fixtures
Apply painter’s tape along baseboards, trim, window frames, and around outlets or fixtures you cannot remove. Press tape edges firmly to prevent paint bleed. This step is key to achieving razor-sharp lines and protecting surfaces you don’t want painted.
7. Prime the Walls
- Use Primer When: Painting over bare drywall, patched areas, stains, or switching from dark to light colors.
- Choose a primer suited to your surface (latex for drywall, stain-blocking for water or smoke damage).
- Apply with a roller for large areas and a brush for corners and edges.
- Allow primer to dry fully before painting (follow manufacturer’s instructions).
Beginner Mistakes to Avoid (and How to Fix Them)
Even with the best intentions, it’s easy to make mistakes that affect your final result. Here’s what pros see most often—and how to avoid them:
- Skipping Cleaning: Paint won’t adhere well to dusty or greasy walls. Always wash and rinse before painting.
- Ignoring Repairs: Small holes or cracks become more noticeable after painting. Take the time to patch and sand properly.
- Insufficient Sanding: Un-sanded repairs and glossy surfaces lead to uneven finishes and poor paint adhesion.
- Painting Over Damp Walls: Moisture under paint causes bubbling and peeling. Ensure all surfaces are fully dry.
- Using the Wrong Primer: Not all primers are created equal. Match the primer to your wall type and stains for best results.
- Poor Tape Application: Tape that isn’t pressed down allows paint bleed. Remove tape promptly after painting for crisp lines.
- Rushing Between Steps: Allow each layer—spackle, primer, paint—to dry fully before moving on. Impatience leads to imperfections.
Advanced Prep Tips for Challenging Walls
Some situations call for extra attention:
- Glossy Paint: If your walls have a glossy finish, a light sanding and a bonding primer are essential for new paint to stick.
- Textured Walls: Inspect for cracks or loose texture. Patch carefully and use a thick-nap roller or specialty primer.
- Heavy Stains: Use a stain-blocking primer for smoke, water damage, or marker stains. Two coats may be necessary for deep discoloration.
- Old Wallpaper Residue: Remove all glue residue with a scraper and cleaning solution; prime after cleaning to seal any remaining adhesive.
Safety Checklist: Protecting Yourself and Your Home
- Always wear a dust mask and goggles when sanding or cleaning walls.
- Ensure good ventilation by opening windows and doors, especially when using primers or cleaning agents.
- Never mix cleaning chemicals; always follow manufacturer’s safety directions.
- Keep ladders stable and never overreach—move the ladder instead.
- Store tools and materials out of reach of children and pets.
Maintenance Best Practices: Keeping Your Walls Fresh
Once your walls are beautifully painted, proper maintenance will keep them looking their best:
- Dust walls regularly with a microfiber cloth or soft brush attachment.
- Spot clean stains promptly with mild detergent and water.
- Repair chips and scratches quickly to prevent peeling.
- Avoid harsh cleaners that can strip paint.
- Touch up high-traffic areas every few years to maintain a uniform look.
Conclusion: Prep Like a Pro for Results You’ll Love
Prepping interior walls for painting is more than a series of chores—it’s the foundation of every successful paint job. While it may seem tedious, each step serves a purpose: protecting your home, ensuring paint longevity, and delivering a finish you can truly be proud of. By investing time in cleaning, repairing, sanding, and priming, you avoid the disappointment of peeling, patchy, or uneven paint. You’ll save money on materials and eliminate the need for premature repaints. Perhaps most importantly, you’ll experience the satisfaction of a job well done—one that rivals professional results at a fraction of the cost.
Remember, great painting starts long before the first brushstroke. With the practical advice and detailed steps outlined in this guide, you can approach your next project with confidence. Take your time, inspect your work as you go, and don’t skip any step, no matter how small it may seem. The difference will be obvious every time you walk into the room. Happy painting—and happy prepping!
Can you clarify what counts as proper wall cleaning before painting? Is a quick wipe with a damp cloth enough, or should I be using specific cleaners to make sure the new paint actually adheres well?
A quick wipe with a damp cloth can remove light dust, but for proper paint adhesion, it’s best to clean walls more thoroughly. Use a mild detergent and water to remove grease, fingerprints, and any residues, especially in kitchens or near switches. Rinse with clean water and let the walls dry completely. This helps ensure the paint bonds well and gives you a smoother, longer-lasting finish.
How long should the whole prep process take realistically for, say, an average-sized bedroom? I’m trying to plan how many days to set aside and balance it with my class schedule.
For an average-sized bedroom, realistic prep time is usually one to two days, depending on the room’s condition and your experience level. This includes moving furniture, cleaning, patching holes, sanding, taping, and priming if needed. If your schedule is tight, you can break the tasks up across several evenings or a weekend to fit around your classes.
You mention that prep helps avoid peeling and flaking, but if my walls already have a few small patches of peeling paint, what’s the best way to handle those before I start painting? Do I need to strip everything or just sand and spot treat?
If you only have a few small patches of peeling paint, you don’t need to strip the entire wall. Use a putty knife to gently scrape away any loose or flaking paint in those areas. Then, sand the spots smooth to feather the edges. After that, apply a suitable primer to those areas before repainting. This targeted approach should help you achieve a smooth, long-lasting finish.
I’m on a pretty tight student budget, so I’m wondering which prep steps are absolutely essential versus which ones are just nice to do. What would you recommend if I only have time and money for the basics?
If you’re on a tight budget, focus on the essentials: clean your walls to remove dust and grease, fill major holes or cracks with spackle, and lightly sand any rough patches. These steps will help paint stick and look smoother. You can skip professional-grade primers or expensive tools—just use a basic primer if your walls have stains or big color differences. Taping edges and removing outlet covers are helpful but not absolutely necessary if you’re careful.
You mentioned using the right tools and materials before even starting the paint job. Could you provide some advice on affordable prep tools that still deliver professional results for a business on a budget?
Certainly! For budget-friendly but effective prep, look for a sturdy plastic putty knife for patching, a sanding sponge (which lasts longer than sandpaper), and painters tape with good adhesion. Microfiber cloths for dusting and a quality roller cover are also smart investments without breaking the bank. You don’t need premium brands—just ensure the tools feel solid and don’t shed fibers or bristles.
I’m getting ready to paint my living room and your emphasis on prep work has me wondering—what’s the biggest mistake first-timers like me usually make during the preparation stage, and is there an easy way to avoid it?
One of the biggest mistakes first-timers make is skipping or rushing the wall cleaning step before painting. Leftover dust, grease, or residue can cause the paint not to stick properly and lead to uneven results. The easiest way to avoid this is to thoroughly clean the walls with a mild detergent and water, let them dry completely, and then check for any leftover spots before moving on to patching and sanding.
How long should I expect the full prep process to take for a standard-sized room if I don’t want to skip any important steps?
For a standard-sized room, you should expect the full prep process to take about one to two days. This includes moving or covering furniture, cleaning walls, patching holes, sanding, taping off edges, and applying primer if needed. Taking your time on each step will help ensure a smooth, flawless result once you start painting.
The article mentions that skipping paint prep can lead to wasted materials and higher costs later on. What are the most budget-friendly ways to properly prepare walls without sacrificing quality?
To prep walls on a budget without compromising quality, start by thoroughly cleaning with mild soap and water instead of specialty cleaners. Use a putty knife and affordable spackle for filling small holes, and sand lightly with a basic sanding block. Painter’s tape can be bought in bulk at discount stores. A quality primer is worth the investment, but you can save by spot-priming only patched or stained areas if the walls are in good condition.
You mention paint adhesion problems if the walls aren’t prepped correctly. Is there a specific primer you recommend for homes with a lot of residue from old wall decals or adhesive patches?
For walls with leftover residue from decals or adhesive patches, a stain-blocking primer like Zinsser Bulls Eye 1-2-3 or Kilz Original is a reliable choice. These primers help seal in any sticky spots, prevent stains from bleeding through, and promote strong paint adhesion. Before priming, try to remove as much residue as possible and lightly sand the area for best results.
If you discover new cracks or nail holes during your prep, would you recommend fixing everything at once before moving forward, or is it okay to do some repairs after the first coat? I’m wondering about the best order for reliable results.
It’s best to repair all cracks and nail holes before you start painting. Filling and sanding imperfections first ensures a smooth, even surface for your primer and paint to adhere properly, which leads to a much better finish. If you spot any missed spots after the first coat, you can touch them up, but addressing repairs upfront will give you more professional, consistent results.
How do you recommend dealing with really stubborn stains on walls before painting? The article mentions that old stains can show through, but I’m not sure what products or techniques work best if normal cleaning isn’t enough.
If regular cleaning doesn’t remove tough stains like watermarks, grease, or markers, try washing the area with a mix of mild detergent and warm water. For persistent stains, use a stain-blocking primer—these are specifically designed to seal in stains so they won’t bleed through your new paint. Apply the primer directly over the stain, let it dry, and then proceed with your usual paint.
For someone updating just a single accent wall, how much time should I realistically set aside for a thorough prep compared to the painting itself?
For a single accent wall, you should plan to spend about the same amount of time on prep as you do on painting—sometimes even a bit more. If painting takes two hours, expect around two to three hours for prep. This includes cleaning, patching holes, sanding, taping, and priming if needed. Thorough prep ensures a much better final result.
The article mentions that paint won’t stick well if the wall isn’t properly cleaned and primed. Are there certain types of stains or residues that are especially important to remove, and what’s the most effective way to handle something like grease or old crayon marks before painting?
Grease and crayon marks are definitely among the most stubborn residues that can prevent paint from sticking properly. For grease, use a degreasing cleaner or a mixture of dish soap and warm water, scrubbing the area thoroughly and letting it dry. For crayon marks, a mild abrasive sponge or a paste of baking soda and water usually works well. Always rinse the wall and let it dry before priming and painting.
Can you clarify what types of cleaning or priming products are actually necessary for paint adhesion, versus which ones are nice to have but not essential? I’d like to keep costs down but still avoid peeling.
For basic paint adhesion, a mild detergent and water are usually sufficient for cleaning most walls; just be sure to remove dust, grease, and stains. Priming is only essential if you’re painting over bare drywall, stained areas, glossy surfaces, or drastic color changes. Specialty cleaners and high-end primers can help, but they aren’t necessary unless you have specific issues like mold or heavy smoke stains.
If I cleaned and primed my walls but still end up with peeling paint a few months later, what troubleshooting steps should I follow to figure out what went wrong and fix it?
If your paint is peeling despite cleaning and priming, start by checking if the walls were fully dry before painting or priming. Next, see if the primer and paint were compatible and suitable for your wall type. Also, assess for moisture issues inside the walls. To fix, scrape off peeling areas, address any moisture problems, sand the surface, and apply a compatible primer and paint.
The article says prepping protects your effort and ensures a crisp finish, but how much extra time should I realistically budget for prep versus the actual painting? I want to plan out my weekend project.
For most interior wall projects, you’ll want to set aside about 60% of your total project time for prep work and 40% for painting. For example, if you have a full weekend, plan to spend most of Saturday on cleaning, patching, sanding, and taping. Painting itself usually goes faster once everything is ready. Good prep really makes the painting smoother and the results much better.
You mention that skipping prep work can lead to wasted materials due to needing more coats of paint. Is there a way to estimate how much extra paint you might need if you skip things like priming or cleaning the walls first?
Skipping prep steps like priming or cleaning can increase paint use by 20 to 50 percent, but the exact amount varies with wall condition and paint type. Unprepared surfaces absorb more paint, so you may need an extra quart or even a full gallon per average-sized room. It’s hard to predict precisely, but planning for at least one extra coat is a safe estimate if you skip proper prep work.
When it comes to filling cracks and nail holes before painting, are there certain materials or products that work better for ensuring an even finish, particularly for older homes with a lot of imperfections?
For older homes with many imperfections, using a high-quality, pre-mixed joint compound or a lightweight spackling paste works well for filling cracks and nail holes. For deeper cracks, consider using a flexible patching compound that resists shrinking and cracking over time. Always sand the patched area smooth once dry, and if needed, apply a primer before painting to ensure an even, flawless finish.
You talked about using the right tools and materials for prep. For someone on a tight college budget, which prep supplies are truly essential and which ones can be skipped without risking a bad paint job?
For a tight college budget, focus on the basics: painter’s tape, a putty knife, spackle or filler for small holes, sandpaper (medium and fine grit), and a clean cloth or sponge for wiping down walls. Drop cloths can be substituted with old sheets or newspapers. You can skip specialized primers unless your wall has major stains or drastic color changes. These essentials will help you get good results without overspending.
For business owners who need the paint job to last as long as possible, is there a recommended schedule or type of maintenance to help freshly painted walls stay looking crisp and avoid premature repaints?
For business owners aiming for long-lasting, fresh-looking walls, regular maintenance is key. Dust and wipe down the walls every few weeks with a soft, damp cloth. Address stains or marks as soon as possible using gentle cleansers. Inspect high-traffic areas monthly for scuffs or chips and do touch-ups when needed. Also, check for moisture issues to prevent paint damage. This schedule can help extend the life of your paint job and keep walls looking crisp.
How long does the prep phase usually take for an average-sized room? I’m trying to plan my week and want to set a realistic timeframe before I can actually start painting.
For an average-sized room, the prep phase typically takes between 1 to 2 days. This includes moving furniture, cleaning walls, repairing any holes or imperfections, taping off trim, and priming if necessary. If your walls need extra repairs or you’re dealing with stubborn stains, allow a bit more time. Planning for 2 days should give you a comfortable buffer before you start painting.
If I’m just repainting a rental and want to avoid major time and money investment, which prep steps are absolutely critical, and which can I safely skip without regretting it later?
For a rental repaint, focus on cleaning the walls, repairing obvious holes or cracks, and lightly sanding any glossy or peeling areas. These steps help the new paint stick and look fresh. You can usually skip full wall sanding, extensive patching, and priming unless there are stains or drastic color changes. This approach saves time and still delivers a decent result.
If I’ve already painted over some areas that weren’t prepped correctly and I’m seeing peeling or uneven paint, do I need to strip all the paint off to fix it, or are there less drastic solutions for touch-ups?
You usually don’t need to strip all the paint off. For peeling or uneven spots, scrape off any loose paint, sand the area smooth, and repair any imperfections with a patching compound if needed. Once the surface is smooth and clean, prime those spots and repaint. This targeted approach often fixes the issue without redoing the entire wall.
I get that paint prep is important for a good finish, but if someone is on a tight budget, what are the absolute essential prep steps and tools you wouldn’t recommend skipping, even for just one accent wall?
If you’re focusing on an accent wall and want to keep costs low, prioritize cleaning the wall thoroughly, patching any holes or cracks, and lightly sanding for a smooth surface. Essential tools include a sponge or cloth, spackle, sandpaper, painter’s tape, and a drop cloth to protect your floor. These steps and tools help ensure the paint adheres well and looks even, even on a limited budget.
You mention that skipping paint prep can lead to paint peeling and flaking. If I already see small areas of peeling paint on my walls, should I completely remove all old paint before starting, or is it enough to just scrape and sand the problem spots?
If you only have small areas of peeling paint, you don’t need to remove all the old paint from your walls. Focus on scraping off any loose or flaking areas, then sand those spots so they blend smoothly with the surrounding surface. Afterward, clean the wall and apply a suitable primer before painting. This should help you achieve a lasting, even finish.
What would you recommend as the most essential tools for someone on a tight budget? There are so many options out there, but I only want to buy what’s truly necessary for prepping interior walls.
If you’re prepping interior walls on a tight budget, focus on a few key basics. A putty knife is essential for patching holes and cracks, and you’ll need some sandpaper or a sanding block to smooth out repairs. A sturdy sponge or cloth is necessary for cleaning the walls. Lastly, painter’s tape helps protect trim and edges. With just these tools, you can handle most wall prep tasks effectively.
I’ve always been confused about how much time I should set aside for wall prep versus the actual painting. Based on your guide, what would be a realistic timeframe for prepping a medium-sized room?
For a medium-sized room, you should plan to spend about 4 to 6 hours on wall preparation, based on recommendations in the guide. This includes cleaning, patching holes, sanding, and taping. The painting itself often takes less time—usually 2 to 4 hours for two coats. Proper prep is key for a flawless finish, so allocating enough time for it is well worth it.
How much time should I realistically set aside for proper paint prep if I’m doing an average-sized bedroom by myself, and are there ways to speed up the process without risking problems like poor adhesion?
For an average-sized bedroom, plan on spending 4 to 6 hours on proper paint prep. This covers moving furniture, cleaning walls, filling holes, sanding, taping, and covering floors. To work more efficiently, gather all materials beforehand and use products like quick-dry patching compounds. Focus on thorough cleaning and proper wall repair—skipping key steps can lead to adhesion issues or visible flaws later.
I’m curious about the essential tools and materials needed for proper paint prep. Are there any budget-friendly alternatives for beginners, or would you recommend investing in higher quality supplies right from the start?
For paint prep, you’ll need basics like painter’s tape, drop cloths, spackle, sandpaper, a putty knife, and a good-quality brush or roller. Beginners can save by starting with budget-friendly brands for items like drop cloths and sandpaper, but investing in a decent brush or roller makes a big difference in the final result and is usually worth the extra cost.
I noticed the guide talks about the importance of safety during prep work. Are there specific safety gear items or precautions that are often overlooked when prepping interior walls for paint?
One safety precaution that’s often overlooked is using proper eye protection—splashes from cleaning agents or debris while sanding can be a risk. A dust mask or respirator is important, especially when sanding old paint or using strong cleaners. Also, gloves help protect against chemicals and minor cuts. If you’re working at height, make sure to use a sturdy, well-positioned ladder and avoid loose clothing that could catch on hardware or tools.
How long does a thorough paint prep usually take for an average-sized room? I always underestimate the timeline, and I want to plan enough time before I actually start painting.
For an average-sized room, thorough paint prep typically takes anywhere from 4 to 8 hours. This includes moving furniture, cleaning walls, patching holes, sanding, taping edges, and applying primer if needed. If the room has a lot of repairs or intricate trim, it could take longer. Giving yourself a full day for prep is a good idea to avoid feeling rushed.
If I’m only painting an accent wall, do I still need to do all the same prep steps mentioned in the guide, or can I cut out a few since it’s a smaller area?
Even if you’re just painting an accent wall, it’s important to follow all the prep steps from the guide. Proper cleaning, patching, sanding, and priming help ensure the paint adheres well and the finish looks professional. Skipping steps, even on a smaller area, can lead to visible imperfections or peeling over time. Taking the extra time to prep will make a noticeable difference in your results.
I see that the article covers both accent walls and whole-house painting. Does the prep process or the time needed change much depending on the size of the project, or are the core steps always the same?
The core prep steps like cleaning, patching holes, sanding, and priming are basically the same whether you’re painting an accent wall or the entire house. However, larger projects definitely take more time because there’s more surface area to cover. You might also need to plan your workflow and manage supplies more carefully for a whole-house job, but the fundamentals stay consistent.
You mention that skipping prep work leads to issues like paint peeling and visible imperfections. If my walls only have minor wear, like little scuffs and maybe a nail hole or two, do I still need to go through the full prep process, or can I spot-fix those areas before painting?
If your walls only have minor wear, such as small scuffs or a couple of nail holes, you don’t need to go through the full prep process. Instead, spot-fix those areas by cleaning the spots, filling holes with spackle, sanding smooth, and priming if necessary. This targeted approach will help your paint look even and last longer without extra work.
You mentioned safety as part of paint prep. Could you explain what potential hazards exist during this stage and what precautions or protective gear are really necessary for a typical DIY homeowner?
During paint prep, potential hazards include dust from sanding, fumes from cleaning products or primers, and possible contact with mold or old paint (which may contain lead in older homes). It’s wise to wear a dust mask or respirator, safety goggles, and gloves. Ensure good ventilation by opening windows. If sanding old paint, check if it’s lead-based and use extra precautions or consider professional help.
I’m wondering about the costs involved in prep work. Are there any low-budget alternatives for some of the recommended tools and materials, or is it really worth investing in everything outlined in the guide?
You don’t have to buy every specialized tool to get good results. For example, instead of a high-end sanding block, you can use fine-grit sandpaper wrapped around a small wooden block. Painter’s tape and drop cloths can sometimes be replaced with newspaper or old sheets. The most important investment is in good surface cleaning and quality patching material, but several other items can be sourced affordably or improvised.
You mention that paint prep is often underestimated by beginners and can lead to visible patches or peeling. Could you expand on the most common preparation mistakes and suggest practical ways to spot and avoid them before starting to paint?
Common paint prep mistakes include not cleaning walls, skipping sanding, ignoring cracks or holes, and failing to use primer. These lead to issues like uneven color, visible patches, or peeling. To avoid them, always wash walls to remove dirt, sand rough spots, fill imperfections with filler, and apply a suitable primer. Before painting, inspect surfaces in good light to catch flaws and run your hand over the wall to feel for bumps or holes that need fixing.
If I’m trying to save money, are there any prep steps that are absolutely essential versus ones that are nice to do but not critical? I don’t want to risk premature peeling, but I’m on a tight budget.
If you’re on a tight budget, focus on the essentials: clean the walls to remove dust and grease, fill any cracks or holes, and sand rough patches. These steps are crucial for good paint adhesion and to prevent peeling. While priming or using special tools can help, they aren’t always necessary unless you have stains or drastic color changes. Stick to the basics to protect your results and your wallet.
You mention that skipping prep steps can lead to wasted materials and premature redos, but I’m not sure what prep steps are absolutely essential if I’m in a rush. Is there a minimum I can get away with while still avoiding peeling or visible patches?
If you’re short on time, focus on these essential prep steps: clean the walls to remove dust and grease, fill any holes or cracks, and sand rough spots so the surface is smooth. Also, make sure the surface is dry before painting. Skipping these basics can result in peeling or obvious patches, even if you’re in a hurry.
You mention that skipping prep can lead to visible patches and wasted materials, but how much time should I realistically set aside for proper prep work on an average-sized living room? I’m trying to avoid running over schedule or getting frustrated when painting.
For an average-sized living room, you should plan on spending 4 to 6 hours on proper prep work. This includes moving or covering furniture, cleaning the walls, repairing holes or cracks, sanding, and taping off edges. If you have textured walls or a lot of repairs to make, add a little extra time. Starting with thorough prep will help your painting go smoothly and deliver better results.
I’m a bit worried about the time investment in prep work. On average, how long should I expect to spend prepping a standard-sized bedroom versus painting it?
For a standard bedroom, prep work typically takes about 3 to 6 hours. This includes moving furniture, patching holes, sanding, cleaning walls, and taping. Actual painting often takes less time—usually about 2 to 4 hours per coat, depending on drying time and your pace. So, prep can take as long or even longer than painting, but it really makes a difference in the final result.
When it comes to fixing visible cracks and nail holes before painting, what’s the best method for DIYers on a budget? Are there any go-to products you recommend, or do simple spackle and putty usually do the trick?
For most DIYers on a budget, basic spackle or lightweight wall putty works well for filling small cracks and nail holes. Apply it with a putty knife, let it dry, then sand smooth before painting. For slightly larger cracks, use a flexible patching compound. You don’t need expensive products—simple spackle or putty from a hardware store is usually all you need for a smooth finish.
If you’re prepping walls in a house with kids and limited time, what steps are truly necessary to avoid premature redos, and which shortcuts (if any) are still safe to take?
With kids and limited time, focus on the essentials: fill major holes or dents, clean walls to remove fingerprints and dust, and use painter’s tape for clean edges. You can safely skip sanding if the walls are already smooth, and spot-prime only patched areas instead of the whole wall. Just be sure surfaces are dry and free of grease to help paint stick and last.
If I already painted a wall and now see peeling or uneven spots, is there a way to fix it without starting from scratch? What’s the best approach for troubleshooting after skipping prep the first time?
You can definitely fix peeling or uneven spots without having to redo everything. Start by scraping off any loose or peeling paint. Lightly sand the area to smooth out rough edges, then clean off dust. Apply a suitable primer to those spots, let it dry, and touch up with your wall paint. This spot-repair approach helps blend imperfections, even if prep was skipped initially.
How much time should I realistically set aside for prepping a standard bedroom? I usually underestimate how long cleaning, patching, and priming will take, so any ballpark estimate would be super helpful.
For a standard bedroom, you should plan for about 4 to 6 hours of prep, depending on the room’s condition. Cleaning usually takes 1 to 2 hours, patching and sanding can need 2 to 3 hours (more if there are lots of imperfections), and priming typically adds another hour. If you’re new to prepping or have textured walls, add extra time just in case.
You mention that skipping prep can lead to wasted paint and materials. Are there specific prep steps that offer the biggest return on investment if I’m trying to stay within a limited budget?
If you’re on a tight budget, focus on thoroughly cleaning the walls to remove dust and grease, and repairing any cracks or holes with spackle. Sanding rough areas and applying a good quality primer to patched spots will also make a big difference in how paint adheres and lasts. These steps prevent peeling and uneven coverage, saving you money on extra paint and redo work.
For those on a tight budget, are there particular prep steps or tools you would consider absolutely essential, and which ones can be skipped or improvised without risking a poor finish?
If your budget is tight, focus on essentials like patching holes, sanding rough spots, and cleaning the walls—these steps ensure paint adheres well and looks smooth. You can use basic spackling, inexpensive sandpaper, and even a damp rag for cleaning. Drop cloths can be improvised with old sheets, but don’t skip taping edges for neat lines. Fancy rollers or specialty tools aren’t necessary; standard brushes and rollers work fine for most projects.
How long does the proper prep process usually take for a medium-sized room, and do you have any tips for speeding it up without sacrificing the quality of the final paint job?
Preparing a medium-sized room for painting typically takes 4 to 8 hours, depending on the condition of the walls and how much furniture needs moving. To speed things up without losing quality, use a pole sander for quicker sanding, choose high-quality painter’s tape for faster, cleaner masking, and patch all holes at once before sanding. Gathering all your supplies ahead of time also helps keep the process smooth.
You mentioned using the right tools for faster prep—could you recommend any particular brands or types of sanders or cleaning solutions that work best for medium-sized rooms in older homes?
For medium-sized rooms in older homes, a quality orbital sander like the DeWalt or Makita models makes prepping walls much easier—look for variable speed options for better control. For cleaning, a mild TSP substitute or Simple Green solution is effective and gentle on older surfaces. Always use a tack cloth or microfiber cloth for dust removal after sanding to ensure a clean finish.
You mention that skipping proper paint prep can lead to paint peeling and flaking. If I have some old patches of peeling paint already on my walls, what’s the best way to fix those before starting the new prep process?
To fix areas with peeling paint, start by scraping off any loose or flaking paint with a putty knife. Next, sand the edges of the remaining paint so they blend smoothly into the wall. Clean the area to remove dust, apply a patching compound if needed, then sand again once dry. Finally, use a quality primer before painting to ensure proper adhesion.
I’ve had trouble in the past with paint peeling a few months after finishing a room. The article mentions poor adhesion as a pitfall. Could you clarify what specific prep steps are most essential to prevent peeling, especially in older homes?
To prevent paint peeling, especially in older homes, it’s vital to thoroughly clean the walls to remove dust and grease, repair any cracks, and sand glossy or uneven surfaces for better adhesion. Always use a high-quality primer, especially on patched areas or bare plaster. Make sure walls are completely dry before priming or painting, and avoid painting over flaking or chalky old paint—scrape and sand those spots first.
When prepping older interior walls that have a lot of small cracks and nail holes, do you recommend using a specific type of filler or is joint compound enough? I’m never sure how much repair is necessary before I start priming.
For most small cracks and nail holes in older interior walls, a standard pre-mixed joint compound is usually sufficient. Just make sure to apply it smoothly and allow it to dry fully before sanding. If cracks are wider or the wall moves a bit, you might want to use a flexible spackling paste or an elastomeric filler, as these can better accommodate movement. Always repair all visible imperfections before priming for the best finish.
I often have limited time on weekends—how long should I realistically set aside for the prep work if I’m doing just one average-sized room? Does the guide include any time-saving tips for busy schedules?
For an average-sized room, you should plan for about 2 to 4 hours of prep work, depending on the condition of your walls and how thorough you want to be. The guide does include time-saving tips, like gathering all your supplies beforehand and spot-cleaning only the problem areas rather than the entire wall. These strategies can help you make the most of a tight weekend schedule.
I understand that visible imperfections like cracks and nail holes can ruin the final look even with good paint. What’s the best way to handle old water stains or stubborn marks before painting? Should I use a particular primer or cleaning method first?
To deal with old water stains or stubborn marks, first clean the area with mild soap and water, letting it dry completely. For stains that persist, especially water marks or crayon, use a stain-blocking primer—either oil-based or a shellac-based type works well. This will prevent the stains from bleeding through your new paint and ensure a flawless finish.
Your article mentions that skipping proper prep can lead to wasted materials and having to repaint sooner. For a small business with a tight budget, are there any prep steps that are absolutely essential versus ones that might be optional if we’re short on time or funds?
For a small business with limited resources, focus on the essentials: clean the walls to remove dust and grease, repair any cracks or holes, and use primer on patched or stained areas. These steps prevent most major paint failures. Skipping thorough sanding or using higher-end primers can be optional if the walls are in decent shape, but basic cleaning and repairs shouldn’t be skipped to avoid costly do-overs.
I understand that skipping prep can result in visible imperfections. For older homes where the walls already have a lot of cracks and stains, what are the most effective tools or products you would recommend to handle these issues before painting?
For older walls with cracks and stains, start by using a flexible putty knife and a good quality pre-mixed joint compound or spackling paste to fill cracks. Sand smooth with a fine-grit sanding block once dry. For stains, use a stain-blocking primer to prevent bleed-through. A caulking gun with paintable caulk is also useful for gaps at trim or corners. These steps will help create a smooth, clean surface for painting.
Suppose I already painted a wall without doing much prep and now I see peeling starting. Is there a way to fix or salvage it without completely starting over from scratch?
You can definitely fix peeling paint without redoing the entire wall. First, scrape off the loose, peeling paint using a putty knife. Then, sand the area smooth and clean off any dust. Apply a quality primer to the bare spots before repainting. This targeted touch-up should help your paint adhere better and prevent further peeling.
I noticed you mentioned the importance of properly priming walls before painting. Can you clarify if there are certain types of primers that work better for walls with old stains or minor cracks, or if the standard primer is usually sufficient?
For walls with old stains, a stain-blocking primer—like those formulated to seal watermarks or crayon—works much better than standard primer. For minor cracks or patched areas, a high-build or patching primer helps smooth and even the surface. Standard primer is fine for clean, unstained walls, but for stains or imperfections, choosing a specialty primer will give you the best results.
The article talks about the importance of having the right tools before starting. For someone new to DIY, what are the absolute essentials for paint prep, and are there any items you can skip if you’re just doing a small accent wall?
For a small accent wall, you’ll want painter’s tape, a spackling compound for minor holes, a putty knife, a sanding block, a clean cloth or tack cloth, and a drop cloth to protect the floor. You can skip advanced tools like a pole sander or paint edgers for a small project. A basic angled brush and a small roller should handle most of the work efficiently.
The article highlights the importance of proper tools and materials. Could you provide some guidance on which prep items are essential for someone on a tight budget, and which ones are nice-to-have but not strictly necessary?
For budget-conscious prep, focus on the essentials: painter’s tape, a sturdy drop cloth or old sheets for floors, sandpaper, a putty knife, and basic spackling compound for filling holes. A decent angled brush is also important. Items like specialty primers, professional-grade sanding blocks, and multi-tool paint tools are helpful but not absolutely necessary for a good result if you’re keeping costs down.
The article says using the right tools and supplies makes the job go faster. Can you list what those essentials are for someone just starting out, and maybe suggest which ones are okay to borrow or buy on a budget?
For painting prep, essentials include painter’s tape, drop cloths or plastic sheets, a putty knife, spackle or filler, sanding blocks, a good quality brush, and a roller with a tray. You’ll also want a step ladder and a cleaning cloth or sponge. If you’re on a budget, you can often borrow a step ladder and drop cloths. Brushes and rollers are best bought new for a smooth finish, but sanding blocks and putty knives can be inexpensive or second-hand.
The article mentions that skipping prep can lead to peeling and flaking, but is there a specific type of primer you recommend for older walls with lots of previous paint layers?
For older walls with multiple layers of paint, a high-adhesion bonding primer is usually the best choice. These primers are designed to grip glossy or previously painted surfaces and help new paint stick properly, reducing the risk of peeling or flaking. Look for products labeled as bonding or stain-blocking primers for the best results.
For someone painting a whole apartment with limited time, which prep steps would you say are absolutely necessary versus those that can be skipped without risking peeling or flaking?
If you’re short on time, focus on cleaning the walls to remove dust and grease, repairing any major holes or cracks, and making sure surfaces are completely dry before painting. Skipping primer is generally fine if the old paint is in good condition and you’re not making a dramatic color change, but don’t skip patching damaged areas or basic cleaning—those steps are essential to avoid peeling or flaking later.
I’d like to know more about identifying imperfections before painting. What’s the best way to spot problem areas on walls that have a lot of old nail holes and stains?
To spot imperfections like old nail holes and stains, start by cleaning the walls thoroughly so you can see issues clearly. Run your hand over the surface to feel for bumps or indents. Use a bright, angled light or flashlight along the wall; flaws will cast shadows and become easier to see. Mark all problem areas with a pencil so you can address them before painting for the best results.
I get that skipping proper prep can make paint peel or flake, but are there cases where it’s okay to do minimal prep, like if my walls are new drywall or already in great shape? Or is full prep always necessary?
When your walls are brand new drywall or in excellent condition, you can sometimes get away with minimal prep. Just make sure the surface is clean, free of dust, and dry. Priming is still recommended for new drywall to ensure even paint coverage. For previously painted but pristine walls, a light cleaning and scuff-sanding may be enough. Full prep is most critical for damaged, glossy, or dirty surfaces.
Can you explain more about the safety precautions for paint prep you mentioned? Are there specific materials or tools that require special handling or protective gear during the process?
Some paint prep materials and tools definitely require extra care. When sanding walls or scraping old paint, it’s important to wear a dust mask and goggles to protect against dust and debris. If you’re working with chemical paint strippers or strong cleaners, use gloves and ensure the area is well-ventilated, as fumes can be hazardous. Always check product labels for specific safety instructions, and keep your workspace clean to avoid slips and accidents.
When you talk about common prep pitfalls, are there any budget-friendly tools or materials that can do the job just as well as pro-quality versions? I want to make sure I don’t overspend on items I might only use once.
Absolutely, you don’t need to buy top-tier tools to get good prep results. For cleaning, a basic sponge and mild soap work fine. Inexpensive sanding blocks or sandpaper will smooth walls just as well as pricier options. Painter’s tape from major brands—even the standard version—does a good job. For patching, generic spackle and a simple putty knife suffice. Just make sure your tools are clean and in good condition, and you’ll achieve professional-looking results without overspending.
You mention that skipping paint prep can end up costing more in the long run. Can you share some advice on budget-friendly tools and materials for someone prepping multiple rooms at once?
Absolutely, prepping doesn’t have to be expensive. For multiple rooms, buy painter’s tape, drop cloths, sanding sponges, and plastic putty knives in bulk packs to save money. Microfiber cloths for dusting and a sturdy, reusable paint tray liner are also cost-effective. Consider a multipurpose cleaning solution and a caulk gun for filling gaps. Investing in a good roller extension pole can help you cover more area quickly without needing a ladder.
How do you determine whether a surface needs priming or if just cleaning is enough? Is there a test or telltale sign that beginners like me can use to decide between the two before painting?
To decide if priming is needed or if cleaning will do, check the surface closely. If the wall is stained, patched, chalky, or has bare drywall or new repairs, priming is a must. For previously painted, non-glossy, and clean walls, thorough washing might be enough. Try rubbing your hand over the surface—if paint comes off as dust or the area feels rough or uneven, priming is recommended before painting.
How much extra time should I realistically set aside for thorough preparation before painting a standard-sized room? I’m trying to balance a busy schedule but want to avoid the premature redos you talked about.
For a standard-sized room, you’ll want to set aside about 4 to 6 hours just for prep work. This includes moving furniture, cleaning the walls, patching holes, sanding, taping edges, and letting repairs dry. Doing the prep properly in one afternoon or weekend morning helps ensure you won’t have to redo any work later on.
If you discover peeling or flaking paint after starting your prep, what’s the best way to handle it before priming and repainting? I want to avoid premature redos as the article warns.
If you notice peeling or flaking paint, carefully scrape off all the loose material with a putty knife or paint scraper until only firmly attached paint remains. Sand the edges smooth so they blend into the surrounding surface. After cleaning off any dust, spot-prime the bare areas before applying your main primer and paint. This approach should help prevent early peeling and ensure your new paint job lasts.
I noticed you mentioned visible imperfections like cracks and nail holes showing through paint if prep is skipped. What’s the best way to fill those, and how do I know when the wall is smooth enough to move on to priming?
For cracks and nail holes, use a quality spackling compound or lightweight filler. Apply it with a putty knife, let it dry completely, then sand the area smooth with fine-grit sandpaper. To check if the wall is ready, run your hand over the surface and look at it from an angle under good lighting. If you don’t feel or see bumps or dips, it’s smooth enough for priming.
The article mentions that prepping properly saves money and avoids wasted paint, but what’s the most budget-friendly way to get the essential tools and materials? Are there any must-haves versus things that are nice but not absolutely necessary?
To prep on a budget, focus on essentials: painter’s tape, drop cloths (old sheets work well), spackling paste, a putty knife, sandpaper, and a clean damp cloth. A good-quality brush and roller are must-haves. Extension poles, paint edgers, or specialty trays are helpful but not vital if you’re saving money. Buying basic supplies in multi-packs or at discount stores can also help cut costs.
If I’m only painting a single accent wall instead of an entire room, do I need to go through the full detailed prep process described here, or are there shortcuts that won’t impact the final result as much?
When painting just an accent wall, you can often streamline the prep a bit, but don’t skip essentials like cleaning, repairing holes, and lightly sanding. Taping edges and protecting nearby surfaces still matter for crisp results. You might get away with spot-priming only problem areas instead of the whole wall, but thorough prep remains key to a quality finish, even on a single wall.
You mentioned that skipping proper prep often leads to visible patches and imperfections. Are there particular types of stains or marks that are especially difficult to conceal with paint, even after prepping, and how would you recommend dealing with those?
Yes, certain stains such as water marks, grease, nicotine, and ink can be stubborn and often bleed through regular paint, even after prepping. For these, it’s best to use a stain-blocking primer specifically formulated to seal tough stains before applying your finish coat. Make sure the area is clean and fully dry before priming, and if the stain is severe, you might need two coats of primer for complete coverage.
You highlight that proper prep helps avoid wasting paint and materials. For someone trying to keep costs down, are there specific prep steps or products you think are absolutely worth investing in, and any that are okay to do with basic, low-cost tools?
Spending a bit more on quality primer and patching compounds is definitely worth it, since these help your paint last longer and cover better, saving paint in the long run. For cleaning walls, sanding, and filling small holes, you can stick with basic sponges, fine sandpaper, and a simple putty knife—no need for expensive versions. Just make sure to prep thoroughly, as careful work with simple tools can be just as effective.
You mentioned that visible cracks and nail holes can ruin the finish. Do you have advice on the best way to fill and smooth these imperfections so they don’t show through after painting?
To fill cracks and nail holes, start by using a putty knife to apply a quality spackling compound or lightweight filler. Let it dry completely, then sand the area smooth with fine-grit sandpaper until it’s flush with the wall. Wipe away dust, and if needed, apply a second coat for deeper flaws. Priming the repaired spots before painting will help ensure the repairs blend seamlessly into the final finish.
If you’ve already painted a wall but notice peeling and uneven spots later, is there a way to fix those issues without completely starting over? I’m curious about troubleshooting poorly prepped surfaces after the fact.
You don’t have to start over entirely if you notice peeling or uneven areas after painting. First, scrape off any loose or flaking paint and sand the affected spots until they’re smooth. Clean the area to remove dust, then apply a quality primer before repainting just those sections. For widespread issues, repeating this process across the wall can restore a smooth finish without completely redoing everything.
The article talks about the costs of skipping prep, so I’m wondering: what’s the bare minimum prep work you’d recommend if I’m on a tight budget but want to avoid peeling or flaking?
If you’re on a tight budget but want to prevent peeling or flaking, focus on these essentials: clean the walls to remove dust and grease, fill any holes or cracks with spackle, and sand rough spots lightly. At the very least, use a primer on patched areas or over old paint that’s glossy. This minimal prep will help your paint stick better and stay looking good longer.
If I already painted my walls a few years ago and just want to refresh the color, do I still need to go through all the prep steps mentioned in your guide or can I skip some since my walls are already painted?
You can usually skip some prep steps if your walls are in good shape. Focus on cleaning the walls to remove dust or grease, lightly sanding any glossy areas, and repairing dents or cracks if needed. You likely won’t need to do extensive patching or priming unless the old paint is peeling or you’re making a drastic color change.
You mentioned that prepping can save money and time long-term, but could you break down which prep steps are absolutely essential for a typical family home versus ones that are just nice-to-have if we’re on a tight schedule or budget?
For a typical family home, the absolutely essential prep steps are cleaning the walls, repairing any holes or cracks, and using painter’s tape to protect trim and fixtures. Light sanding is also important to help new paint stick well. Steps like priming every wall, removing all old paint, or filling very tiny imperfections are nice-to-haves and can be skipped if you’re tight on time or budget.
For a business on a tight budget, how can we decide which prep materials are truly essential versus what might be nice-to-have but not crucial?
When working within a tight budget, focus on the basics: quality painter’s tape, spackle or filler for holes, sandpaper, drop cloths, and a good primer if your walls need it. Items like specialty cleaning solutions, advanced sanding tools, or high-end brushes are helpful but not strictly necessary. Prioritizing essentials will give you the best results without overspending.
When it comes to filling cracks and nail holes, do you recommend a specific type of filler or spackle that works best for older plaster walls versus newer drywall? I’ve had issues in the past with patches showing through even after priming.
For older plaster walls, a setting-type joint compound or a plaster patching product tends to blend better and is less prone to cracking than lightweight spackle. For newer drywall, a lightweight spackle or premixed joint compound usually works well. Regardless of the surface, make sure to feather the edges smoothly and use a high-quality primer designed for patched areas to prevent patches from showing through your paint.
For beginners, how can you tell if you’ve done enough surface prep, or are there signs that indicate you’re ready to start painting and won’t run into issues like uneven coverage?
You’ll know your surface prep is complete when the walls feel completely smooth to the touch, all holes and cracks are filled and sanded, and there’s no dust or debris left. Make sure any stains or glossy spots are primed as well. If you run your hand over the wall and feel bumps or see differences in texture or color, some extra prep may still be needed before painting.
The article talks about visible imperfections like cracks and nail holes showing through paint. What’s the best way to deal with hairline cracks in drywall to make sure they don’t reappear after painting?
To prevent hairline cracks from reappearing, start by widening the crack slightly with a utility knife to give filler something to grip. Clean out any dust, then apply a thin layer of drywall compound or spackling paste. For extra strength, embed a strip of fiberglass mesh tape over the crack before covering with more compound. Sand smooth when dry, prime the area, and then paint as usual.